How to get your books ready for publishing with Scrivener
@dinavice this is for you.
Scrivener is difficult to use. It isn't the easiest platform to create books on, but once you know how to use it the functionality is more than worth the effort it takes to learn. Do yourself a favor, check out this guide and save yourself the time and frustration I went through to do Scrivener to publish books easier.
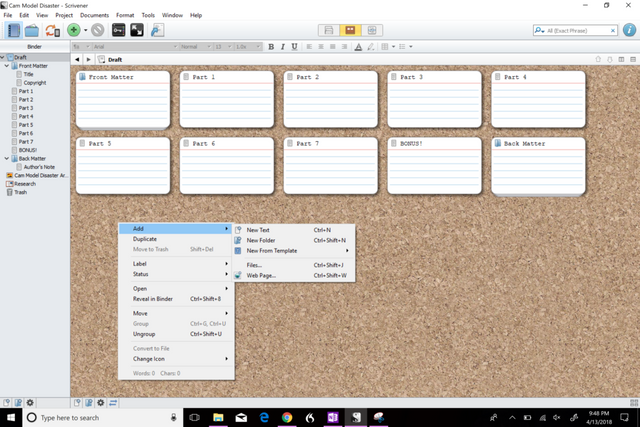
Open a new document, and click on "Draft" or whatever the default folder/area is. Right click, and add > New Text file.
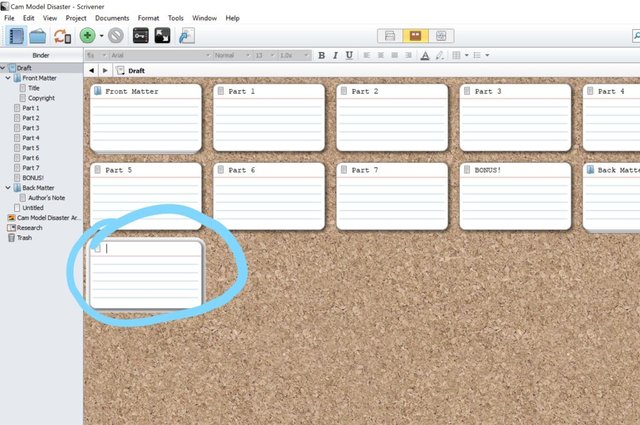
This will open up a new document for you to do your writing in. Generally, this is where you're writing your chapters or sections.
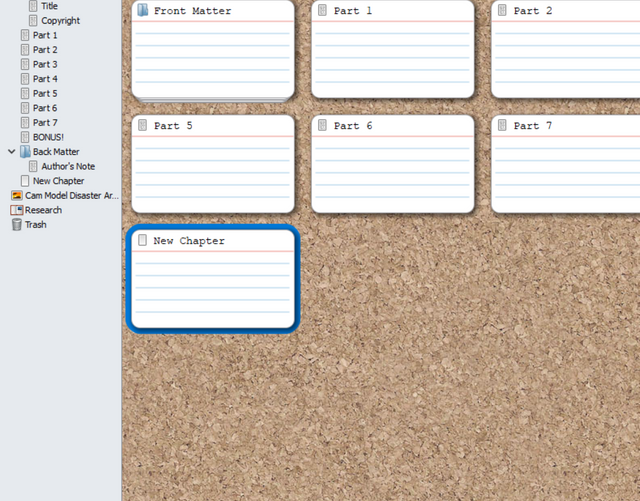
Give your new file a title. You can see from my existing files, I used Part 1, Part 2, etc. You can call it Chapter 1, or Scene 1, or whatever; Sometimes I name my chapters "Things Remembered." Or whatever.
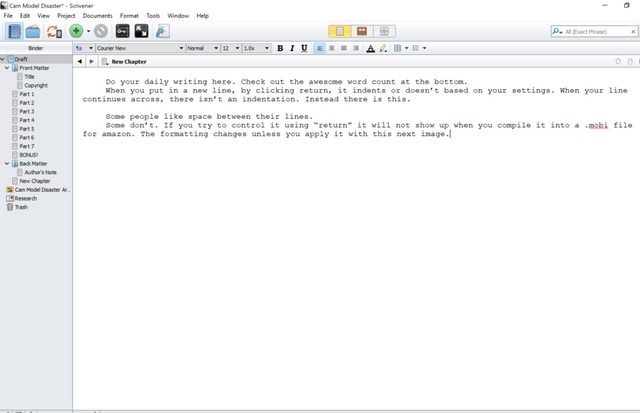
Double click on it and you can start doing your editing.
Maybe the text isn't what you want it to look like.
I've found that formatting is one of the most difficult things to figure out in Scrivener. It is annoying because there are so many different types of things to format in different ways and they're not labeled clearly. I'm going to assume that you don't like this old school typewriter default that Scrivener things you want. Who does? The first thing I did was change my typography, the font settings, and then the spacing. Here is how you do it.
Change the Font:
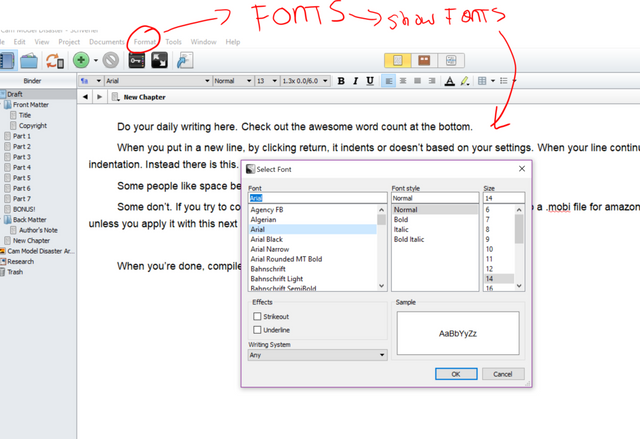
Click "format" on the option bar. Click on "Show fonts." Then choose the type of font and size you want. I like Ariel so I use that. Apparently, it is easy to read for a long time. I made it a little bigger too so you can see it easier.
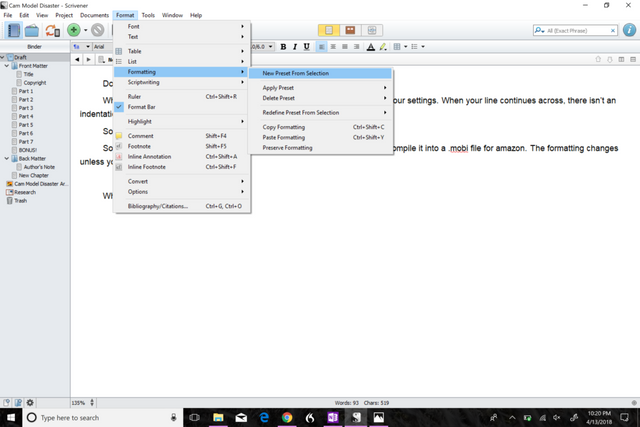
Apply preset:
You don't want to have to change it every single time. Instead of always going through the settings, and clicking ten times, create a preset for your new font. You can update later as you add more options like spacing and indents.
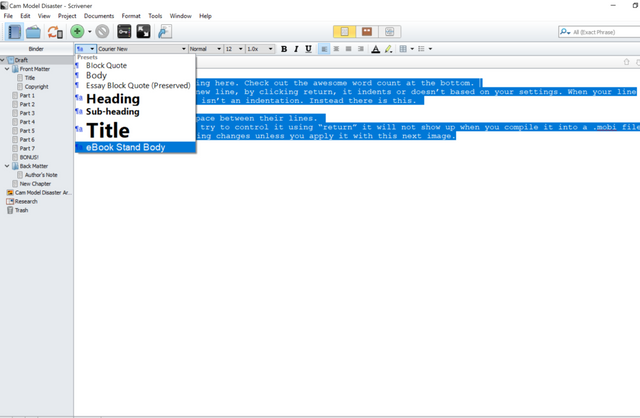
The next time you want to assert your preset for the text and spacing, then you go up to the top right, and select the name for the new preset. I named mine "eBook Standard Body". When I select all the text, then apply the preset then I can make it all look like I want for publication.
I prefer a little bit of space between lines where i click "return," so dialogue can be separated and easier to read.
Spacing:
When you want to change your spacing, follow these steps.
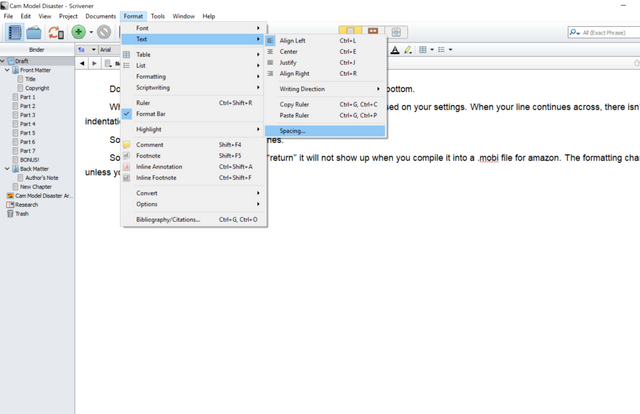
Click on Format, Text, then Spacing.
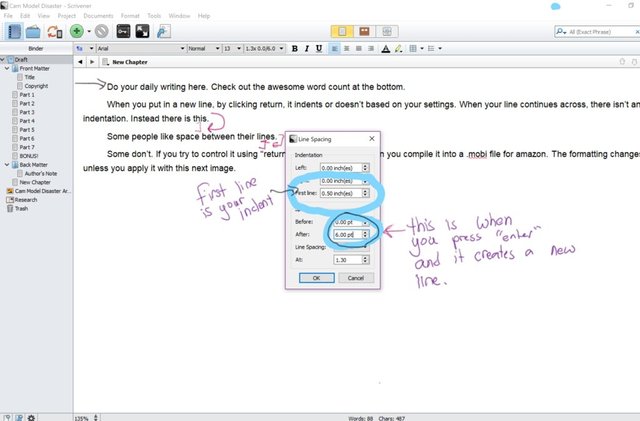
Next, you'll see this image pop-up. You'll see this.
Okay, a few things.
First Line is what happens in the first line of a paragraph. Like the indentation that you did on official letters and papers. I put .5 inches because I like a sizable indentation. I feel like it makes it easier to read Dialogue when it gets moving. It also makes it clear a new line is happening without the giant space.
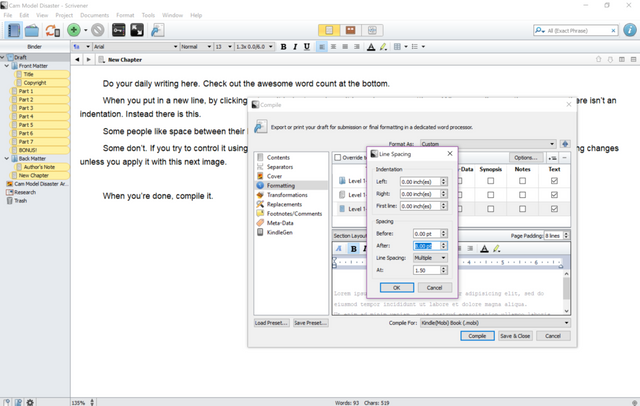
After: This is the amount of space you want "after" you press Enter. This is not when your typing continues through a line like a long paragraph that goes from the end of the page to the next line. This is what happens after you end your dialogue line, or when you end your paragraph and press the "enter" key. It took me a long time to figure this one out. This is how you put a space after marking a new line.
Set your preferences, and then Save that preset! Create a new one, or save over your preferred one.
Done with your work? Ready to publish? Now things get complicated, again, but it isn't too bad.
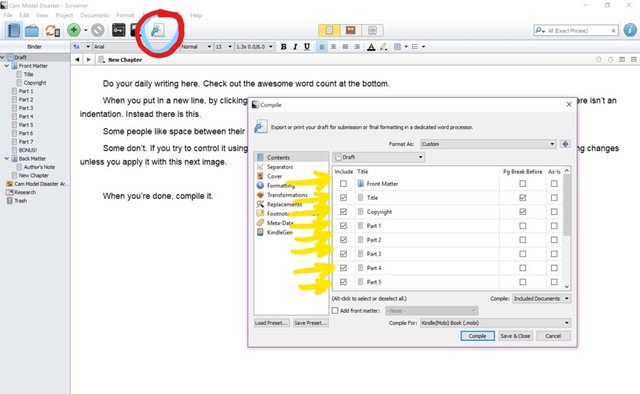
Use your friendly "Compile" button. I've circled it in red. Open that up, and you get a dialogue to save and close, or compile. You need to select from the dropdown, "Kindle (mobi)" and then click the "custom or Down-arrow. You'll see this screen.
This is where you select what you're going to publish in your new file. If you made notes, or an outline, don't check the "include" box. Only check what you want to "include" in your new file.
Move down the list, select what you want to include with the "contents," then how you want to separate your texts. i like putting Page Breaks between everything.
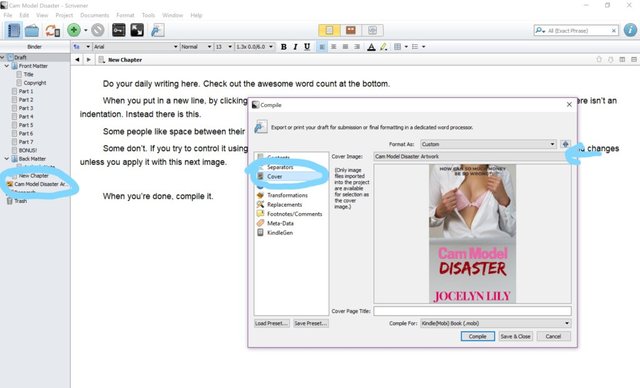
Then put your cover in.
Inserting your cover
You can drag and drop your cover file (use a jpeg) on the left, and click accept. Just import the file and add it below your text. This will associate it with your document. When you compile and get to the Cover section, click on the dropdown, and select the name of your file. Kindle requires a JPEG for your Cover.
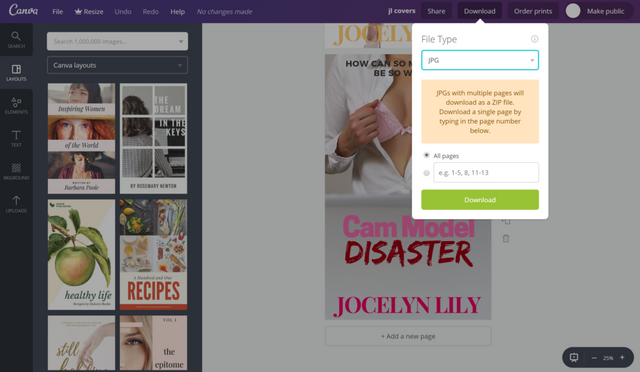
You can do your cover for free in Canva; it isn't excellent, but it gets the job done quick and easy.
After you have your cover set up and in the document and selected you're all set to move onto formatting.
Formatting:
Your paragraph is generally set, what we want to look at mostly is how our chapter titles are going to be formatted.
Click on your "Title" in the window.
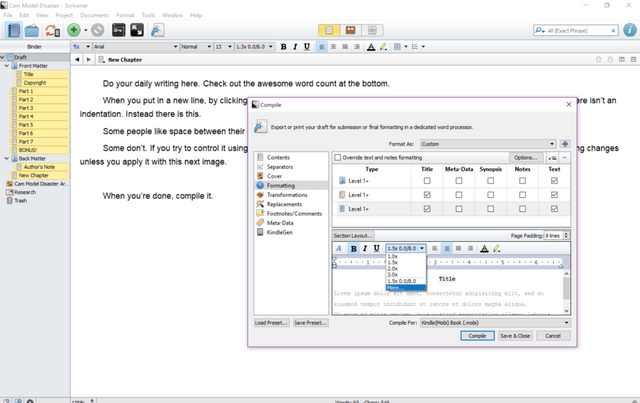
Click on the highlighted part with 1.0 or 1.5, or 1.3. It'll have a dropdown. Then go down to "More ..."
Doing this will give you the options window for how the title shows up in your final product. The only way you can see what it will look like is to compile, and look inside the file itself. If you have a kindle mobi file, then you'll have to sideload it into your kindle viewer or email it to your kindle address.
I wanted to have some space between my Title and my paragraph start, so I changed the "After" to 8 pts. That will give me a little room between the title of my chapters, like "Part 1" or whatever you name it.
Meta-data:
Put in whatever metadata you want, like the title, author, and description.
KindleGen:
This is pretty easy. Click the link. Download or install it somewhere easy to find on your computer, then point Scrivener to it by clicking "browse" or link.
You're done!
Click Compile, name your file, and you're done! You have a .mobi file ready for Kindle!
Your next step is to go to KDP, or Kindle direct publishing, create an account, and create a new kindle ebook. Follow the steps, and upload the files you created and you're all set! Well done! Go write that novel!
Super interesting! I never had heard of this software before!
You are truly amazing, Jocelyn! This is fantastic. I've got all of the stuff I've written for the Alexis Daimon novella in Scrivener now, and I can't wait to finish so I can push that compile button haha.
It's actually not so intimidating when you lay it all out with screenshots and step by step instructions :) Thank you so much for the encouragement. I have a renewed energy and motivation to finish this novella and start on something new. xx
Yes!! Your comment makes all the effort worth it. Let me know when you publish. I'll be amoung the first to buy.
Oh wow this is golden. I've been looking for something like this, because you're right: scrivener is NOT the easiest platform to use.
Have you thought of publishing a Udemy course that goes into more detail about this? I have a feeling you'd cash in quite well.
https://www.youtube.com/paulbegley34
Resteemed your article. This article was resteemed because you are part of the New Steemians project. You can learn more about it here: https://steemit.com/introduceyourself/@gaman/new-steemians-project-launch
@gaman is on the @abusereports blacklist for being a bad Steemian! Bad spammer, bad!