Utopian Animated GIF Opening Title Text
Hello, friends I made an Utopian.io Animated GIF Opening Title Text using Adobe After Effects CS4. As with other layers in After Effects, you can animate entire text layers. However, text layers offer additional animation features with which you can animate the text within the layers. You can animate text layers by using any of the following methods:
Here's is the preview and procedure how to make this Animated GIF.
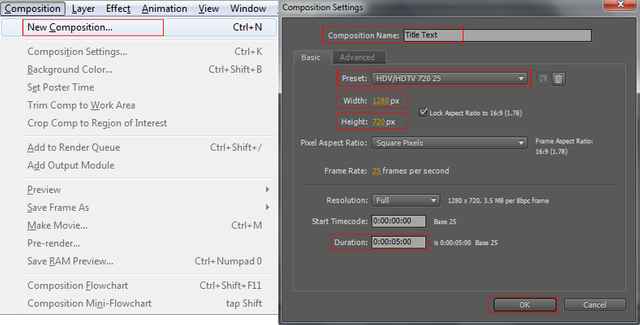
•To start we are going to create a new Composition, choose (Compositon > New Composition) or by clicking (CTRL + N) on your keyboard. If the Composition Settings menu is open you can change the Compostion Name what ever you want the name. You can also set the Preset I choose (HDV/HDTV 720 25), Width is (1280px) and Height is (720px) and the Duration to "5s" long and If you are done
click OK.
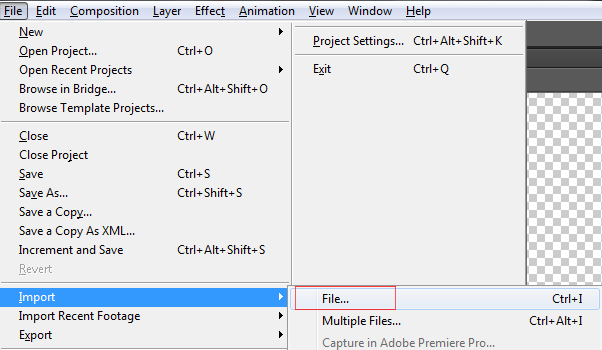
•To Import Files, choose (File > Import > File) and choose the files into your Gallery.
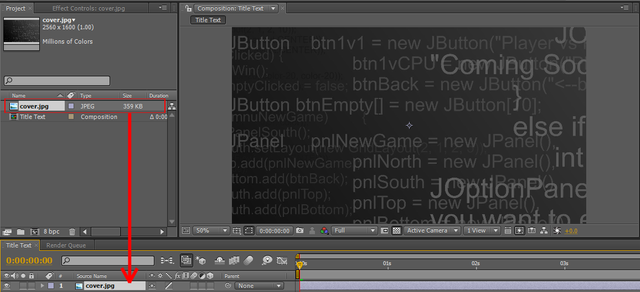
•Drag the background file into to composition timeline.
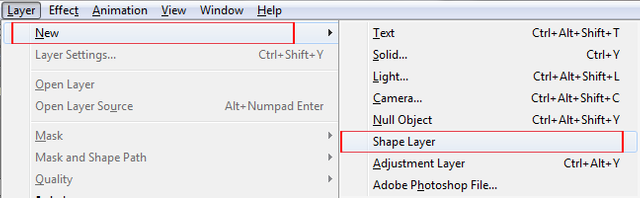
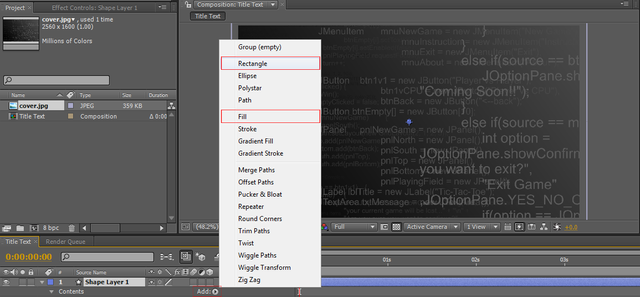
•We need animating the rectangle and where going to add text, click on (Layer > New) choose Shape Layer.
•Let's add a rectangle to add a rectangle click the arrow of Shape Layer 1 click the Add Button, add the rectangle and a fill.
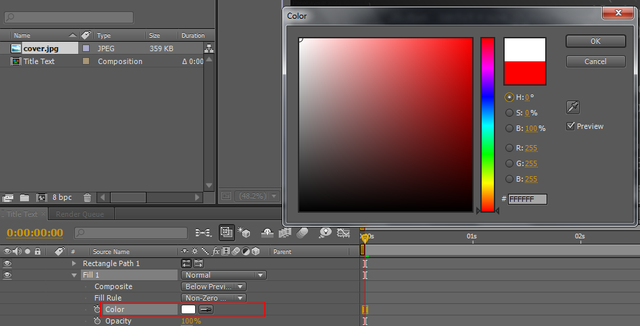
•We gonna use color white for the color of the fill, click the arrow of the Fill 1 and in the color click the color picker and choose color white.
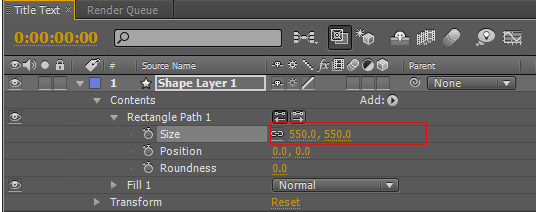
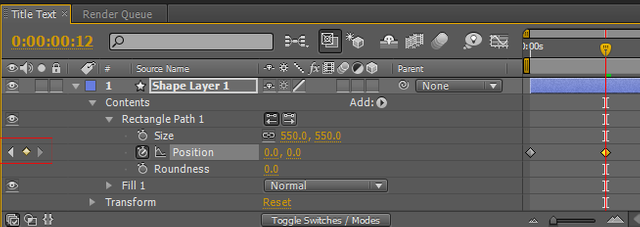
•Set the size of the Rectangle Path to "550" so the size of a rectangle is enough to our Text.
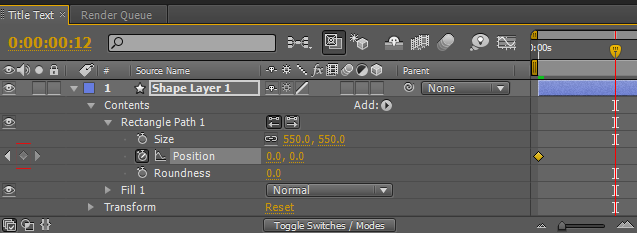
•Create a Position key frame click the timer of Position, press the Shift Key and Page down once and press again the Page down twice on your keyboard so the time indicator is move to 0.5 second.
•Create a second key frame click the key frame and move the time indicator to the end of the timeline and if the time indicator is end of the timeline create a new key frame there. Press the Shift Key and Page up once and press again the Page up twice and the time indicator move 0.5 second backwards and create another second key frame.
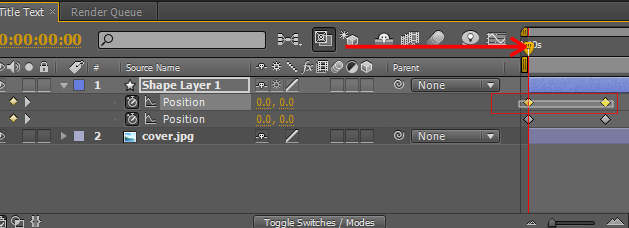
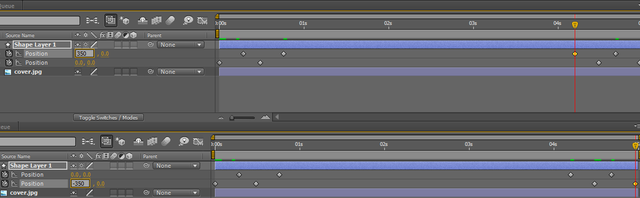
•So now we duplicate the Rectangle Path 1 click the Rectangle Path 1 and press CTRL + D on your keyboard.

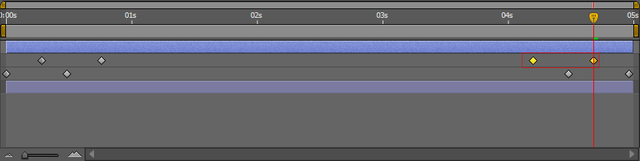
•Select the Shape Layer and press U on your keyboard. Let's take this two key frames select them and I move my time indicator in 7 frames by pressing the Page down 7 times.
•Move the two frames, from the beginning move to when the time indicator stop and I'm going to do the same thing at the End and press the Page up 7 times and move the keyframes two.
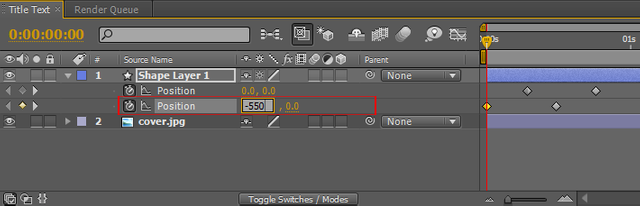
•Go to the first frame and press it set the X position of the second Rectangle Path to -350 so it's all the way to the left.
•At the fourth frame set the value of X position of the first Rectangle Path to 350 so it's all the way to the right.
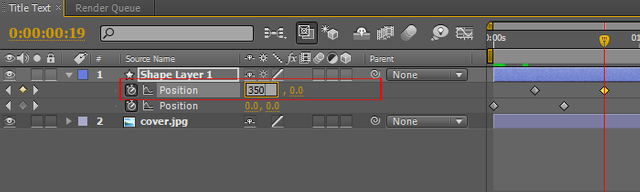
•Now on this key frame set the value of the X position of the first Rectangle Path to 350 and In the last key frame set the value of X position of the Second Rectangle Path to -350. So basically we done the same thing and it is just and reverse.
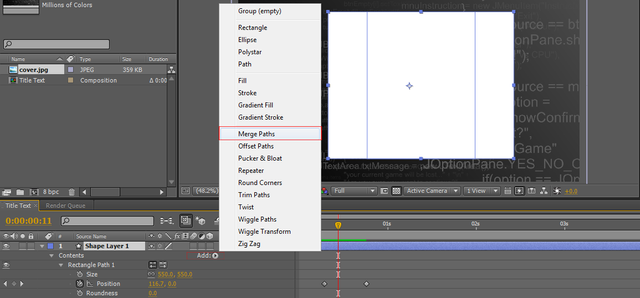
•We need to add the Merge Paths click the arrow of the Shape Layer 1 and click the Add button and choose the Merge Paths.
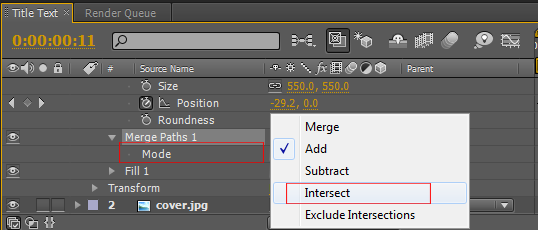
•Click the arrow of the Merge Paths we need to set the Mode of the Merge Paths to Intersect. So in any place with the rectangle Intersect is visible.
•Select the Shape Layer 1 again and press U on your keyboard to show those key frames select all theme key frames and press F9 to eases theme.

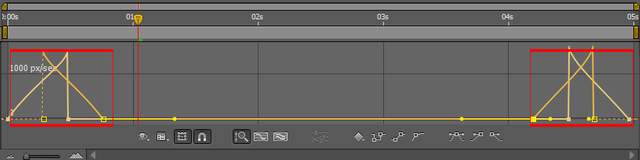
•Open the Graph Editor you need to Right Click on the timeline and enable the Speed Graph.
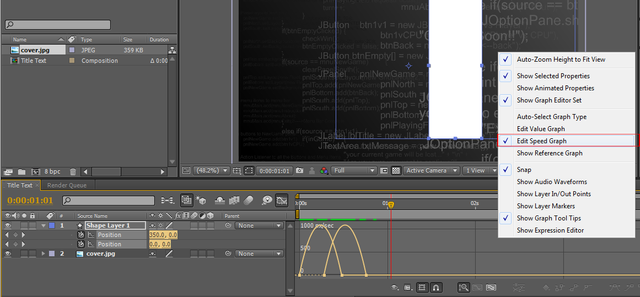
•We need to adjust those graphs so the graph look like this and we gonna the same thing at the end and we have these graph pretty much looks and click the graph editor to close the graph.
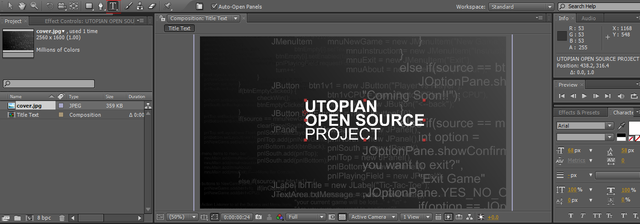
•Let grab the Typle Tool and add a Text and I'm going typing "Utopian Open Source Project" so align the text layer to the center of the compositon.
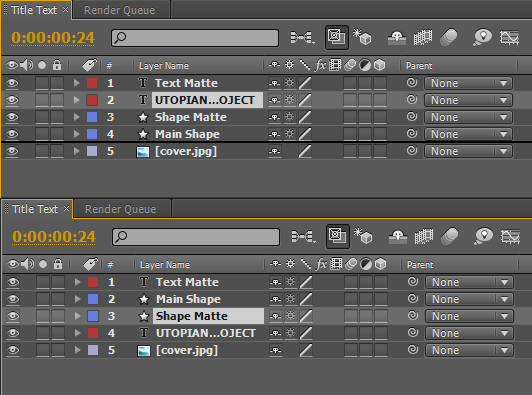
•We need to rename the Shape Layer, click the Shape Layer and click the right click and choose rename write Main Shape.

•Click the Main Shape and press CTRL + D to dublicate the layer and the name of the duplicate layer to Shape Matte and duplicate the text layer and rename to Text Matte.
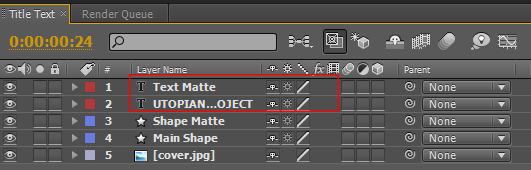
•Grab the main text layer in the buttom of Main Shape and move the Shape matte to the top of Main Text Layer.
•Click the Toggle Switches / Modes until the see the TrackMat.
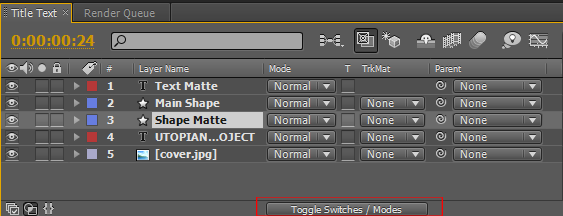
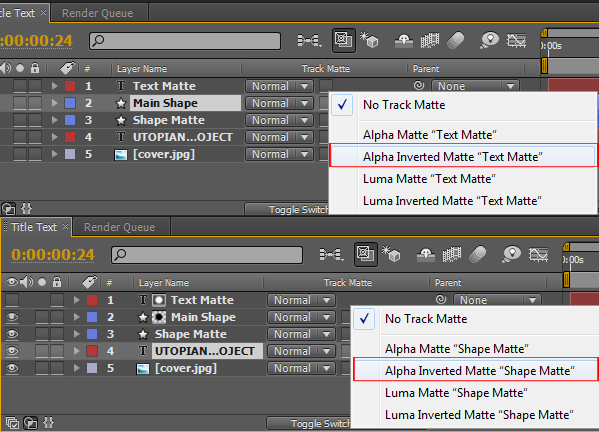
•Set the TrkMat of the Main Shape to Alpha Inverted Matte "Text Matte" and I'm going to set the TrkMat of our Main Text Layer to Alpha Inverted Matte "Shape Matte".
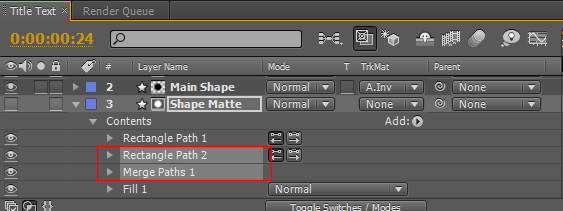
•Let open the Shape Matte Layer and let's edit the Content we don't need longer the Merge Paths 1 and Rectangle Path 2 so click the Delete on your keyboard.
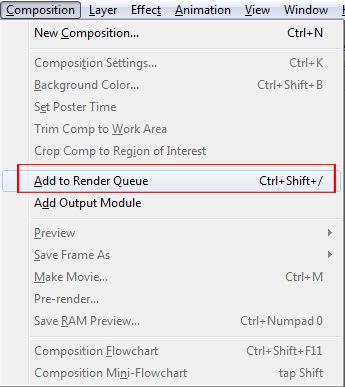
•To save, choose (Composition > Add To Render Queue)
•Click the Lossless, If the Output Module Settings is Open change the format to Animated GIF and click OK.

•Click the Render to save your work.


Open Source Contribution posted via Utopian.io
Hey @toffer I am @utopian-io. I have just super-voted you at 64% Power!
Achievements
-Creativity makes the World a better place. Thanks!
-Good amount of information. Thank you!
-A very informative contribution. Good job!
-You have a good amount of votes on your contributions. Good job!
-In total you have more votes than average for this category. Bravo!
Up-vote this comment to grow my power and help Open Source contributions like this one.
Thank you very much @utopian-io..
Creating a tutorial is hard work. Thanks!
Thanks for the support, that why i really love to making a tutorial @theninhart
nice contribution
verified this
[utopian-moderator]
Thank you sir @arie.steem