VueJS - How to Apply Transition on Image Gallery
Hello, world!
VueJS is still one of the most popular JavaScript frameworks and widely sponsored by other well-known and famous platforms. In this article, I will clearly guide you how to build some interactive user-interface with transition using VueJS. Slightly different about how we can apply transitions to the component compared to conventional ways. But, certainly not difficult to practice.
OK. Here we go!
Murez Nasution
All the articles I've created are dedicated to all of open source consumers and especially Utopian-IO as the platform of contributions.
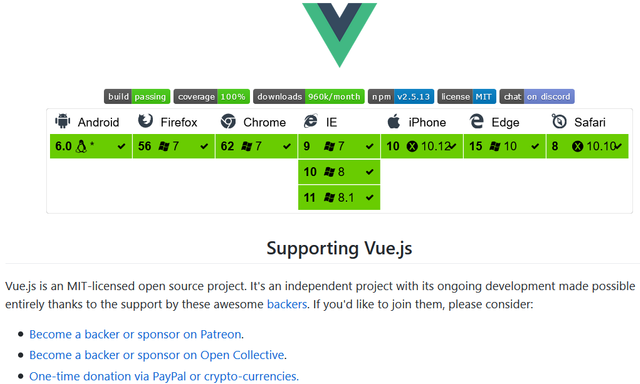
Courtesy and Special Thank to VueJS
Captured from: https://raw.githubusercontent.com/vuejs/vue/dev/README.md
Requirement
Install NodeJS
Install vue-cli
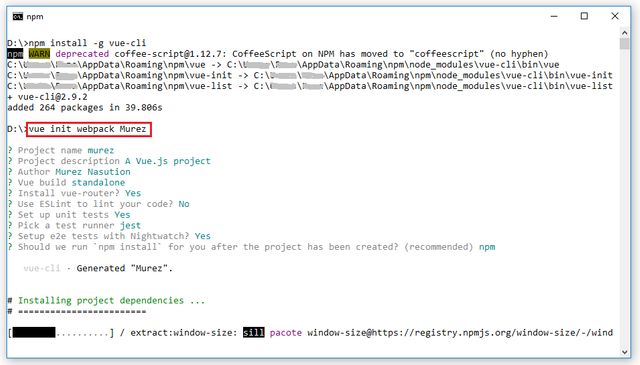
Type:npm install -g vue-cli, then hitEnter.

Create new webpack project
Type:vue init webpack Murez, then hitEnter.
Install text editor (Sublime, or any others)
Your passion and free time
Implementation
After all needs are met, here is a general steps that we will do.
Overview
We will try to create a simple page consisting of two buttons,
- Generate/Add - to insert new card, and
- Shuffle - to shuffle all existing cards,
and several Cards, which will be inserted transitions into each of them. A card is a container of an image and an its index in below.
Here is the general steps:
- Create a New Component
- Edit Router
- Create Template
- Apply Transition on Click Event of Generate Button
- Create Add Button
- Create Shuffle Button
- Apply Transition on Shuffling Cards
- Apply Transition on Switch of Buttons
1. Create a New Component
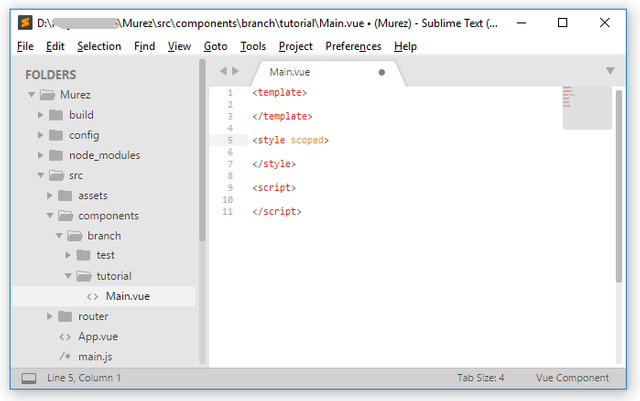
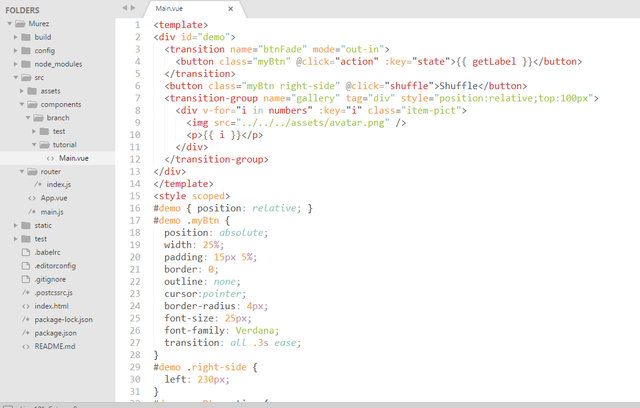
Create Main.vue file in relative directory: src/components/branch/tutorial/ as seen below,
2. Edit Router
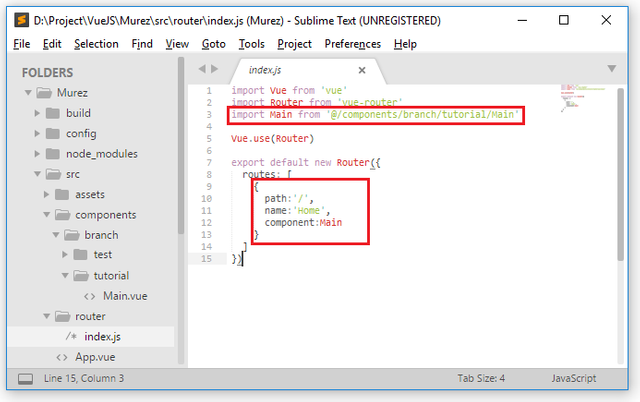
Change src/router/index.js so that it looks like the following,
3. Create Template
Add the following code,
<template>
<div id="demo">
    <button class="myBtn" @click="action">Generate</button>
    <div style="position:relative;top:100px">
        <div v-for="i in numbers" :key="i" class="item-pict">
            <img src="../../../assets/avatar.png" />
            <p>{{ i }}</p>
        </div>
    </div>
</div>
</template>
<style scoped>
#demo { position: relative; }
#demo .myBtn {
    position: absolute;
    width: 25%;
    padding: 15px 5%;
    border: 0;
    outline: none;
    cursor:pointer;
    border-radius: 4px;
    font-size: 25px;
    font-family: Verdana;
    transition: all .3s ease;
}
#demo .right-side {
    left: 230px;
}
#demo .myBtn:active {
    background-color: dimgray;
    color: #fff;
}
.item-pict {
    width: 100px;
    display: inline-block;
    margin: 15px 10px;
    border-radius: 5px;
    box-shadow:0 4px 8px 0 rgba(0, 0, 0, 0.3),0 6px 20px 0 rgba(0, 0, 0, 0.2);
}
.item-pict > img {
    width: 100%;
    border-radius: 5px 5px 0 0;
}
.item-pict > p {
    margin: 5px 0;
    font-size: 35px;
    text-align: center;
}
</style>
<script>
import _ from 'lodash';
export default {
    data:() => ({
         state:0
        ,numbers:[ ]
        ,n:0
    }),
    methods: {
        rnd(array) { return Math.floor(Math.random() * (array.length)) },
        action() {
            if(this.state == 0) {
                let i = -1;
                for(; ++i < 10; this.numbers.push(i));
                this.n = i;
                this.state = 1;
            }
        }
    }
}
</script>
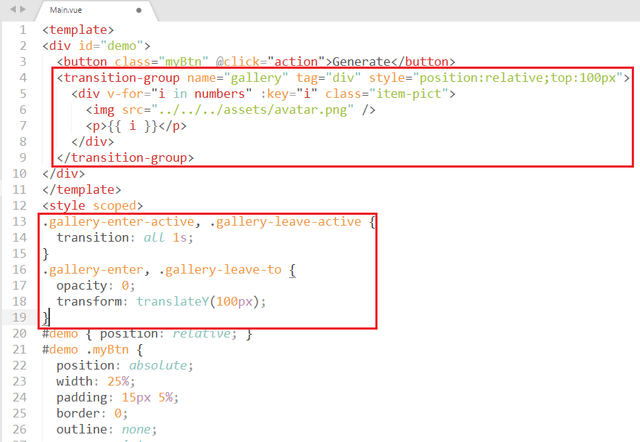
4. Apply Transition on Click Event of Generate Button
Add the following code to the <style> tag,
.gallery-enter-active, .gallery-leave-active {
    transition: all 1s;
}
.gallery-enter, .gallery-leave-to {
    opacity: 0;
    transform: translateY(100px);
}
And edit the <div> element to be as follows,
<transition-group name="gallery" tag="div" style="position:relative;top:100px">
   . . .
</transition-group>
Open your browser and access to localhost:8080.
My apology for not including a live demo of this section. But, the results should already be present for you as your progress following this article.
5. Create Add Button
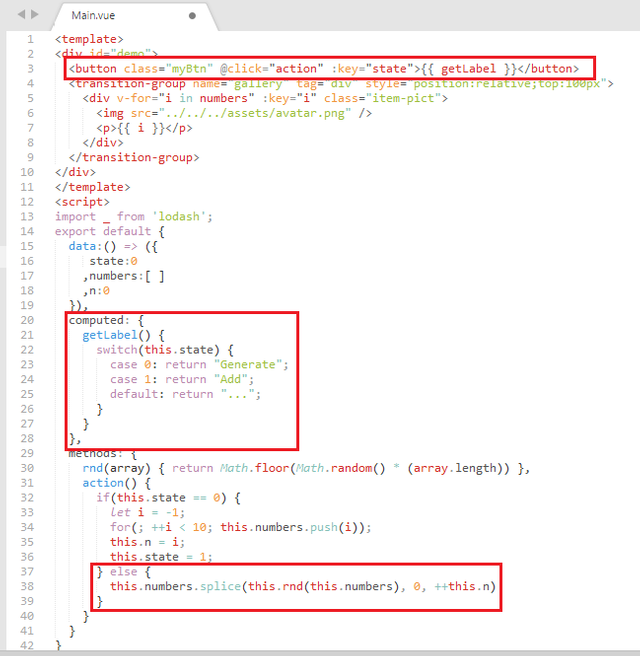
Modify the <button> tag to be as follows,
<button class="myBtn" @click="action" :key="state">{{ getLabel }}</button>
And again, action method to be as follows,
if(this.state == 0) {
    . . .
} else {
    this.numbers.splice(this.rnd(this.numbers), 0, ++this.n)
}
Finally, add computed of getLabel,
computed: {
    getLabel() {
        switch(this.state) {
            case 0: return "Generate";
            case 1: return "Add";
            default: return "...";
        }
    }
}
Again, focus on your browser, then reload. How cool. :-D
6. Create Shuffle Button
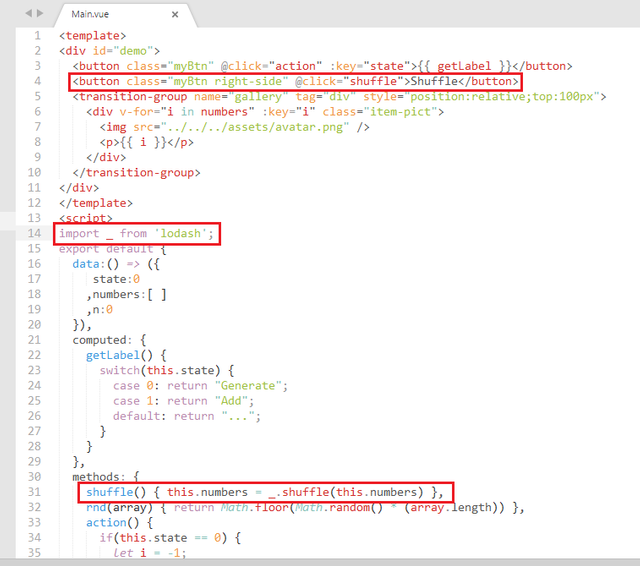
Add another button to be as follows,
<button class="myBtn right-side" @click="shuffle">Shuffle</button>
And another method of shuffle.
shuffle() { this.numbers = _.shuffle(this.numbers) }
Don't forget to include lodash, because we don't want to spend a lot of time creating the shuffle (of array) algorithm,
7. Apply Transition on Shuffling Cards
Just, add v-move class on <style>. :-D
Because the <transition-group> has been named, i.e. gallery , then do as follows,
.gallery-move {
      transition: transform .5s;
}
8. Apply Transition on Switch of Buttons
Finally, we will demonstrate the transition between the elements, in this context, they are Generate and Add buttons.
Completely just do this following,
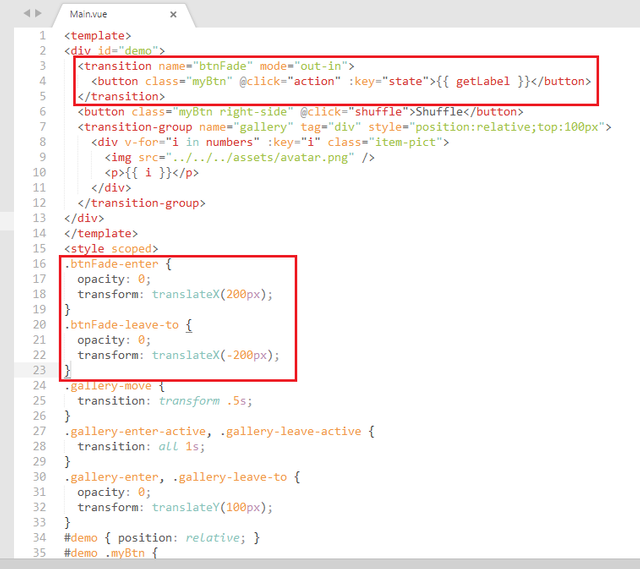
Now you will see that buttons Generate and Add will slide to change position one against the other.
Now, we're done! And,
Thank you!
Share with Heart
Posted on Utopian.io - Rewarding Open Source Contributors
Good Job man... I'm definitely going to learning Vue soon..
So easy, you'll grasp it fast.
Thank you for the contribution. It has been approved.
You can contact us on Discord.
[utopian-moderator]
You're welcome.
Thank you.
Hey @murez-nst I am @utopian-io. I have just upvoted you!
Achievements
Suggestions
Get Noticed!
Community-Driven Witness!
I am the first and only Steem Community-Driven Witness. Participate on Discord. Lets GROW TOGETHER!
Up-vote this comment to grow my power and help Open Source contributions like this one. Want to chat? Join me on Discord https://discord.gg/Pc8HG9x