Error and Exception Handling in ASP.NET (asp.net tutorial)
Lesson Objectives
A. Introduction to Error and Exception Handling
B. Understanding ASP.NET Error Pages
C. Exploring the Error Modes
D.Working with Page Level Tracing
Needs are;
A.Asp.NET
B. Visual Studio
C. C#
The difficulty level of commands we use is middle.
ASP.NET Error Pages
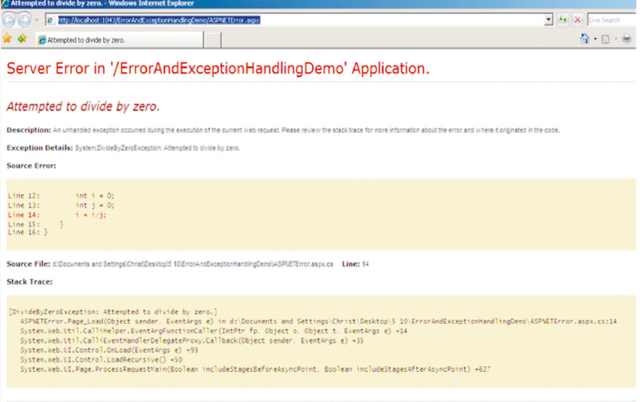
The ASP.NET Error Pages are the appropriate error pages displayed to the user by ASP.NET runtime, when an error occurs in the web application.The ASP.NET Error pages contained detailed information about the error that has occurred. Some of the information is the web application in which the error occurred, the description of the error, the Exception Details, the source code where the error occurred, the source file in which the error occurred,the line number where the error occurred, the Stack Trace and the Version Information. With these detailed information a software professional can easily diagnose the error and solve the problem.
Demonstration: Displaying ASP.NET Error Page
Let us create a web page with an error and execute it to display the appropriate ASP.NET Error Page.
Steps to create the Demo:
- Create a New Web Project named “ErrorAndExceptionHandlingDemo”.
- Add a new Web Form named as “ASPNETError.aspx”.
- Switch to the Code behind file and enter the following code:
protectedvoid Page_Load(object sender, EventArgs e)
{
int i = 0;
int j = 0;
i = i/j;
}
- Right-Click the “ASPNETError.aspx” file and select “Set as Start Page”.
- In the “Debug” Menu, select “Start without Debugging” to execute the project.
- View the Output 1 below:
Error Handling
Error Handling in ASP.NET web applications can be done at the page level or at the application level. Page-Level error handling is used to handle the errors in a single web page.Application Level Error handling is used to handle the errors that can occur inside any web page in the web application. The various mechanisms ASP.NET provides to handle errors and exceptions are Error Pages, Debugging and Tracing, Logging Information and Structured Exception Handling. Error handling can be done by coding inside the web forms or by configuring the web.config file of the web application.
Error Modes
The Error Modes are used to control the error handling in an ASP.NET web application. The various Error modes are "On", "Off" and "RemoteOnly". These modes can be configured in the web.config file with great ease. The "On" error mode allows the web application to display custom error pages instead of the standard ASP.NET Error Pages. The custom error pages are displayed to the users accessing the application on the server running the web application, as well as the users accessing the web application form remote applications The "Off" mode displays the standard ASP.NET Error Pages containing the detailed error information, to both the local users and the users accessing the web application form remote locations. The "RemoteOnly" mode displays the standard ASP.NET errors to the local users and Custom Error Pages to the users who are remotely accessing the web pages of the web application. This is the default mode.
Configuring web.config for Error Handling
The web.config file contains the configuration information for the web application. The advantage of using web.config file is that, changes can be made to the file without the need to re-compile the web application. It is easy to change the configuration settings as no coding
isrequired.The tag has to be configured to control the error handling of the web application. For example consider the tags given below...
< customErrors mode="On" defaultRedirect="ErrorDefault.aspx" >
< error statusCode="404" redirect="PageUnavailable.aspx" / >
< /customErrors >
The settings above displays the "PageUnavailable.aspx" file if there is an unhandled
exception in the web application, and the error status code is "404". If any other unhandled
exception occurs in the application and the error status code is not “404”, then the
"ErrorDefault.aspx" page is displayed to the user.
Custom Error Pages
The Custom Error Pages are the error pages created by the programmers in the web application according to the requirement. The Custom Error Pages can be used to display a customized error message to the user instead of the ASP.NET Error pages. The ASP.NET error pages contain information which is useful to the programmer, but not to the user. The custom error pages contain information which the user can understand. The custom errors for a page can be configured as shown below:
< customErrors mode="On" defaultRedirect="ErrorDefault.aspx" >
< error statusCode="404" redirect="PageUnavailable.aspx" / >
< /customErrors >
The "ErrorDefault.aspx" and the "PageUnavailable.aspx" pages in the above code snippet are the custom error pages which can be displayed to the user.
Demonstration: Displaying Custom Error Page
Let us create a custom error page and display it when an error occurs in the application.
Steps to create the Demo:
Add a new Web Form named as “ErrorDefault.aspx” to the already created “ErrorAndExceptionHandlingDemo” web project.
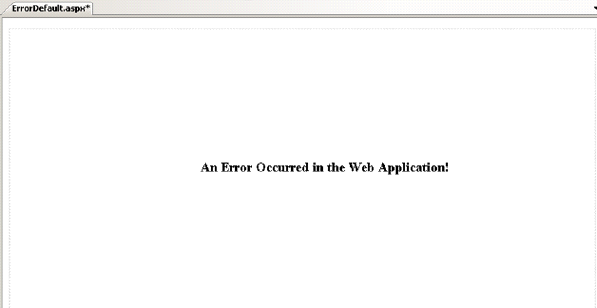
Add a Label and set its text to “An Error Occurred in the Web Application!” The design should look as below :
- Double click the web.config file in the Solution Explorer to open it.
- Insert the following tags below the <system.web>element in the web.config to enable
Custom Error Handling.
< customErrors
mode="On"
defaultRedirect="ErrorDefault.aspx" >
< /customErrors >
- Right-Click the “ASPNETError.aspx” file already created and select “Set as Start Page”.
- In the “Debug” Menu, select “Start without Debugging” to execute the project.
- View the Output 1 below:
- Note that the Custom Error Page “ErrorDefault.aspx” is displayed as output instead of displaying the “ASPNETError.aspx”error page with the error information.
- Modify the “customErrors” tag in the web.config file as shown below to disable
Custom Error Handling.
< customErrors
mode="Off”
defaultRedirect="ErrorDefault.aspx" >
< /customErrors >
- Right-Click the “ASPNETError.aspx” file already created and select “Set as Start
Page”. - In the “Debug” Menu, select “Start without Debugging” to execute the project.
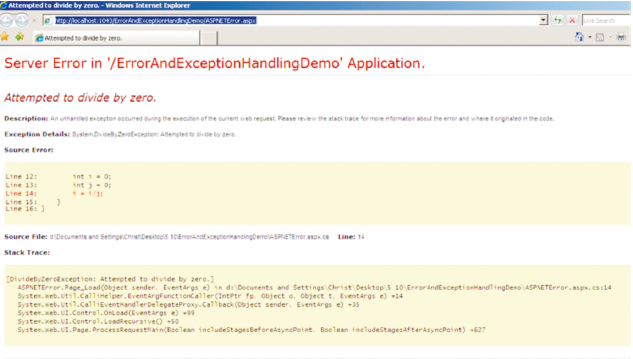
- View the Output 2 below:
- Note that the Custom Error Page “ErrorDefault.aspx” is not displayed, but the
“ASPNETError.aspx”page is displayed with the error information as Custom Errors
has been disabled.
Tracing
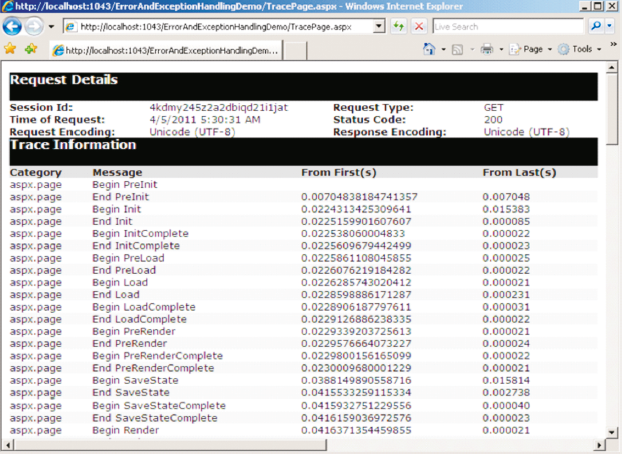
The Tracing is a process which is used to collect the information of a particular web page for diagnostic purposes. The Tracing information can be stored in a file name trace.axd file and can also be displayed on the page. The Trace can be used to display the following information:The request inf ormation such as Session ID, Request Type, Request Status etc.The information about controls in the web page such as the Control ID, Type, size of the View State etc.The values stored in the cookies and their size.The variables stored on the server and their values.The classes required for tracing a web application are present in the System.Diagnostics namespace.The Trace and Debug classes are present in the System.Diagnostics namespace.The TraceContext.Write () method can be used to write a message to the trace.axd file.TraceContext.Warn() method can be used to write a warning to the trace.axd file.
Page-level Tracing
Tracing can be enabled for a specific web page in an ASP.NET Web Application, which is
called Page-Level Tracing. The "Trace" attribute of the "@Page" directive has to be set to
"true" in the web page as shown below:
< %@ Page Trace="true" % >
The "TraceMode" attribute of the "@Page" directive can be set to “SortByTime" to display th trace messages in the order at which the server processes the code. The "TraceMode" attribute of the "@Page" directive can be set to “SortByCategory" to display the trace messages grouped according to the category to which the message belongs. Messages can be written to the trace by using the Trace.Write () method. Warnings can be written to the trace by using the Trace. Warn () method.
If the programmer would like to run the web page without trace information, he has to set the
"Trace" attribute to the value "false" and it is not necessary to remove the lines containing the
Trace.Write() method or the Trace.Warn() method. It is easy to enable and disable the trace
and can be done quickly.
Demonstration: Implementing Page Level Tracing
Let us create a page and trace the information about the page.
Steps to create the Demo:
- Add a new Web Form named as “TracePage.aspx” to the already created
“ErrorAndExceptionHandlingDemo” web project. - Switch to the Source View of the “TracePage.aspx”.
- Modify the “@Page” attribute and set the value for “Trace” attribute to true as shown
below:
< %%@Page
Language="C#"
Trace="true"
AutoEventWireup="true"
CodeFile="TracePage.aspx.cs"
Inherits="TracePage"
% >
- Right-Click the “TracePage.aspx” file and select “Set as Start Page”.
- Execute the project by pressing “F5” key.
- View the Output below:
Posted on Utopian.io - Rewarding Open Source Contributors


Thank you for the contribution. It has been approved.
Please use < code > for code (delete spaces)
You can contact us on Discord.
[utopian-moderator]