Interfacing SIM 800l GSM Module with Arduino
Global System for Mobile Communication (GSM) is a mobile communication modem. It was created to describe the protocols for second-generation (2G) digital cellular networks used by mobile phones and is now the default global standard for mobile communications. And in this tutorial, i am using SIM 800l Module because it is very tiny and easy to use.
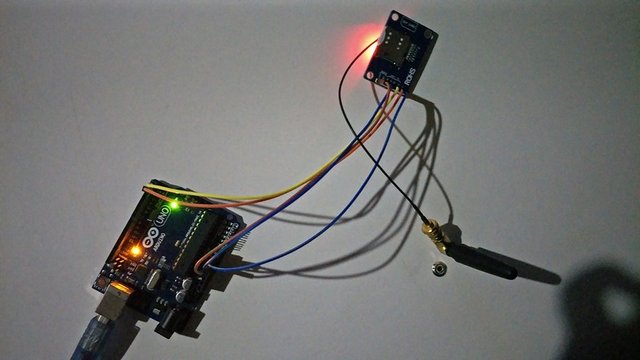
Note: Use a micro sim card and it must have a load.
What Will I Learn?
This tutorial aims to:
- Interface SIM 800l GSM Module with Arduino
- Send message using GSM Module
Software Requirements
Hardware Requirements
- Arduino Uno
- SIM 800l GSM Module
- Connecting Wires
Difficulty
- Basic
Tutorial Contents
Step 1: Physical Connection of SIM 800l GSM Module to Arduino Uno
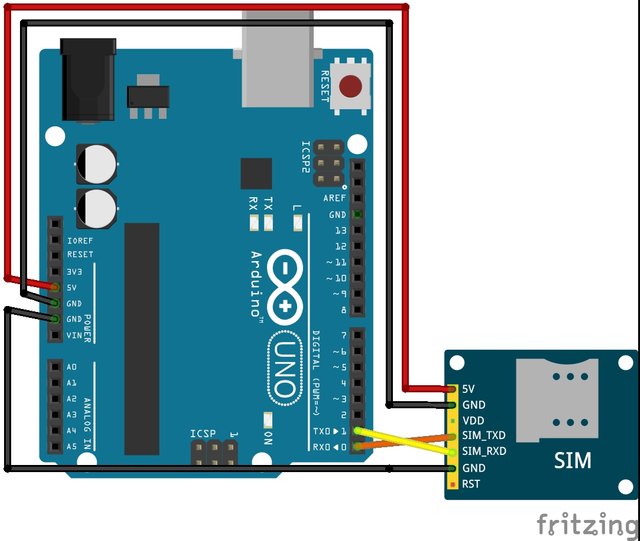
Circuit developed using fritzing
Connect the following:
| GSM Module | Arduino Uno |
|---|---|
| 5VIN | 5V |
| GND | GND |
| SIM_TXD | RX0 or pin 0 |
| SIM RXD | TX0 or pin 1 |
| GND | GND |
- Insert the micro sim card to the GSM Module
Step 2: Software Connection
- Connect the USB Cable from Arduino Uno to a PC/Laptop
- Open your Arduino IDE

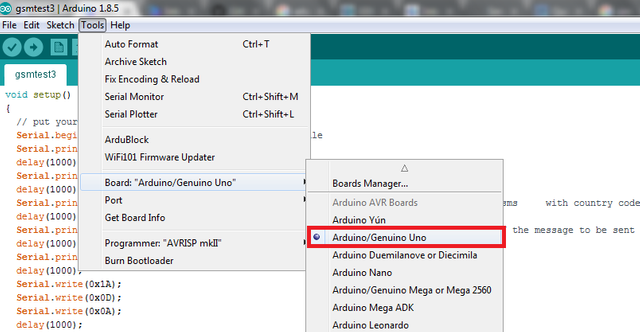
- Change your board to Arduino Uno: Go to Tools > Board: > Arduino/Genuino Uno
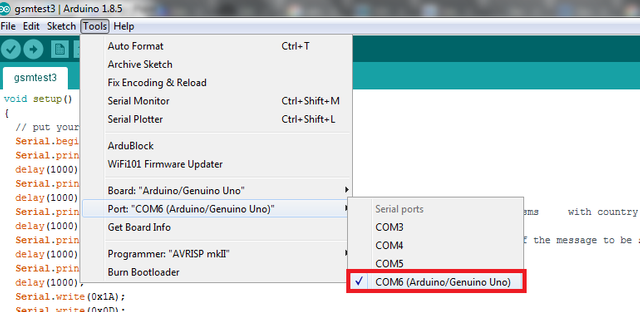
- Also, change the Port settings: Go to Tools > Port: > COM6 (Arduino/ Genuino Uno)
Step 3: The Arduino Code
GSM Module uses the AT Commands this instructions are used to control modems. AT is a short term for ATtention. There are different commands to perform different tasks using the GSM module. GSM modems and mobile phones support AT commands set that is specific to the GSM technology, which includes SMS-related commands like AT+CMGS (Send SMS message), AT+CMSS (Send SMS message from storage), AT+CMGL (List SMS messages) and AT+CMGR (Read SMS messages). Read more.
Code inside the setup function, the code to run once.
void setup() {
}
First, initialize the baud rate of the GSM Module
Serial.begin(9600);
Second, \r will start the message and followed by 1 second delay everytime we use an AT command.
  Serial.print("\r");
  delay(1000);
Third, set the GSM Module in Text Mode
  Serial.print("AT+CMGF=1\r");
  delay(1000);
Fourth, input the number to which you want to send the sms with country code
  Serial.print("AT+CMGS=\"+639xxxxxxxxxx\"\r");  //replace x with the mobile number you want to send the message.
  delay(1000);
Fifth, input the message you want to send.
  Serial.print("This is a test message using GSM Module with Arduino.\r");
  delay(1000);
Then, to end the SMS content it is identified with CTRL+Z symbol. The ASCII value of this CTRL+Z is 26. So we need to send a char(26) to GSM module using this line
  Serial.println((char)26);
  delay(1000);
And lastly, to read the message with the correct format we need to write this hex values.
  Serial.write(0x1A);
  Serial.write(0x0D);
  Serial.write(0x0A);
  delay(1000);
We leave the loop function empty because we have nothing to do after the setup
void loop() {
}
- Copy the code, compile it and click the check button to Verify or just simply press Ctrl+R
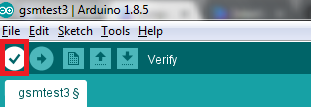
- And check the dialog box below that contains the message if it has error

- If no error, then upload the program, just click the arrow-sign or just simply press Ctrl+U
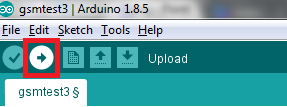
Note: Before uploading the program disconnect the pins 0 and 1 or the TX and RX in Arduino Uno so that it would not give an error message. And just re-connect after uploading.
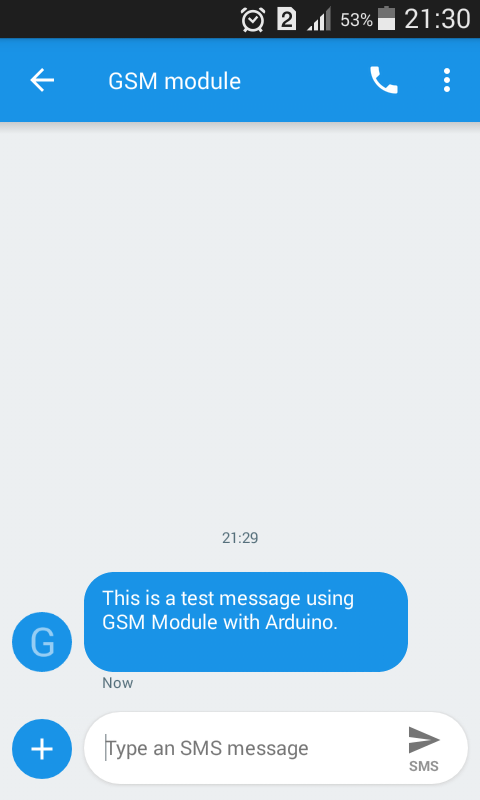
Thanks for reading and Happy Coding!
Curriculum
To visit my previous contributions click below:
- Interfacing GPS Module with Arduino
- Create, Write, Read and Delete file into SD Card using SD Card Adapter Module in Arduino
- Playing music in Arduino using SD Card Module
- Interfacing RFID RC522 Reader to Arduino: A step-by-step guide on lighting up LED
Posted on Utopian.io - Rewarding Open Source Contributors
Your contribution cannot be approved because it is not as informative as other contributions. See the Utopian Rules. Contributions need to be informative and descriptive in order to help readers and developers understand them.
You can contact us on Discord.
[utopian-moderator]
i'm so sad with your decision sir but i respect it. Thank you anyways
In the connections table shouldn't it be
?
yes sir sorry for the mistake my bad, i already edited the connection ")
Hi @kimp0gi,this is @upvotedonator and your post is amazing. Keep it up!
I upvoted and resteemed it.
Hoping for your support by following and upvote this comment.
Thank You!