How to build iOS view programmatically by code and Auto Layout
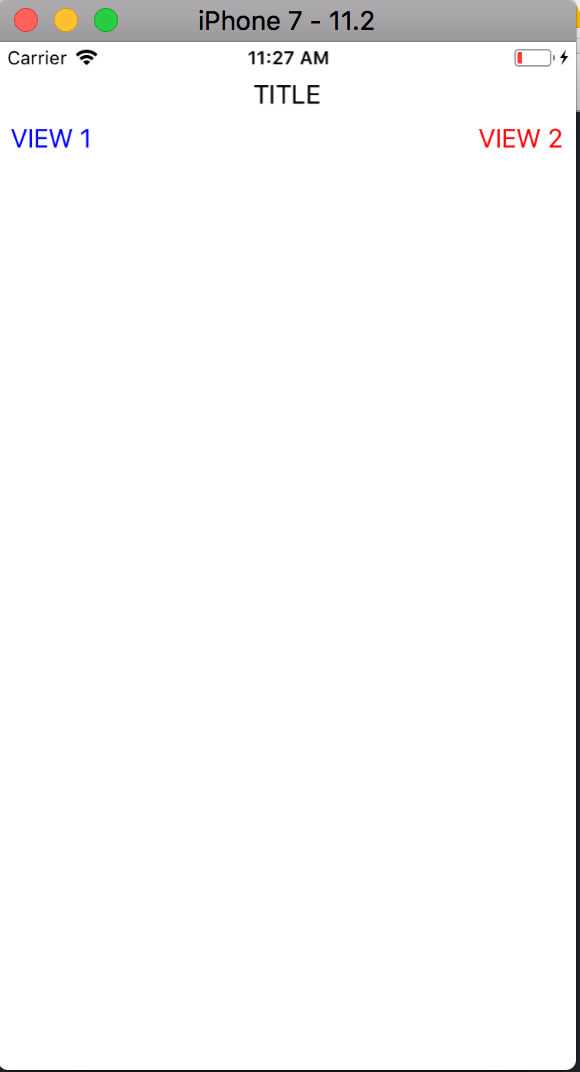
Storyboard of Xcode provide many fantastic feature but still there is some bugs and sometimes we must restart the Xcode. Moreover, when you are using many class using storyboard, it can be very slow when opening up a project. So, i thought the best way to reduce the problem using code. And using the code we can also add Auto Layout using Masonry library to align and position all views better on many devices.
Creating Project
- Open XCode (Xcode 9 recommended). You can download on the official page of Xcode.
- File -> New Project -> Single View App
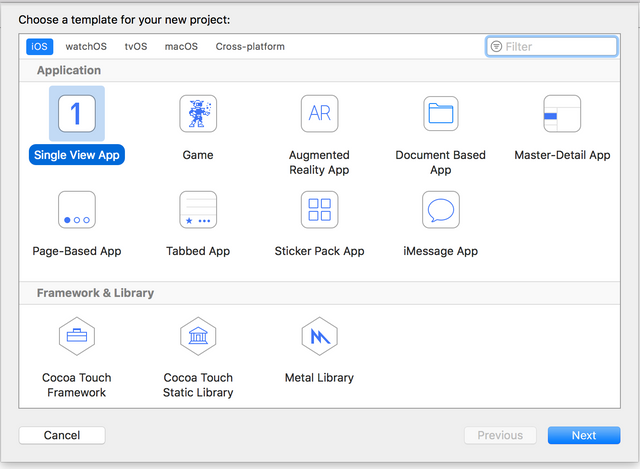
Choosing template for project -> Single View App - Name your awesome project
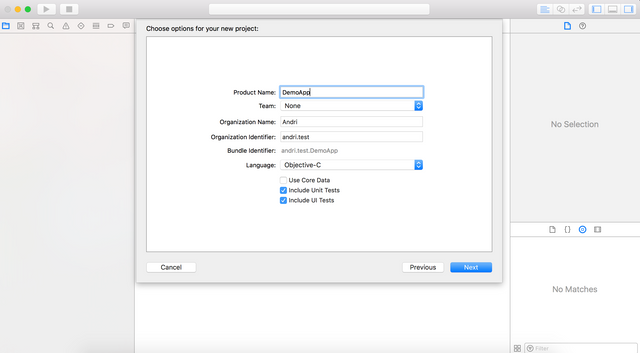
- Click Next and Create
Your Project should be done instantiated.
Creating a ViewController
Once you're done, create or refactor the default ViewController like below code to instantiate our root view controller. In my case i named it LocationViewController. The steps are
- File -> New File
- Choose Cocoa Touch Class and click Next
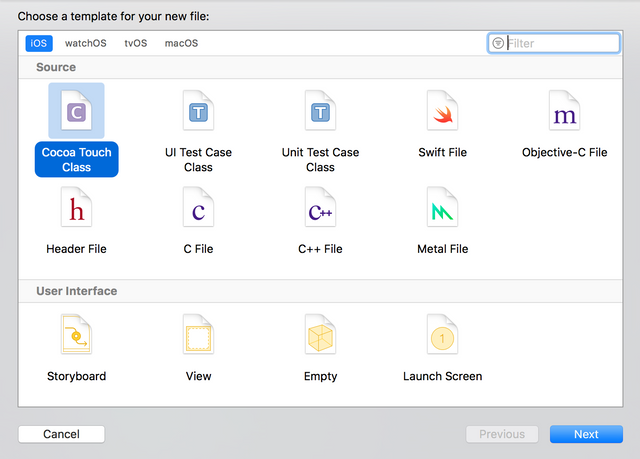
- Name your ViewController and choose the Language Objective C as subclass of UIViewController and let the checkbox unchecked because we don't need create xib file in this case
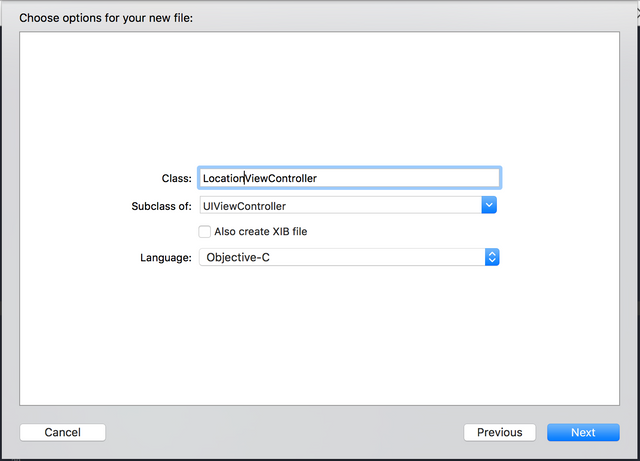
- Finish and enter to create the file
Once you're finish with the file, go to the .m file in this case LocationViewController.m if you follow my naming to the file. Copy this code below. This code below is creating the uiview manually via code and has autolayouts.
//
//  ViewController.m
//  LocationApp
//
//  Created by Dealmedan on 1/5/18.
//  Copyright © 2018 Andri. All rights reserved.
//

#import "LocationViewController.h"

@interface LocationViewController ()

@end

@implementation LocationViewController

- (void)viewDidLoad {
    [super viewDidLoad];
    self.view.backgroundColor = [UIColor whiteColor];

    //Label for title
    UILabel *titleLabel = [UILabel new];
    titleLabel.text = @"TITLE";
    [self.view addSubview:titleLabel];
    [titleLabel mas_makeConstraints:^(MASConstraintMaker *make) {
        make.top.equalTo(self.view).offset(24);
        make.centerX.equalTo(self.view);
    }];

    UILabel *view1 = [UILabel new];
    view1.text = @"VIEW 1";
    view1.textColor = [UIColor blueColor];
    [self.view addSubview:view1];
    [view1 mas_makeConstraints:^(MASConstraintMaker *make) {
        make.left.equalTo(self.view).offset(8);
        make.top.equalTo(titleLabel.mas_bottom).offset(8);
    }];

    UILabel *view2 = [UILabel new];
    view2.text = @"VIEW 2";
    view2.textColor = [UIColor redColor];
    [self.view addSubview:view2];
    [view2 mas_makeConstraints:^(MASConstraintMaker *make) {
        make.right.equalTo(self.view).offset(-8);
        //if using inset
        //make.right.equalTo(UIEdgeInsetsMake(0, 0, 0, 8))
        make.top.equalTo(titleLabel.mas_bottom).offset(8);
    }];
}


- (void)didReceiveMemoryWarning {
    [super didReceiveMemoryWarning];
    // Dispose of any resources that can be recreated.
}


@end
This the explanation
Take a look at this block explanation of titleLabel code and its constraint
 UILabel *titleLabel = [UILabel new]; // this is we instantiate the UILabel first
    titleLabel.text = @"TITLE"; //this is we set the label text
    [self.view addSubview:titleLabel]; //this is we add the titleLabel to our view in this case our view controller
    [titleLabel mas_makeConstraints:^(MASConstraintMaker *make) {
        make.top.equalTo(self.view).offset(24); // this means we make constraint for the top of our view to this component with offset value 24
        make.centerX.equalTo(self.view);// this means we make constraint for the x axis to stay in center on our ```self.view```
    }]; // this line is the autolayout to make our view place well when run on several devices using Masonry Library
The other view almost the same just the position differ
[view1 mas_makeConstraints:^(MASConstraintMaker *make) {
        make.left.equalTo(self.view).offset(8); //create constraint for view1 with offset 8 to our self.view
        make.top.equalTo(titleLabel.mas_bottom).offset(8);
    }];
But, there is something unique. The right positioning and this happens on the bottom too. The right value offset is mean we offset it to the left we are using offset keyword using this line. Therefore, we need to use minus if we want to offset the right of the self.view
make.right.equalTo(self.view).offset(-8);
However, there is another technique that if we don't want to use minus value using insets like this code.
//if using inset
//make.right.equalTo(UIEdgeInsetsMake(0, 0, 0, 8))
It is the same with the make.right.equalTo(self.view).offset(-8);
Okay, we're done. You can press cmd+r or click on the play button to run. Thanks for following up this guide. I hope this is useful for those who is learning autolayout programmatically.
Posted on Utopian.io - Rewarding Open Source Contributors
Hey @andrixyz I am @utopian-io. I have just upvoted you!
Achievements
Suggestions
Get Noticed!
Community-Driven Witness!
I am the first and only Steem Community-Driven Witness. Participate on Discord. Lets GROW TOGETHER!
Up-vote this comment to grow my power and help Open Source contributions like this one. Want to chat? Join me on Discord https://discord.gg/Pc8HG9x
Thank you for the contribution. It has been approved.
You can contact us on Discord.
[utopian-moderator]