How to Make Your Own 3D Glasses
I previously posted about How to Play 3D Movies on Laptops, where we can enjoy three-dimensional film technology through PC / laptop itself, which of course must be watched by using 3D glasses. Well this time I will share how to make 3D glasses, which must be very easy for you to make your own.
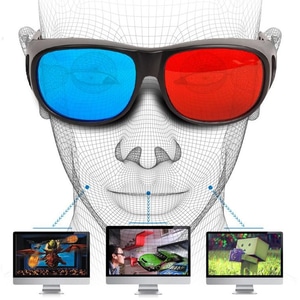
The glasses made here are the commonly used 3D glasses, the red-cyan type (red and blue) that can see anaglyphs image / video. The picture above is an example of 3D glasses that I have made, and the results were not disappointing.
Prepare tools and materials first:
- Paperboard
- Plastic mica color red and blue
- Scissor
- Glue or staples
Just go to how to make it, step by step:
Make a pattern of glasses on cardboard, then scissors. If you do not want complicated, download the pattern here (from Paper Project), then print and scissors.
An example of a 3D glasses pattern, from Paper Project
Mica plastic scissors, with a size slightly larger than the holes in the glasses. Blue Mica for the right eye, and the red for the left eye.The mica plastic color brightness test. This test must be done, because it greatly affects the quality of 3D obtained later. The trick, test with the following picture.
The brightness is right if:
- Red Mica can only see blue circles that turn black
- Blue Mika can only see the red circle that becomes black
How to test it more like the following animation
So what if both circles are still visible? Initially I experienced the problem, but I akali with sticking mikanya layers, until only 1 circle that is seen in each mica. The number of layers depends on the dark / brightness of the mica itself. In my experiment, my blue mica was arranged 3 layers, and a red 6 layers. Just a suggestion, look for a really dark red mica (dark red), because if coated too much, it will be opaque. If the laptop screen is too dark, increase the brightness of your laptop, or watch in dim areas.
If the brightness is fitting, paste the mica on the glasses. Please use glue or staples. In my case, because mikanya are layered, then I use staples just let it be practical (you can see in the first picture above)
Well if it is finished please test on your 3D movie, or please see the following anaglyphs images.
How, can you see something "new" in the picture above? If yes, congratulations, your glasses are ready for use!
Or please check out the following video, and feel its 3D senses! (no need to be afraid of being pricked by a machete, or trying to catch his machete!) This is 3D graphics only! hehe ..)
Visit & Follow My Steemit @amsar20


Source
#introduceyourself/#introducemyself
The “introduceyourself/introducemyself” tag is for creating one introductory post that tells us about you. Users are encouraged to use this tag exclusively for that, and not to reuse it.
More information:
The Game of Tags
Greetings, amsar20! I wish you a very exciting experience here in this loving and caring community :) Life is good!
By the way, there are several groups you as a newcomer can join. They will stay with you for your journey, helping and mentoring along the way.
@greetersguild invite link https://discord.gg/AkzNSKx
@newbieresteemday invite link https://discord.gg/2ZcAxsU
This post has received a 20.66 % upvote from @steemdiffuser thanks to: @amsar20.
Bids above 0.1 SBD may get additional upvotes from our trail members.
Get Upvotes, Join Our Trail, or Delegate Some SP
thanks bro...
Welcome to steemit @amsar20. Join @minnowsupport project for more help. Checkout @helpie and @qurator projects.
Send SBD/STEEM to @treeplanter to plant trees and get an get an upvote in exchange of your donation (Min 0.01 SDB)
Upvote this comment to keep helping more new steemians
Send SBD/STEEM to @tuanis in exchange of an upvote and support this project, follow for random votes.