SLC S23W3 - Building a Weather Forecast App in Flutter
Assalamualaikum my fellows I hope you will be fine by the grace of Allah. Today I am going to participate in the steemit learning club season 23 week 3 by @mohammadfaisal, @kafio, @alejos7ven under the umbrella of steemit team. It is about the technology and development. Let us start exploring this week's learning club.
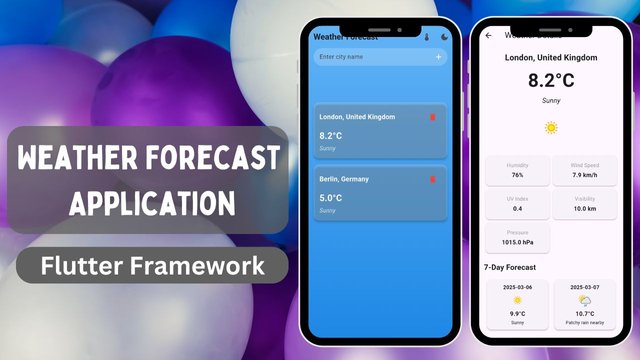
I have worked with Flutter in last season. And today I will be creating an application with the help of the Flutter Framework. I have decided to create an application which will help the people to know the weather of any location. It will provide weather forecast for the next 7 days and with other details of the weather. It will act as a pocket weather system for the users. This is the need of every user.
In my this project of weather forecast there will be these features:
- Home Screen
- Temperature Converter
- Dark/Light Theme
- Search Bar to add location
- Weather Details Screen
These will be the major screens and features of my this weather forecast application.
I am going to use the weather API from the widely used website http://api.weatherapi.com/v1. I wanted to use OpenWeatherMap's API but it was not free to use. This API will help me to fetch and display the data. To use their API I have created an account on the website and after verifying the email I got the API key without any further procedure.
And in order to fetch the API data and to display it on the screen I will have need of following packages:
- http: ^1.3.0
- geolocator: ^13.0.2
- geocoding: ^3.0.0
- shared_preferences: ^2.5.2
- flutter_svg: ^2.0.17
These are the latest versions of these packages at the time of building the application and it can be changed later on with the new updates.
I am going to design the complete application step by step.

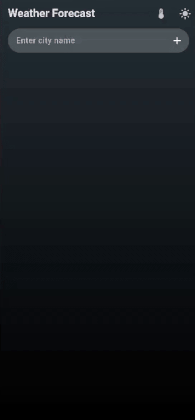
First of all I have taken a container with the light blue background to make it look attractive. This is the app bar of the home screen. It includes a title and two icon buttons. Each icon button is specific for the functionality. The temperature thermometer icon is used to convert the temperature from Celsius to Fahrenheit. The next icon button is used to convert to change the appearance of the application from the light mode to dark mode and so on.

This is the code for the interface of this application. In the actions of the appBar I have declared IconButton. When the icon buttons are pressed the relevant function is called. These are the bool values which return true and false.

This is the search bar to search the locations and add to the screen. In the column widget I have taken a container for the search bar. To make the search bar I have used TextField widget in the row widget and then I have used a plus icon as an icon button to perform the functionality to add the location.

Here is the code to develop the search bar and to make it functional. This function _addLocation gets the user input text and searches it from the API endpoint and if the location exists then it adds the location to the screen. If the location is already added in the application then it returns it already exists. It also handles the error if the API is not working correctly. If the API endpoint is not accessible then it returns failed to load data.

This is the interface of the home screen. It loads the list of the favourite locations added by the user on the home screen. In the list there are cards which replicate themselves whenever a new location is added into the list of the favourite locations. In this card I have used a column widget and then the row widget for the location of the city and country and then for the delete icon button.
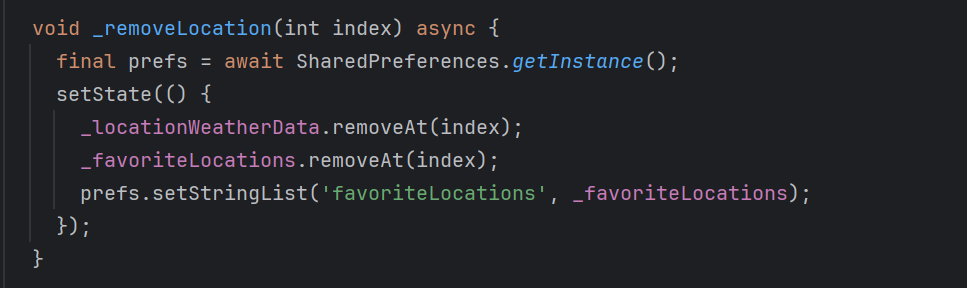
To remove the location from the list this code works. When the user clicks the remove icon then it calls the shared preferences and access the relevant index of the location and delete the card based on that index from the list. I am using shared preferences to store the lists of the locations in the local storage.

This is the detailed screen of the application. It appears when the user clicks any location from list of the saved locations. It is also a card widget which displays the weather details. There are three parts of the details screen. One part is to display the general weather of the location as shown above. The other part sis used to display the complete details of the weather. At the end the screen displays the weather forecast.
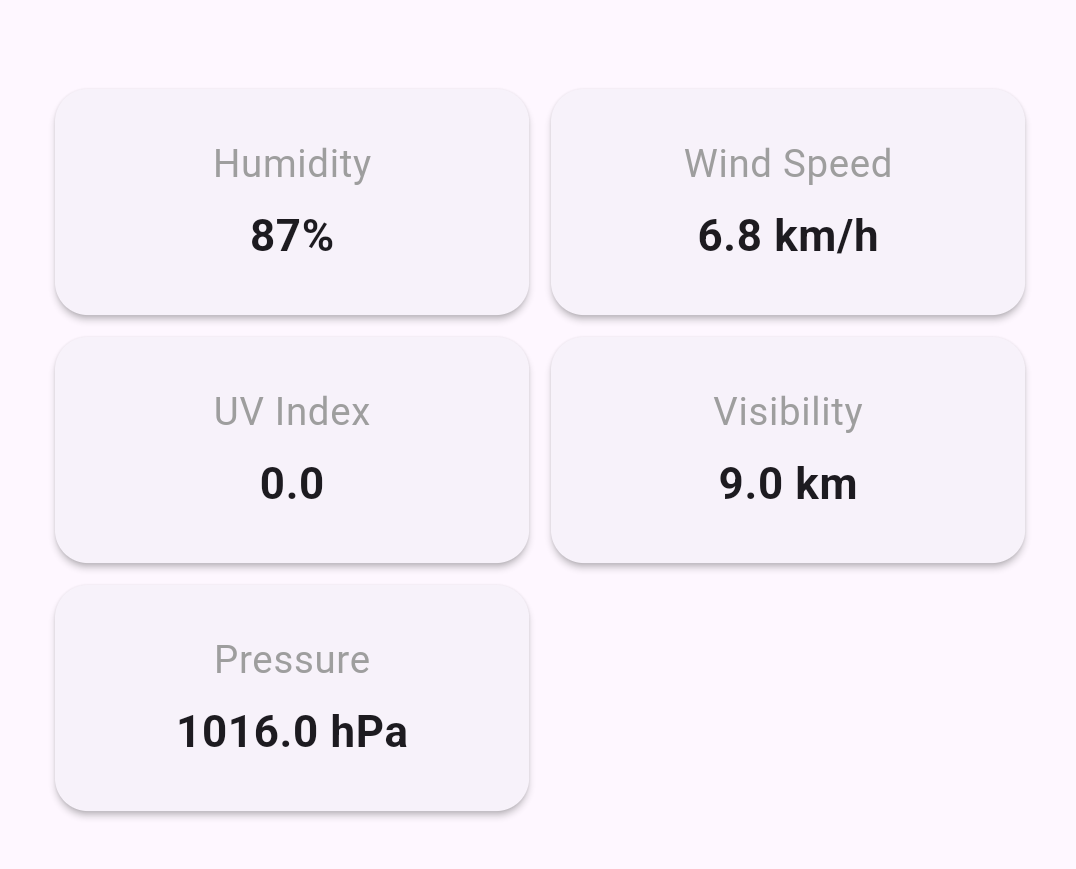
This sections displays the details of the weather. It shows Humidity, Wind Speed, UV Index, Visibility, and Pressure. To display all the cards in an align way I have used GridView widget.

In the details screen this portion is used to display the weather forecast for the next 7 days. Currently you can see the 7 days weather forecast for the London, United Kingdom. Each card representing the day has all the details such as the date, weather icon, temperature, and description of the weather. This shows the temperature on the basis of the selected scale in the home screen such as Celsius or Fahrenheit.
 |  |
|---|
This is the interface of the application in the light mode.
 |  |
|---|
This is the interface of the application in the dark mode.

In the weather service file there are two main functions which map the data from the API. This functions accepts the name of the city as a string value and then it checks the url response if the response of the status code is 200 then it returns the data or the weather otherwise it gives an exception.

This is also a asynchronous function which is used to fetch the weather forecast. It works in the same way but uses a different endpoint with the base url such as forecast.json and then with the city it accepts the duration for the weather forecast which I am using 7 days.
This is the complete working of my project. When the user searches the location and click on add icon then the location is being added on the screen. The search bar retrieves data from the API endpoint and display the location and save this location in the local storage with the help of the shared preferences. And when the thermometer icon is clicked the temperature is converted to Fahrenheit. The details screen shows all the details of the weather. It shows the weather data and the forecast of the weather for the next 7 days. The light and dark mode is also operational.
I have uploaded all the files in the GitHub Repository.
I invite my friends @ulfatulrahmah, @maarnio, and @chant to show their capabilities in this technology and development learning club.
Upvoted! Thank you for supporting witness @jswit.
Hi brother! Your project on weather forecast application with the use of Flutter is really impressive! You hve structured the app good, incorporate with essential feature like location-base weather update, and a seven-day forecast, dark and light mode, and the temperature converter. Use with the Weather API for data retrieval is smart choice, ensure the reliable weather updates.
I suggest you to add a feature to display the real time weather alerts, such severe weather warning and air quality update. You can integrate this feature by fetching data from the APIs alert section.It should allow users to set their prefer default location can enhance usability. Keep optimize your User Interface for better user experience. Well done on your great progress, and best wishes for your project!
Regards,
Faran Nabeel
Thank you for the suggestions for my project I will surely consider them and will try to integrate them to enhance its usability.