Basic HTML to Help You on Steemit
I'm brand new to Steemit, but I do have a few tricks up my sleeve. While I'm still getting to grips with navigating steemit and finding the kind of content I most enjoy, I do know some basic HTML which has turned up being very helpful when it comes to formatting my posts. A couple of people have said they're impressed with my formatting so I want to offer some basic HTML that will help you format your content, so it can look as good as it reads.
Let's jump right in...
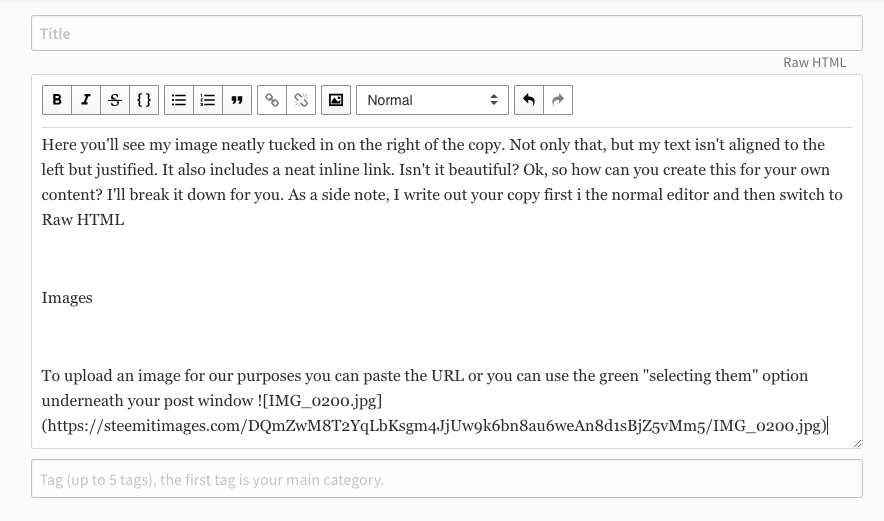
Here you'll see my image neatly tucked in on the right of the copy. Isn't it beautiful? Ok, so how can you create this for your own content? I'll break it down for you.
As a side note, I would write out your copy first in the normal editor and then switch to Raw HTML later.
Images
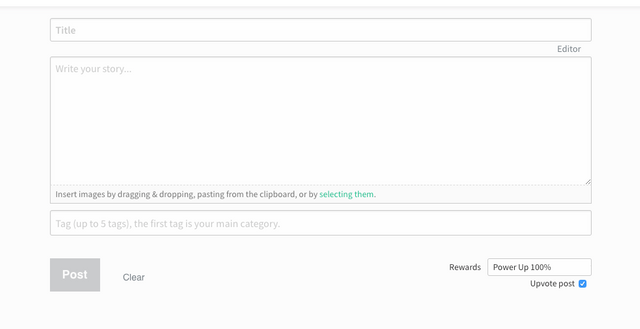
To upload an image you can paste the URL or you can use the green "selecting them" option underneath your post window. You want to be in Raw HTML mode, which should be at the top right of your type box. Don't worry if it's not there, just copy your content, clear the window and it should appear. Just select editor at the top, paste your content back in and then press Raw HTML when you're ready to drop in your images.
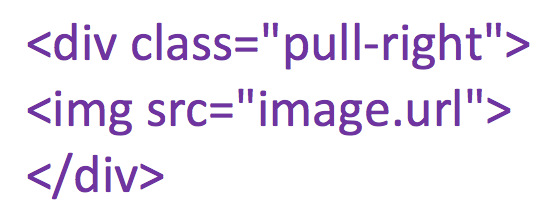
You can insert div classes to tell the editor that you want your images to the right or left. Use the code in the image below to position your image.
Note: I've had to show you the code as an image because if I type it, the code runs and it won't show up in the blog (it will just do what I've asked it to do).
This code will keep your image on the right. To keep it on the left just write "pull-left" instead. You may notice the code in the image includes "img src=". You may need to use it, you may not but if you see that piece of code in the preview then just delete it and check that it still works. It's that easy!
Hyperlinks
Next, let's look at how you can include hyperlinks to link out but keep your text looking pretty. Simply follow the code in the image to add a hyperlink to any text. You can also use this same method to add an email address. Just replace the URL with mailto:[email protected]Practise makes perfect
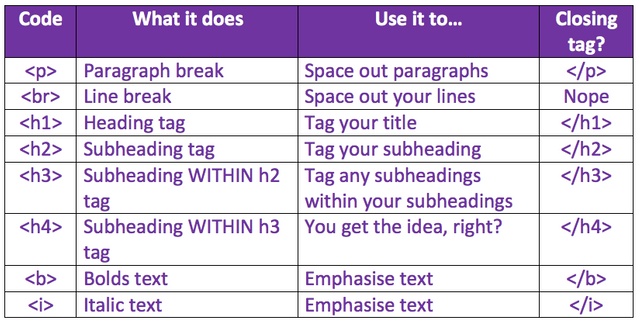
The thing with code is practise and trial and error, just keep trying until you see what you're trying to achieve. Steemit is the perfect playground to try new things, research and ask for help. To get you started here's a cheeky little cheat-sheet of some basic HTML you can play with. I hope you've found this post useful. What are your go-to HTML tricks for Steemit posts? Let me know below :)

Did you find this post useful?
What are your go-to HTML tricks for Steemit?
Let me know below :)
For @cryptosharon for appreciating my formatting


<3 Thank you! :) I'll be passing this article around every time someone asks me anything about Steemit HTML.
Some other thingies
And using three backticks ( ``` ) for embedding html.
Thanks that's awesome! I'll comment back with anything new I learn too :)
this post is super helpful! its also written and described in a way thats super easy to digest. i might be better off bookmarking it so i can circle back anytime i need to reference. i need to brush up on my front-end dev anywayyyy