Solana Token Development: Everything You Need to Know
To create your own SPL token (Solana Program Library Token) on the Solana blockchain, you can use the GTokenTool platform for a no-code, one-click token creation process — ideal for beginners and users without programming experience. Here’s a step-by-step guide:
Prerequisites
Install a Solana-compatible wallet:
Download and set up Phantom or Solflare (Phantom is recommended for its user-friendly interface).
Create or import a wallet, and securely back up your seed phrase.
Ensure your wallet has a small amount of SOL (~0.01–0.05 SOL) to cover transaction fees (network gas fees are typically < 0.000005 SOL).
Access GTokenTool Platform:
Visit the official website: https://sol.gtokentool.com.
Ensure a stable internet connection (Phantom wallet recommended).
Step-by-Step Token Creation
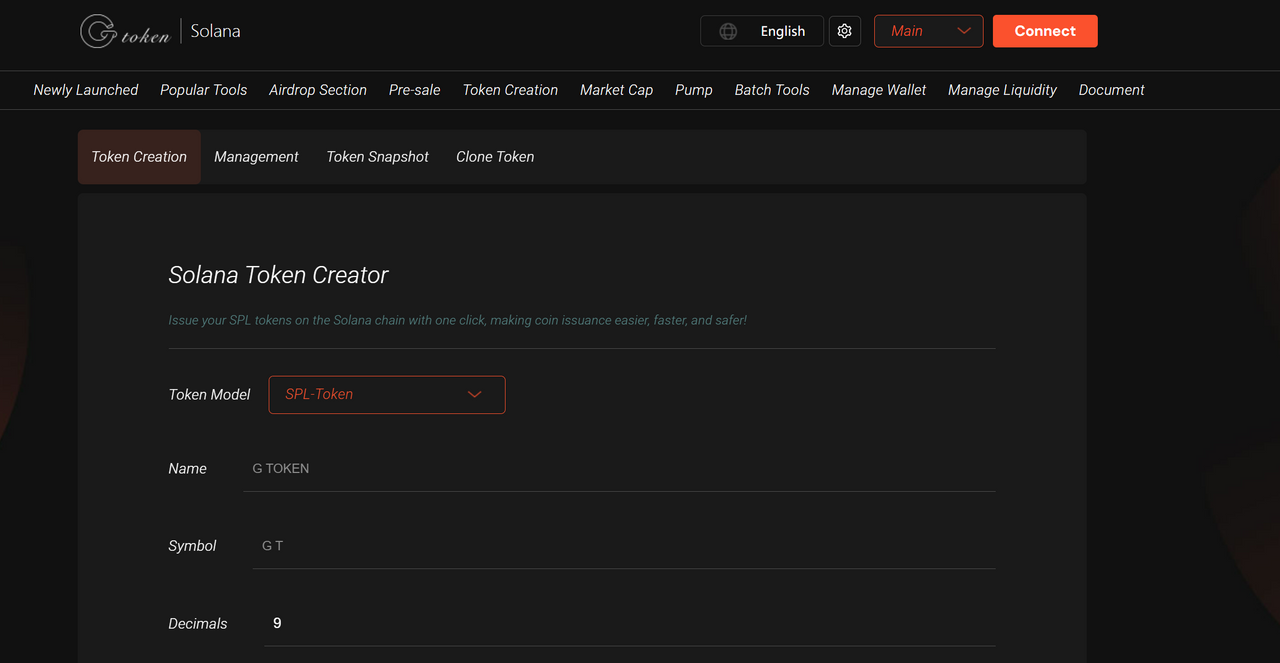
Navigate to the Token Creation Page
On the GTokenTool homepage, click “Solana Token Creation” in the left menu.Connect Your Wallet
Click “Connect Wallet” and select Phantom or another supported wallet.
Approve the connection request — your wallet address will appear once connected.
- Enter Token Details
Fill in the following parameters:
Token Name: e.g., “MyToken”.
Token Symbol: e.g., “MTK” (usually 3–5 characters).
Total Supply: The maximum number of tokens (e.g., 1,000,000).
Decimals: Typically 6 or 9 (determines divisibility).
Token Icon (Optional): Upload a PNG/JPG/GIF (square, high-resolution recommended).
Note: The image is not stored on-chain — you’ll need to submit it later to Solana explorers/wallets for display.
Verify the details and click “Create Now”.
- Confirm the Transaction
Phantom will prompt a transaction confirmation.
Review the details and approve the gas fee (~0.000005 SOL).
Wait a few seconds — the page will display your token’s contract address.
⚠️ Do not close the page — token creation is still finalizing.
- Save the Contract Address
Copy and securely store the token contract address (your token’s unique on-chain identifier).
Post-Creation Management
- Token Management
Use GTokenTool’s “Token Management” to:
Update metadata (name, symbol, logo).
Configure permissions (freeze/mint authority, blacklists).
Create an OpenBook Market ID for DEX listings (e.g., Raydium, Orca).
- Batch Transfers & Airdrops
To distribute tokens, use the batch transfer tool:
Supports “One-to-Many,” “Many-to-One,” “Many-to-Many,” or SOL-relayed transfers.
Upload a CSV file with recipient addresses and amounts.
Confirm the transaction — Solana’s high speed ensures quick execution (ideal for airdrops/rewards).
- Add Liquidity
To enable trading on DEXs:
Select “Add Liquidity” in GTokenTool.
Set up a token-SOL pair, deposit tokens and SOL, then confirm.
Key Notes
Fees: Token creation and logo upload cost minimal SOL (~0.000005 SOL). Ensure sufficient SOL for gas.
Security: Never share your seed phrase/private key. GTokenTool executes transactions on-chain (transparent & verifiable).
Support: Join the official Telegram group (https://t.me/GToken_EN) for assistance.
Logo Display: Uploaded logos must be submitted to Solana explorers/wallets (e.g., Solscan) for visibility.
Contract Permissions: After creation, use “Revoke Token Permissions” (e.g., freeze/mint) to enhance security.
Why Choose GTokenTool?
✅ No coding required (user-friendly interface).
✅ Multi-functional: Token creation, batch transfers, presales, IDOs, NFT minting.
✅ Low-cost: Leverages Solana’s near-zero fees.
✅ Active community: Dedicated support via Telegram.
By following these steps, you can quickly and securely launch your own SPL token on Solana and manage it efficiently using GTokenTool’s tools.