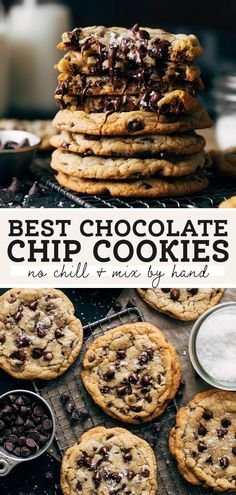
BEST Chocolate Chip Cookies
This is without-a-doubt your new go-to chocolate chip cookie recipe and for so many reasons! The dough does not need to be chilled, they can be mixed by hand, and they turn out perfect every single time. They have a rich flavor and are soft on the inside but crisp and chewy on the outside. I’ve also included my top cookie bake tips to ensure your cookies turn out just right
What makes these the best chocolate chip cookies?
When I think chocolate chip cookie, this is the exact cookie I picture. They’re soft and melty on the inside, crispy and chewy on the outside, spread beautifully in the oven, and are loaded with chocolate chips. Oh, and let’s not forget the sea salt on top!
But the reason why I love this recipe so much is because of how quick and easy they are to make. Usually to get the most flavor out of your cookies, the dough is chilled overnight. This helps the flour fully absorb, giving you a cookie with a chewier texture and stronger flavor.
With these cookies, you can all that flavor and texture but without the chill time! Right after the dough is mixed, they’re ready to scoop and bake.
Another major reason why this recipe is SO good is that you don’t need special mixing equipment. All you need is a bowl, a whisk, and a rubber spatula. So not only is the dough quick to make, but clean up is also super fast.
In the end you’re left with the perfect chocolate chip cookie. Each bite just melts in your mouth, and the sound of sinking your teeth into this cookie is something you just have to experience to understand!
My top chocolate chip cookie baking tips
I have made maaaaannnyy cookies in my day, and it’s even the largest dessert category on my blog. Throughout the years, I’ve picked up some important tips and tricks to ensure my cookies turn out perfect every time. Here are some of my secrets so you too can up your cookie baking game:
Properly measure the flour – I say this in every post, and for good reason. It’s the number one reason why most recipes fail, especially for cookies. If there’s too much flour, the cookies will turn out dry and they will not spread. If you can, measure the flour with a food scale. Otherwise, to ensure you use the exact amount needed, gently spoon the flour into your measuring cup and level if off with a flat edge. If you scoop directly into the flour container, it packs it down into the cup which could leave you with 1/4 cup or more of added flour.
Know your butter – The type of butter you use can make a big difference. You would think that a really high-quality European style butter would make this recipe even better, and you may be right. But most cookie recipes are made with basic unsalted butter. If you try to use something that’s a bit more rich, it can throw off the entire cookie. Different butters have different water to fat ratios. If your butter contains too much fat, it could cause the cookies to be too soft, greasy, or spread too much in the oven. When it doubt, stick with plain old unsalted butter.
2 sugars are better than 1 – There’s a reason why I choose to use both light brown sugar and granulated sugar in this recipe, so don’t make any substitutions. The molasses in the light brown sugar is what gives these cookies that soft but chewy texture. On the other hand, granulated sugar is what gives you that golden and crisp ring around the edge. Utilizing both sugars is what gives you a well rounded cookie, one that’s soft in the middle and chewy on the oustide.
The larger the scoop, the better – Not only do I just desire a bigger cookie, but large cookies bake much better than smaller cookies. 2oz is the sweet spot, so I highly recommend adding a 2oz scoop to your baking kit. Otherwise, you can use 1/4 measuring cup which is also equal to 2oz. Larger cookies bake better because there’s more surface area to cover. It takes the heat of the oven much longer to penetrate the center of the cookie. So as it heats, the outer layers of the dough begin to melt, darken, and crisp while the center stays soft and tender. With a smaller cookie, this process happens too quickly and there just isn’t enough dough in the center of the cookie for you to achieve that soft and gooey texture.
Don’t over bake – The cookies are ready when they look exactly like the picture above (and this goes for most cookies). You always want to pull the cookies when the edges are golden brown and the center looks pale, puffed, and slightly underdone. What most people don’t realize is that cookies continue to bake outside of the oven. It’s not much, but the residual heat transforms the center of the cookie from goopy and doughy to soft and melty. Then, as they cool, they will deflate and flatten. This compacts that soft and slightly underdone center, giving you the PERFECT texture right in the middle.
Don’t skip the sea salt – A light sprinkling of sea salt on top of warm chocolate chip cookies makes a world of a difference. The salt helps balance out the sweetness of the cookie, but also brings forward that chocolate flavor. Just that tiny pinch gives the cookies a much stronger flavor, and once you try it you’ll never go without it!
