CIRCUIT STARTER GUIDE: EVERYTHING YOU NEED TO PROTOTYPE, TEST, AND BUILD CIRCUITS WITH A RASPBERRY PI COMPUTER
We’re into digital making here at The MagPi and this almost always involves build a circuit: first as using prototyping board (or breadboard) and then as a permanent physical circuit board.
Incredible projects using Raspberry Pis cross our news and social feeds every day, and we love to discuss them and how we’d go about making them.
We tend to cover many programming and small projects in the magazine, so we don’t often get to do the big impressive builds. If you have collected a few bits and bobs to build these small projects, you may have assembled the kit you need to attempt something bigger.
In this feature, wee’ll show you what you need to make your own amazing, Raspberry Pi-powered monster projects with circuits.
Circuit starter guide: start out with a prototype
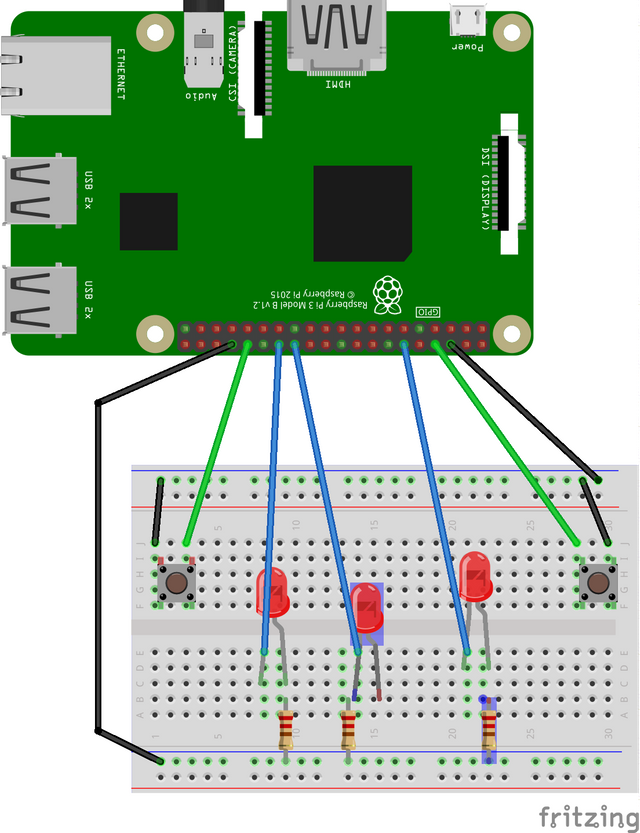
The humble breadboard is an amazing device for prototyping circuits. We often use them in our tutorials, as they allow you to quickly wire up LEDs and other components to test concepts for your projects. Hopefully you already have one, but if not you can buy them from anywhere that sells electronics components, including Pimoroni, The Pi Hut, ModMyPi, etc.
Breadboards allow you to connect up components without the need for soldering. You can reuse the components and quickly rearrange them to test your ideas. You can wire them up to each other and to a Raspberry Pi to create a circuit. Some of the holes are connected by built-in strips of metal, allowing you to use fewer wires to complete your circuit.
breadboard
See also: How to use a breadboard
Common components found in a circuit prototype project
You can use these components in a breadboard. Most of them can be used in your final circuits as well.
Prototyping wire
prototyping wire
This wire uses a single core of metal throughout, which means that it bends easily. This makes it easy to use for prototyping circuits. While you can solder with this wire, it is not ideal for soldered circuits.
Jumper wires
jumper wire
These make it very easy to hook up a breadboard to the Pi.
Resistors
resistors
Most electronic circuits will require a resistor. Different circuits will require resistors of different strengths.
LED
led
The classic LED can be used to test your circuit, or to add lights to your project. Other outputs include buzzers, speakers, motors, actuators, and more.
Button
button
A common input device; pushing down the button completes the circuit. Inputs can also include light sensors, temperature sensors, etc.
Turn your prototype into a permanent circuit
Breadboard circuits are great, and you could easily fit one into a project if you have space. Alternatively, use a soldering iron to make your circuit smaller and more permanent, and to protect against loose wires.
Hi! I am a robot. I just upvoted you! I found similar content that readers might be interested in:
https://www.raspberrypi.org/magpi/circuit-starter-guide/