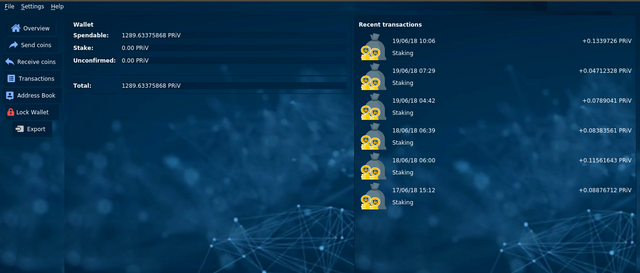
Staking [PRiVCY Coin] with Raspberry Pi
Hardware Requirements
- Raspberry Pi 3 model B+ (1GB RAM)
- 32GB MicroSD Card
Step 1: Setting up Raspberry Pi OS
Download the latest Raspberry Pi OS (Rasbian Stretch Lite) from the official website: https://www.raspberrypi.org/downloads/raspbian/
Burn the OS to SD Card with Etcher.

Now, to enable SSH for the OS, access the boot partition of the SD Card.
sudo touch sshEnable WiFi connection.
sudo nano wpa_supplicant.confEnter the following config
country=GB
ctrl_interface=DIR=/var/run/wpa_supplicant GROUP=netdev
update_config=1
network={
 ssid="<wifi name>"
 psk="<wifi password>"
}
Now, insert the SD card into Raspberry Pi then power on.
Find the IP address from your router admin web panel.
Connect to Pi for the first time
ssh -p 22 pi@{IP-addresss}
Step 3: Hardening Raspberry Pi
Configure Pi locale, to prevent warning messages and compilation errors.
sudo raspi-configDon't forget to edit the locale file too.
sudo nano /etc/default/localeAdd the following content.
LANG=en_US.UTF-8
LC_ALL=en_US.UTF-8
LANGUAGE=en_US.UTF-8
Hardening security by adding a new user.
sudo -i
adduser <yourusername>
adduser <yourusername> sudo
Then reboot Pi.
sudo rebootThen connect back as the new user
ssh -p 22 <yourusername>@<ip-addresss>And delete the default Pi user
sudo deluser pi
sudo passwd root
Step 4: Configure Raspberry Pi
Update Pi packages.
sudo apt-get update
sudo apt-get upgrade
Reboot the system.
sudo rebootInstall the required libraries.
sudo apt-get install git qt5-default qt5-qmake qtbase5-dev-tools build-essential libboost-dev libboost-system-dev libboost-filesystem-dev libboost-program-options-dev libboost-thread-dev libssl-dev libdb++-dev build-essential libtool autotools-dev autoconf pkg-config libssl-dev libboost-all-dev libqt5gui5 libqt5core5a libqt5dbus5 qttools5-dev qttools5-dev-tools libprotobuf-dev protobuf-compiler libqrencode-dev autoconf openssl libssl-dev libevent-dev libminiupnpc-dev
sudo apt-get install autotools-dev autoconf automake bsdmainutils build-essential git
sudo apt-get install libtool libssl-dev libboost-all-dev pkg-config
sudo apt-get install libqrencode-dev libminiupnpc-dev libevent-dev libcap-dev libseccomp-dev
Have a coffee, come back after 10 minutes.
Step 5: Install & Compile PRiVCY daemon
The compilation for Raspberry Pi is not straightforward. Here's my handy script that:
- Download the source for Github.
- Compile required libraries.
- Configure build files.
- Compile daemon.
- Copy daemon to home folder.
You can check the content of the script here.
wget "https://gist.github.com/stiucsib86/9eca3c814d5af2308d6d57f227d65f7f/raw/fed383f434d62dc5ae8ee214933f7c257c9d53c1/privcy-raspberry-pi.sh" -O privcy-raspberry-pi.sh
chmod +x privcy-raspberry-pi.sh
Run the script in background.
sudo nohup ./privcy-raspberry-pi.sh &Come back after 2 hours.
Step 6: Setting up PRiVCY daemon for first-run
Setup PRiVCY.conf to connect to the correct node
nano ~/.PRiVCY/PRiVCY.confPaste the following content.
testnet=0
listen=1
server=1
daemon=1
maxconnections=90
rpcuser=<YourIrrelevantUsername>
rpcpassword=<YourIrrelevantPassword>
rpcport=18580
rpcconnect=127.0.0.1
rpcallowip=127.0.0.1
addnode=otwsvate4vvogbrt.onion:17770
addnode=nufiijzpo7ac2k6u.onion:17770
(Note: You should always double the check correct nodes from official Github Repo).
Copy your wallet.dat and paste in ~/.PRiVCY/ folder.
Step 7: (Optional) Setting Startup Daemon
You can setup cron to automatically start PRiVCY daemon when system boot up.
mkdir ~/logs
sudo crontab -e
Append the following:
@reboot sudo -u <yourUser> /home/<yourUser>/PRiVCYd >> /home/<yourUser>/logs/crontab.log 2>&1Note: The last part is to send all output to a log file so you can check that if you still have problems
Step 8: Done!
Fire up PRiVCY daemon!
cd ~ ./PRiVCYdPsst, don't forget to buy me coffee :D
PRiVCY: PLxacTDxY5EYsTk2538s6nCbVGm4mqB74z
TODO
- walletpassphrase
- clear bash history
- add swapfile - https://pivx.freshdesk.com/support/solutions/articles/30000027088-how-to-set-a-swapfile-on-the-raspberry


Congratulations @stiucsib86! You have received a personal award!
Click on the badge to view your Board of Honor.
Wew fishballllls
Posted using Partiko Messaging