SLC S27 Week1 - Let's Play OpenTTD

Edited By Photofilter
Hello steemians,
Today I’m jumping into @sergeyk’s OpenTTD play-along challenge. Come build with us!


I began by downloading the stable 14.1 release from the official OpenTTD website, selecting the Windows 7/8/10/11 (64-bit) installer, because this option provides a straightforward setup wizard that configures the program files and creates Start-menu entries automatically, and after the file finished downloading I ran it directly from my browser’s downloads list so that the installer could open with administrative privileges and proceed without any interruptions.
 |  |  |
|---|
 |  |
|---|
Once the wizard appeared, I advanced through the sequence of pages, Welcome, License, Destination Folder, and Start-menu Folder and clicking Next each time and I accept on the license page, while keeping the default path C:\Program Files\OpenTTD because this location is standard for 64-bit applications on Windows and avoids any permission issues later when the game writes configuration files or updates its components, and finally I clicked Install to copy the files and Finish to exit the wizard.
 |  |
|---|
I have allowed the missing character to be installed for use in the game. It was 3.36 MB in size and only took a few moments to complete the download.
 |  |
|---|
 |  |
|---|
On the very first launch, the game immediately informed me that it had program code but no base graphics, sounds, or music, which is expected behavior for modern OpenTTD packages, so I deliberately chose “Yes, download graphics” to let the built-in content fetcher install the essential OpenGFX art set, because without this package the game cannot render maps, vehicles, or user interface elements, and the prompt progressed to a compact downloader showing the status bar until the graphics were fully installed.
 |  |
|---|
 |  |
|---|
After reaching the main menu, I opened Check Online Content to complete the baseline assets, and inside the content browser I used the quick search for “fx”, a handy trick that surfaces both OpenGFX and its companion packs, then I selected and installed OpenSFX (the standard sound effects) and OpenMSX (the classic music set), which ensures that menus, construction tools, and vehicles will have audio feedback and background music, while deliberately ignoring NewGRF packages for now because custom vehicle sets and industry overhauls are not required in Week 1 and would only complicate a beginner save.
 |  |
|---|
 |  |
|---|
To standardize my screenshots with the challenge guidance, I opened Game Options and set Language = English and Currency = USD, then in the Graphics and Sound tabs I verified that Base graphics = OpenGFX, Sound set = OpenSFX, and Music set = OpenMSX were selected, also increasing the UI scaling / font size multiplier slightly to match my monitor so the interface remains readable in screenshots while still fitting the entire toolbar across the top of the window without truncation.
 |  |  |
|---|
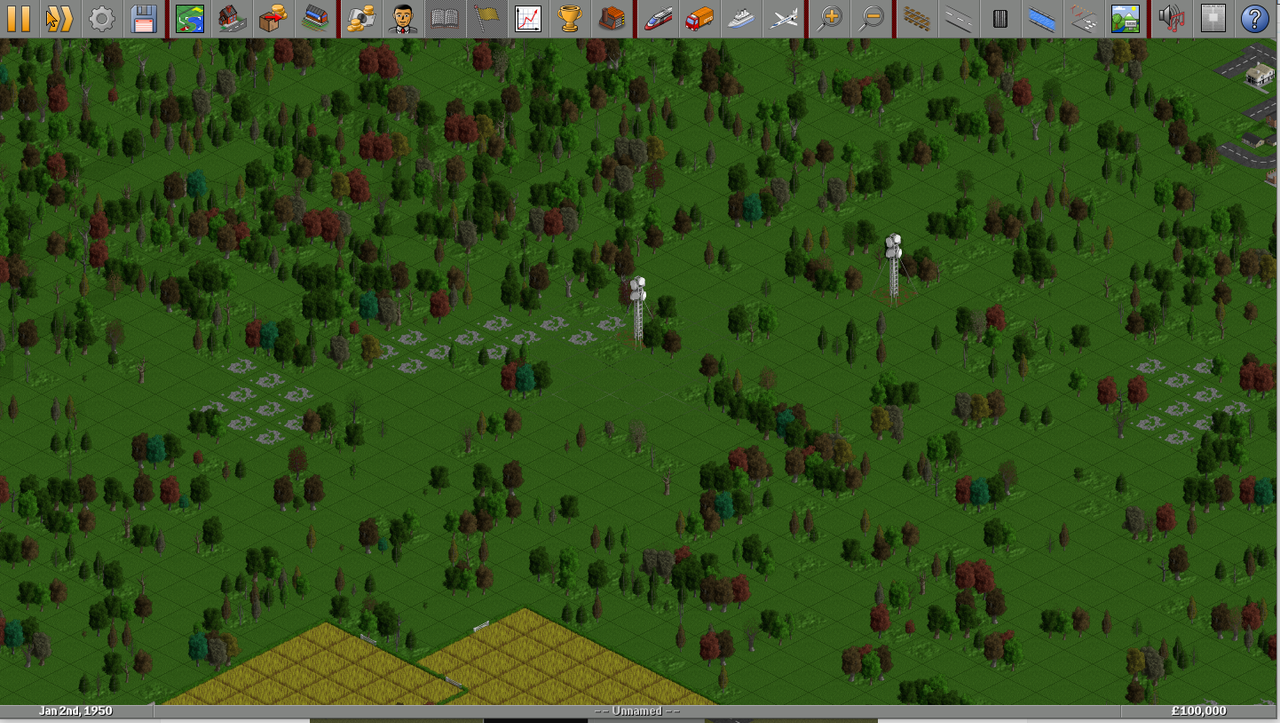
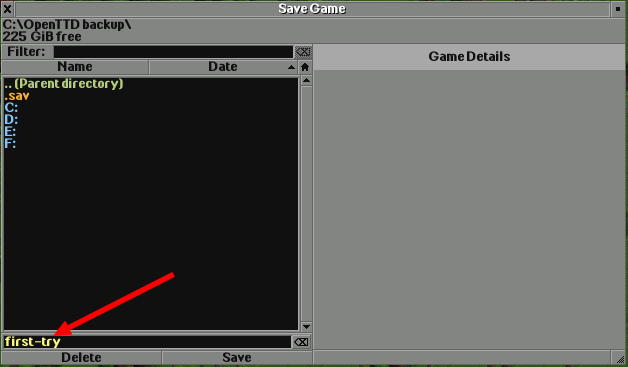
With the environment ready, I created a new map using the default Week-1 recommendations (temperate climate and a flat world, which makes later railway construction cheaper and easier), and when the map appeared I immediately practiced the crucial workflow for progress safety, I clicked the floppy-disk icon on the toolbar, held the mouse to slide into Save, typed a clear filename such as first-try.sav, and confirmed the save so that a persistent copy of my world existed in the save directory afterwards, I chose Quit to return to desktop in order to demonstrate that the file loads correctly from a fresh start.
 |  |
|---|
To complete the cycle, I relaunched OpenTTD, opened the Load menu from the same disk icon, selected first_try.sav from the list, and verified that the map restored perfectly with the same date, towns, and seed, which proves that my installation and content packs are correctly recognized by the game and that I can resume the same world in later lessons without recreating anything, as a small tip, I also noted the presence of the Autosave folder, where the game periodically writes backup saves by month, which can be very helpful if you forget to save manually during long building sessions.

Toolbar buttons
| Button | What it shows or controls | How I use it in practice | Why it matters | Example action |
|---|---|---|---|---|
| Subsidies (gift box) | A live list of offers with cargo type, origin, destination and a deadline for the first successful delivery | I click each town name to center the camera, lay the simplest working service and complete one delivery before the timer ends | A granted subsidy increases payments for a period, which turns an early route into a reliable cash source | Open the board, spot “Passengers A → B,” place two bus stops, buy one bus, start service, deliver once, keep window pinned |
| World Map / Minimap (globe) | Whole-map view with contours, elevation legend and overlays for towns, industries, infrastructure and vehicles | I click on the minimap to jump the main view, toggle Industries to reveal chains and use contours to trace gentle grades | It is a fast planning table that prevents costly terraforming and shows where the network is dense or thin | Toggle Industries, find Forest near Sawmill, plan a flat rail corridor, jump to the site, build with minimal earthworks |
| Company Finances (coins/ledger) | Yearly ledger splitting revenue and operating expenses by vehicle class, plus construction and new vehicles, with loan, rate and max loan | I read trends to judge route health, borrow only enough to open quick earners, then repay once totals move from red to black | It guides safe expansion and keeps interest costs under control | Borrow in 10,000 steps, build a subsidized shuttle, watch revenue rise, start repaying to cut interest |
Window behavior
| Feature | How to use it | Why it helps |
|---|---|---|
| Pin | Click the small pin on the title bar to keep a window on top | Prevents auto-closing so key panels like Subsidies or Finances stay visible while building |
| Shade | Click the shade control to collapse content to the title bar | Reduces clutter while keeping the window parked and ready |
| Resize | Drag the lower right corner | Fits more rows in lists such as towns or industries with less scrolling |
| Drag | Hold the title bar and move the window | Arranges panels into a comfortable cockpit layout |
| Click and hold menus | Press and hold on a toolbar icon, slide to the command and release | Executes Save, Load or Options quickly without multiple clicks |
| Right-click help | Right-click any icon or label | Shows context help that explains controls directly in place |
 |  |  |
|---|---|---|


I began the third task by opening the Town Directory and sorting the list by population so that the smallest settlements rise to the top, since the challenge asks for a modest town of roughly five hundred residents that can be adopted as my home base. With the list in view I scanned for a location that combined a population near the target and a position that promised easy early growth, ideally with flat terrain and shoreline access for future docks, then I clicked the entry to center the camera and open its information window so I could inspect streets and available building space.
 |  |
|---|
From that list I selected Trunningville, which reported 568 inhabitants and sat on a gentle stretch of coast, a combination that felt perfect for beginner services and for clean screenshots of the town core. After centering on it I clicked the town name on its info window to bring up the rename dialog, typed kouba01-land as my custom name, and confirmed with OK. The new name appeared above the buildings immediately and the population label stayed intact, which gave me a neat identity for the save file and a clear anchor for planning my first passenger shuttles and mail runs around the bay.
 |  |
|---|
Next I looked for a nearby large city that could function as a regional magnet for jobs, shopping, and intercity travel. Panning across the map I found Frinninghall with a population of 3,258, a dense grid of streets, and plenty of central tiles for future stations. I opened its window, used the rename control again, and entered Tunis so that my world now has a recognizable capital that pairs thematically with kouba01-land and gives me a natural destination for early passenger services, which will later evolve into a trunk rail line once the treasury allows.

 |  |  |
|---|
With the two city names established I finalized the company identity. I opened the Companies panel, chose an owner portrait that looked suitably serious, selected a calm blue corporate color for clear map visibility, and set the company name to B.Bilel Transit Service. I then used the Build HQ button to place my headquarters on a flat block just off the main square of kouba01-land, close enough to the seafront to suggest future ferry ambitions while still leaving space for a compact bus station and a freight spur. This placement anchors the brand inside the town I renamed and makes later screenshots consistent, since the HQ becomes a visual landmark that ties the story together.
 |  |
|---|
To close the task I saved the world under the filename homework1.sav so that the exact same map, the renamed towns, and the freshly placed headquarters will load instantly in the next lessons without any risk of losing progress, which keeps the narrative coherent and lets me focus on building the first profitable routes rather than recreating setup steps.
 |  |
|---|

I opened the Landscaping toolbar and started by clearing a work area beside kouba01-land. The dynamite tool removes surface objects instantly, which lets the raise, lower and level tools act on bare ground without the game refusing the order because a tree or a fence occupies a corner. With a clean rectangle selected I pressed and held Shift to preview costs, then I raised a shallow ridge on the inland side and lowered a matching step toward the sea. The cost preview is essential because terrain edits can become expensive around towns, and the preview lets me adjust the plan until the price tag looks acceptable.
 |  |
|---|
Once the perimeter was carved, I used the Level tool to pull a flat terrace from the first tile across the area. Leveling copies the height of the tile where you start the drag, so by choosing a corner that already sits at the exact altitude I want, I can sweep a perfectly even platform that will later accept stations and depots with no awkward foundations. I then switched back to the raise and lower tools to etch a simple geometric pattern in the middle of the terrace. The stepped surfaces in the screenshots show how the tiles break into neat diamonds that read clearly even when you zoom out, which makes the shapes easy to see on the minimap and in overview shots.
 |  |
|---|
With the ground shaped, I opened the Trees window and planted several species in small clusters to demonstrate the variety. I placed a few conifers tight against the buildings to frame the town label, then mixed broadleaf and darker evergreens along the new terrace so the edge reads like a park strip rather than a construction scar. Each placement shows a red cost indicator before confirmation, and the random type option helps avoid uniform rows that look artificial. The result is a varied treeline that also improves screenshots and slightly softens the Local Authority mood after earthworks inside the town boundary.
 |  |
|---|
To show the transparency features I opened the Transparency Options panel and toggled trees and houses. With trees hidden the new platform and the stepped cuts become crystal clear, which is perfect when placing stations, road junctions or a future rail alignment. Hiding buildings briefly exposes sidewalks and lot edges so I can check coverage tiles without moving the camera, then restoring visibility returns the natural look for beauty shots. Between the landscaping tools for shaping and the transparency toggles for inspection, I now have precise control over both the terrain and the readability of dense town centers.

I finished by panning out to confirm that the terrace sits on the flattest contour band near the shoreline and that the new tree line does not block potential station approaches. This area is now ready for a compact bus terminal or a short freight spur, and the transparency presets will let me flip instantly between a construction view and a clean presentation view when I take the next set of screenshots.


 |  |  |
|---|
I began by opening the Industries directory and reading the production lines to understand what the map could offer near my renamed town. The list immediately revealed a healthy mix of primary and secondary sites: several forests that produce wood for sawmills, multiple farms that generate grain and livestock for factories, iron ore mines that would feed a steel mill, and, crucially for a coastal start, a cluster of oil wells that were already reporting strong monthly output. To focus the search on my area I typed the town prefix in the filter and the window returned a single, very promising entry labeled kouba01-land Oil Wells with 135,000 litres of oil available, which is exactly the kind of steady volume that can finance an early network.

After confirming that the wells were close enough for short road links, I checked the directory for a compatible consumer and found Bedingbury Oil Refinery listed among the secondary industries. In the temperate economy the refinery accepts crude oil and converts it into Goods that towns will happily receive, so the complete chain forms itself almost automatically: haul oil from the pumps to the refinery and then haul goods from the refinery into the city. I panned to the refinery to make sure there was room to place a station on level ground and that the surrounding roads allowed trucks to turn cleanly without awkward detours, both conditions looked favorable in my save.
|
Since the challenge is still in its first week, I chose oil as my resource for one simple reason that the chain is short, the cargo is valuable even over modest distances, and a small fleet of tank trucks can be deployed without heavy upfront track costs. My first phase will connect the kouba01-land wells to the refinery using a pair of road depots and a compact loading bay at each end, which will start cash flow with minimal risk. Once the income graph stabilizes, I will replace the road leg with a single-track rail line and a passing loop so two or three tank trains can run safely, and that upgrade will multiply throughput without changing the basic route.

With oil refined into goods, the final step is to feed the urban market. I will place a goods station on the refinery side and a drop-off inside Tunis, because the capital’s larger population guarantees acceptance and the higher demand smooths revenue spikes. The refinery will act as a hub, crude arrives from kouba01-land, goods leave to Tunis, and the same platform can later dispatch goods to secondary towns if I add a short road fleet. This plan keeps the logistics simple, avoids expensive terraforming, and exploits what the map already gives me: oil that sits close to my starting town, a refinery within practical range, and a capital city ready to pay for finished products.
Thank you very much for reading, it's time to invite my friends @pelon53, @max-pro, @sushanta83 to participate in this contest.
Best Regards,
@kouba01

@tipu curate
;) Holisss...
--
This is a manual curation from the @tipU Curation Project.
Upvoted 👌 (Mana: 0/9) Get profit votes with @tipU :)
In your Presentation Dear Friend, I really gained lots of new ideas on how to installed in PC. I haven't yet lots of about programming or Downloading but with your presentation I get more interesting by doing it, best of luck. ☺