#needleworkmonday :: Sewing a fabric lining for a weaved basket
Hi hi hi! Happy @NeedleworkMonday lovely Steemians!
Thank you, thank you again to @crosheille and @crystalize for starting and hosting this superb platform for us to share our love for needlework 💟.
So, yesterday, I shared a post on Weaving a Basket with (old) Magazines. You can read all about it and try weaving one for yourself 🙂.
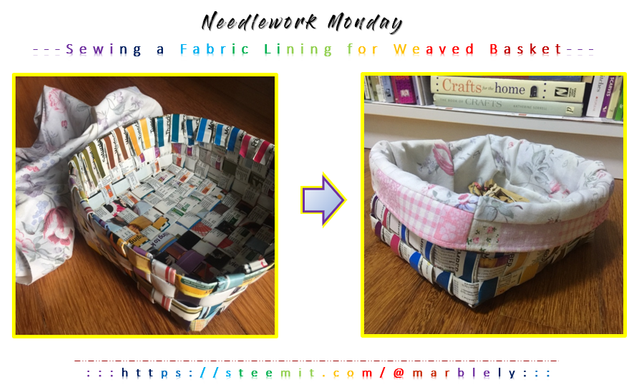
As a continuation to the weaved basket, today, I will share with you on how to sew a fabric lining for the basket so that it is a complete basket 😁! And you can use scraps to do this. For my lining, I used an old bedsheet that was thinning.
And since this is sort of like part 2 to my post yesterday, I will go with the similar presentation theme, hehe 🎨.
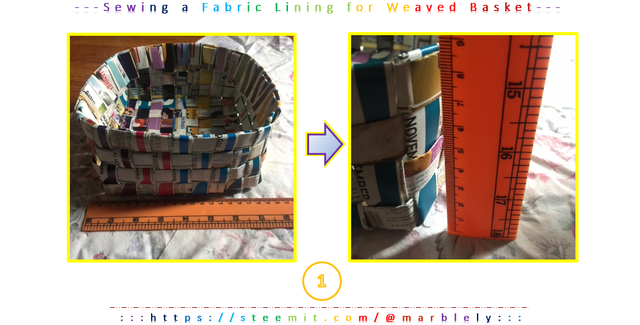
Step 1
- Measure the basket's width, length and height. My basket was about 19cm x 19cm x 8cm (roughly).
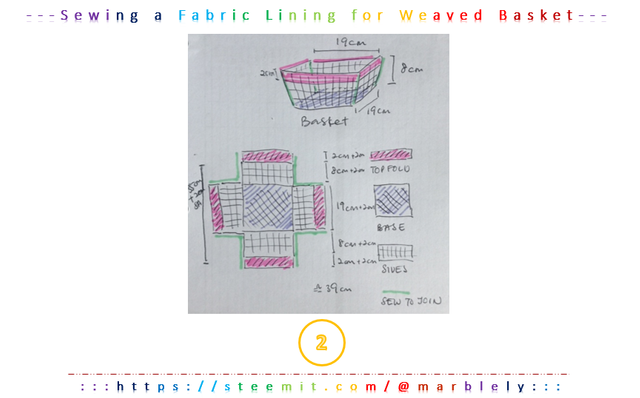
Step 2
- Draw the schematic shape breakdown for the basket to have a better visual of the fabric measurements that you need to cut.
- For my basket, if we were to break down the shapes that makes up the basket, it will consist of 1 square in the middle and 4 rectangles on each side of the square. But I used a rectangle fabric to cover one side of the square plus rectangle to lessen the sewing.
- I also decided to add a pink patchwork to the sides, just for the fun of it.
- For each piece, the sides that you will be sewing, remember to add 1 cm seam allowance (SA) on each side that needs to be sewn to join the fabric.

Step 3
- Cut out the fabric pieces according to your measurements.
- Sew to join the fabric pieces according to the schematic drawing.
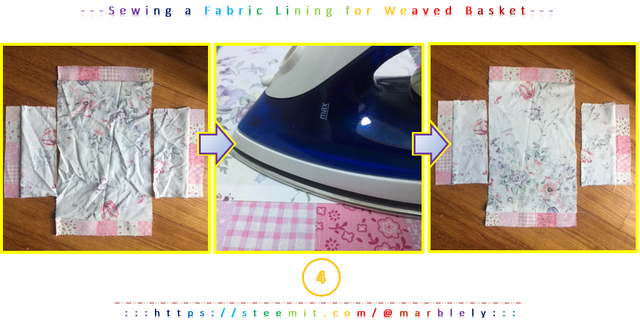
Step 4
- After the pieces are sewn together, iron to flatten the seams for a neater result.
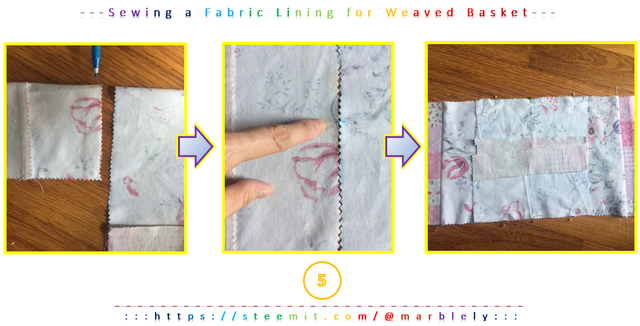
Step 5
- Fold each rectangle to half to get the center point to join and sew the fabric together, and ensuring the rectangles meet in the middle.
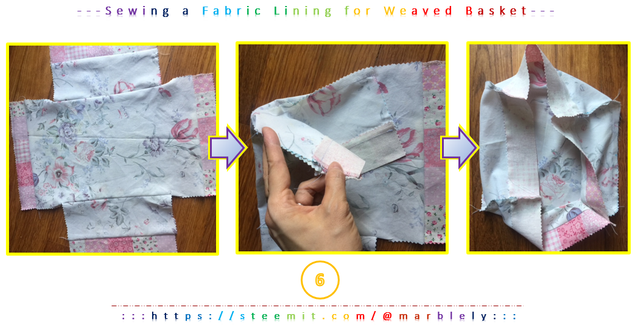
Step 6
- Once the flat rectangle pieces are joined, sew the sides to form the corners.

Step 7
- Hem the top edges of the lining.
- You can use zigzag stitch for the hem too or if you have a serger, serge away! 😁

Step 8
- Place the completed lining into the basket, adjust and fold the pink sides to the outer side of the basket.
- Voila! We are done!
Have a happy, happy week!

Wow, there's a lot of work with it but the result is great! I used to do that using paper, newspaper more precisely. That's much more easier. Great job!
Thank you @erikah! Newspaper works well too!
That's so cool!
Yay! Thank you @phoenixwren! Yours is cool too!
This looks very handy. I like the washable lining.
Thank you @gmatthe2! I like anything that is washable :D
Thank you @pixresteemer!
Very nice @marblely! Thank you for sharing the steps with us! I really love this basket!! 😍
Thank you @needleworkmonday! 😘
😘
How can you be so multi-talented??? I have two of these baskets and I love them, but I must admit I bought them, with your tutorial I am almost convinced I could try it myself :-D
Thank you for writing down the explanations and the shematics <3
Aww thank you @neumannsalva! I just tried for fun. You are multi-talented! I love your pieces - poem, needlework, artwork, week by week!
when you look at the completed basket, you will never guess that it is made of old magazines. great !!!!!
Awww.. thank you @tali72 😘. Think I'm going to make some more. It is a really good way to make use of the magazines.
Well done! I especially like your schematics - I may be able to sew a straight line but drawing? Not one of my skills ;)
Thank you @muscara! :) Your knitting is beautiful!!
So pretty and well explained your entire post... I love the way you put the photo step by step...
Thank you for sharing! !
Thank you @tahiaarq! :)
You just planted 0.12 tree(s)!
Thanks to @marblely
We have planted already 3349.32 trees
out of 1,000,000
Let's save and restore Abongphen Highland Forest
in Cameroonian village Kedjom-Keku!
Plant trees with @treeplanter and get paid for it!
My Steem Power = 25454.15
Thanks a lot!
@martin.mikes coordinator of @kedjom-keku