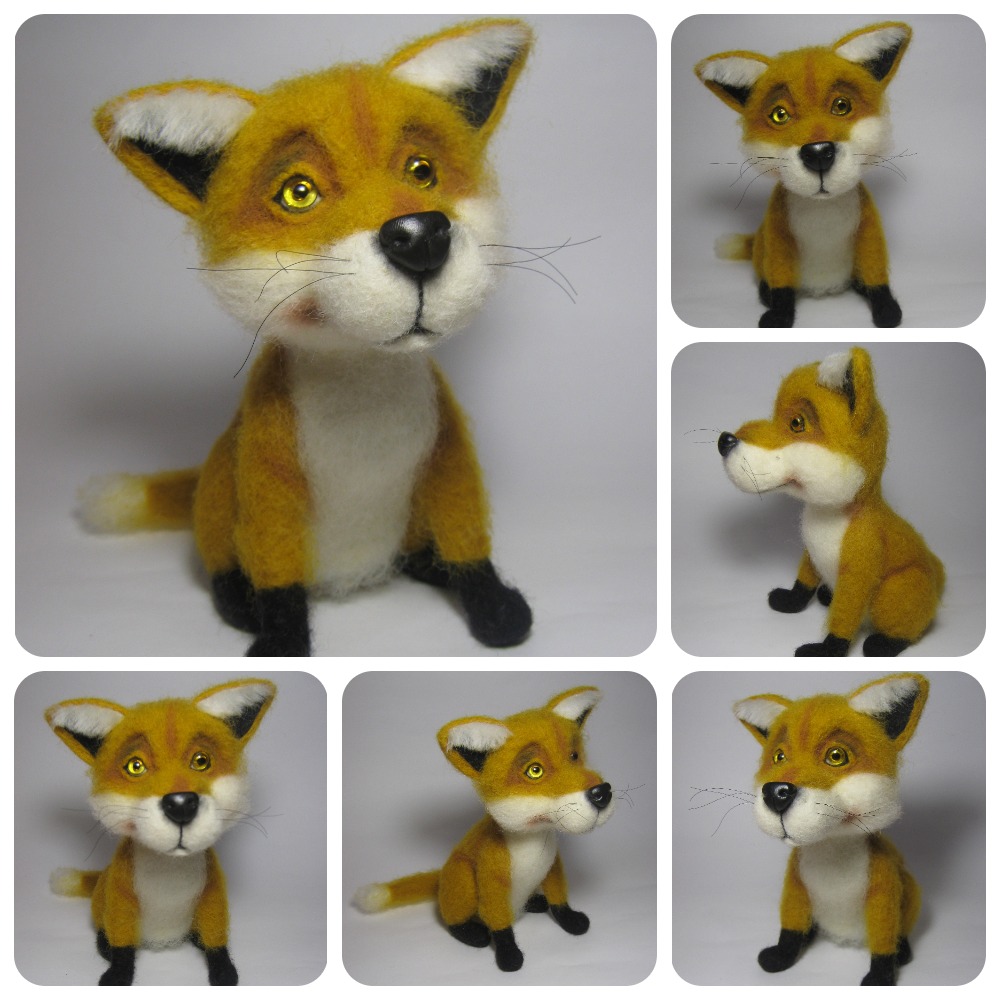
Master class on the creation of the Fox by the method of dry felting #needleworkmonday.
Hello.
Here's my entry for #needleworkmonday by @crosheille
Master class on the creation of the Fox by the method of dry felting.
We need:
- foam rubber sponge;
- Special wool for felting-cardios (orange, white, black);
- chenille wands;
- eyes (sewn, glutinous);
- nose (glued or molded from polymer clay);
- pastel for toning;
- Needles are thick (№ 36 triangular, long);
- Needles are thin (№ 38 triangular);
- Reverse needle (for fluffing toys).
We tear off a piece of red hair - for the head of a fox. So we form the ball for the future head.
We stick the needle into the wool at a right angle, and pull out the needle. We repeat, trying to observe this angle further. Stick in with quick movements and gradually you will notice how the ball starts to compact. Help the process and, if necessary, shape the part.
Initially, it is necessary to stick the needle as deeply as possible, taking out the middle so that the upper surface remains soft and the core is compacted. We leave loose strands in the junction to allow them to be welded to the main part.
Evenly we dump the wool from all sides, it is possible to work alternately, with a thick needle, № 36, giving the original shape to the product, and then to the medium №38.
Then take a piece of white wool is smaller and roll the ball or you can oval - it will be a muzzle-nose of our Lisenka. We attach the Lisenka's nose to the head, we connect the parts with the needle № 36. This is the same as the whole process - we put the strings of the attached part to the head (base) and quickly put the wool inside.
We plan eyes: for a long time we poke into the same place to form a cavity for the eye. Muzzle: select the place of the mouth, and the place where the spout will be. From a piece of black wool we form a spout and attach it to the base. I took a nose molded out of polymer clay.
Next we'll be tripping. We take the wool about the same as we took for the head, or quite a bit more, and we are no longer laying a ball, but an oval body. We lay the body of red hair leaving a white triangle on the breast.We put the body to the head.
We take chenille sticks, fold them in half, twisting it for greater rigidity. We form paws, tail.
Then take the wool and wrap the formed paws in the wool and "poke" until the seal.
We put everything to the trunk.
Sew our eyes. We make eyelids.
We lug the ears: We take two identical lumps of wool, bend them in the form of ears and roll them with a few needles, periodically turning and poking from the other side.
Then take the back needle, fluff the toy and comb it. Sew a mustache (you can use a fishing line or monofilament). Toning the pastel. The Fox is ready!
.jpg)
Aaaww, so cute! I dont have enough patience for felting. You have a new follower!
Thank you. Felting very calms the nerves)
Sooooooooooo supercute. Too much.
Now I hardly dare to post my silly needleworkmonday ! You have set the bar too high
Thank you so much!
Your work is excellent! Follow you.
I can only say the same :)
wow its nice!!
Thanks!
I can never get enough of seeing your Amazing work and how these animals come to life right before our eyes! Thank you for sharing the process with us and for being here to share your work! You are inspiring! 😊
Thank you very much, I'm very pleased!
Absolutely! 😊
I love love love how cartoony his face looks with such a happy smile. The eyes are perfect and your shading is excellent!
Thank you so much!
I really like the facial expression of the Fox)
Thanks ;)
Stunning! So super cute!
Thank you very much!
That's a lovely fox @innahandmade... the details and shading are great !
What's your favourite animal to do in felt? Do you make cats?