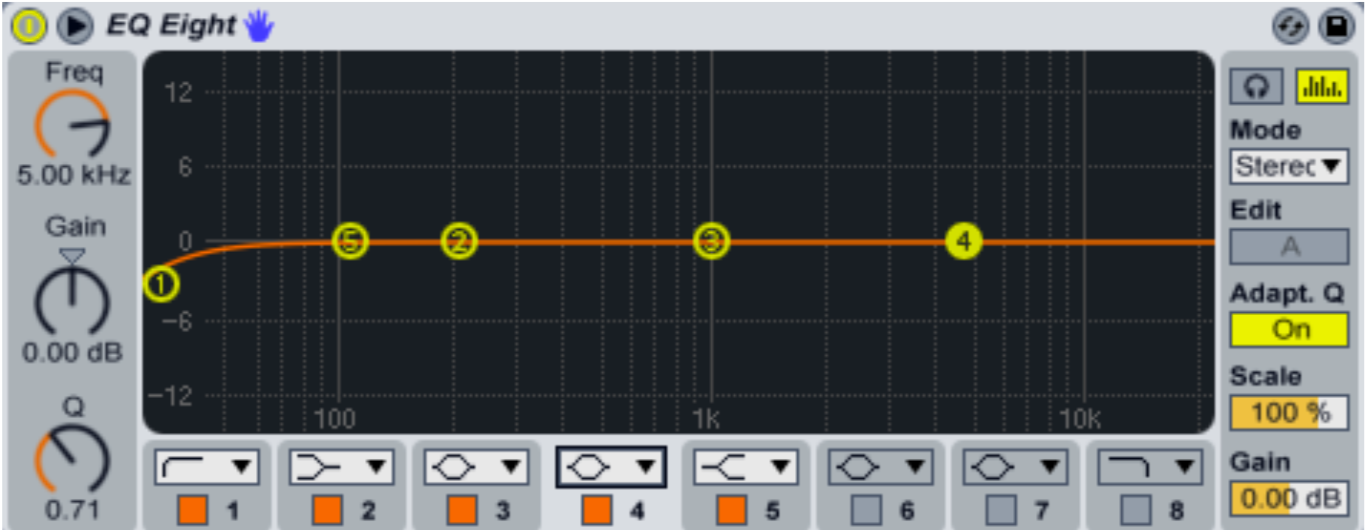
Intro to Music Production Lesson 5: Ableton Live's EQ Eight plugin configured as a Large Format Mixing Console EQ Section
Welcome to my Intro to Music Production Lesson 5. If you haven't read any previous lessons yet, I recommend you go to my main blog page and scroll down a bit to look for the previous four lessons. However, this one might be perfect for you if you just want to get straight into mixing your song using the Equalizer tool. You will learn how to configure the settings of an EQ plugin to function as a large format standard mixing console equalizer and save this as a preset you can return to any time. This will basically replicate the most common analog mixing board settings for you on your digital audio workstation. To demonstrate, I will be using Ableton Live’s EQ Eight audio effect plugin.
The Mixer’s EQ Section
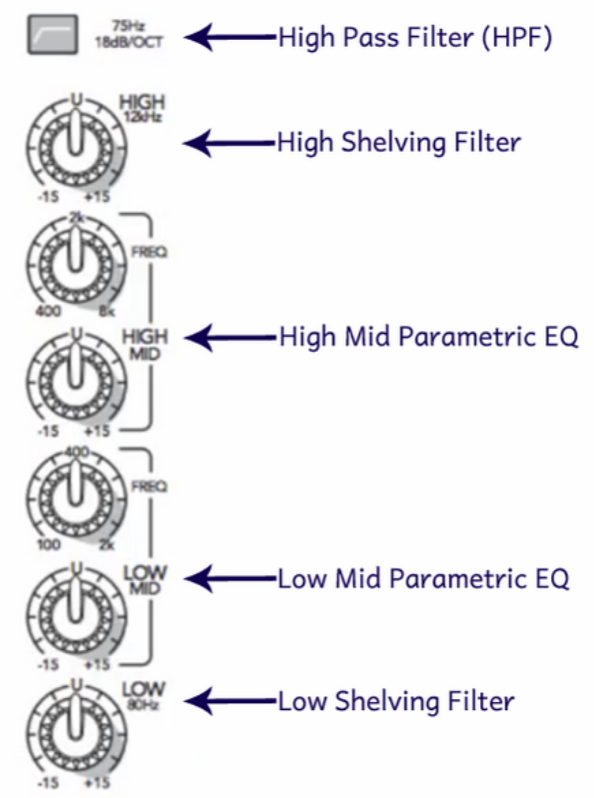
A good mixing board channel strip will have a basic equalizer section. These four primary sections are as follows:
- High Pass Filter: This section is used to remove unwanted low frequencies, noise below the desired audio signal, or disagreeable rumbles.
- High Shelving Filter: Can focus and brighten a particular desired element. It is usually a good idea to boost the high end just a bit on vocals, for example.
- Mid Range Filters: The midrange is quite important. Use these to boost or cut the midrange. It is not advisable to do very much boosting at all around the middle range. Boosts can sound unnatural. This setting is better used for cutting certain elements. For example, cutting precise elements of your percussion with a very narrow notch is useful for preventing clashing frequencies and muddied sounds. Mid range filters generally function as parametric equalizers. A parametric equalizer can control three aspects of each frequency: level (boost or cut), the center or primary frequency and the bandwidth or range of each frequency.
- Low Shelving Filter: Use this to boost the low frequencies to create a more full bass sound. It is useful to boost around the 100 Hz range.
Typical Mixing Parameters
Creating your standard mixer EQ in Ableton Live
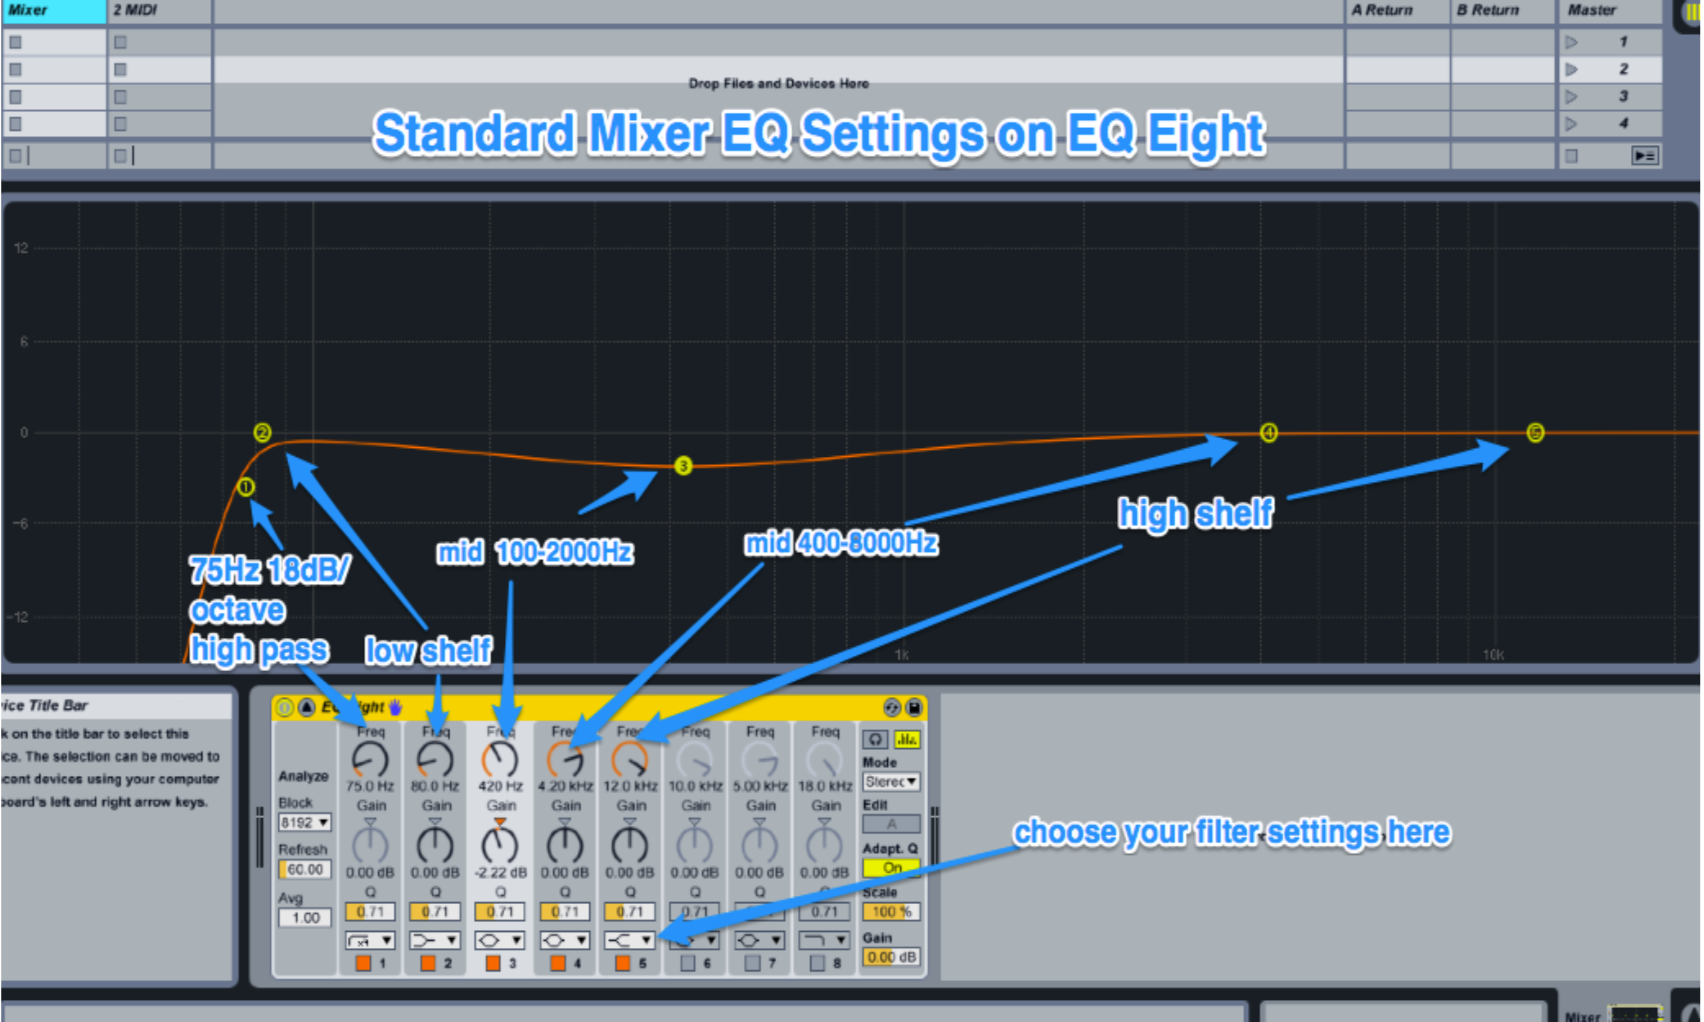
A standard mixing EQ will look similar if not identical to the above settings (knobs), usually seen from top to bottom:
• A 75 Hz, 18dB-per-octave high pass filter (usually seen as a button).
• A 12 kHz high shelving filter
• A 400-8000 Hz mid-frequency bell filter
• A 100-2000 Hz mid-frequency bell filter
• An 80 Hz low shelving filter
Ableton Live has no default setting for replicating these precise console settings that I am currently aware of. It is advisable to create a custom preset using Live’s built-in EQ Eight plugin. You will enhance your ability to mix more efficiently with these industry- standard EQ settings. Use the description and the image above to help you create your own custom settings.
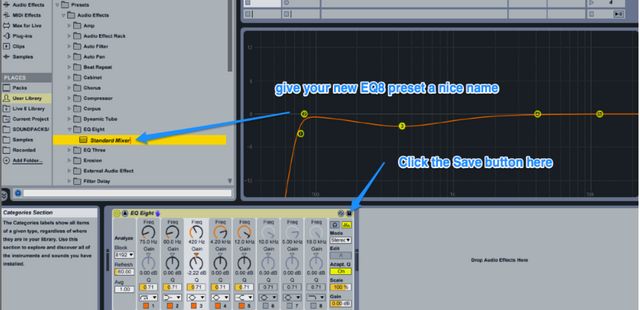
Save as a Preset
To save this as a preset, simply click the floppy disk icon in the top-right corner of the EQ Eight’s window. A new preset will appear in your library. Label it something memorable, such as Large Format Mixing Console EQ or Standard Mixer.
Voilà! Now you’re ready to mix your sounds with greater acuity. A few practical tips:
• Electric guitar: Guitars generally have more low-end presence. Use a high-shelf to attenuate the signal at around 12kHz.
• Piano: Use a high pass filter at 180Hz. Use a low shelf to attenuate the signal at around 337Hz at -6dB. Boost the high frequencies using a high shelf filter.
• Remember that interaction between tracks is more important for mixing than listening in isolation.
• Remember that the fundamental frequency or first harmonic is the lowest sound a given instrument can create. Anything below the fundamental frequency will become audible as noise. Search for “Fundamental Frequency and Harmonics” for more information.
I hope you gained some valuable knowledge today on how to use Live’s default equalizer as if you were controlling an actual hardware mixer. Have fun experimenting with these settings on various signals to mix music to your liking. The computer settings will aid you in your mixing process, but bear in mind what Obi Wan said to Luke: “Use the Force!” Now, Obi Wan’s advice to you may well be: “Use your ears!” Have a nice day. ☺


