Guide to get 10% Off for a Toyota Rental Car in Japan (in 5 minutes)
Welcome! This is my first Steemit Story!
I've no idea what kind of content will I share in the future. But I'm going to Japan in August, so let me share something about it first.
Japan is a really nice country to visit. I'm sure most of you may have travelled to Japan before, yet not many of you did rent a car there. Driving is a big thing in Japan, especially when you are not travelling in major cities like Tokyo or Osaka. Driving would be the best way for you to explore the country.
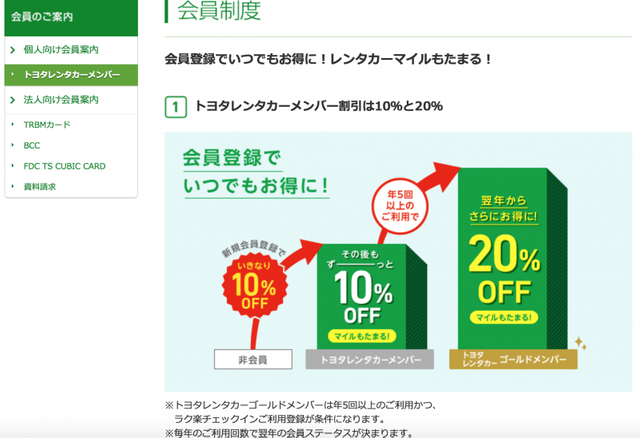
When you want to rent a car in Japan, the most common choice would be Toyota Rental Car. While you could make a reservation in their global website, their Japanese Website (https://rent.toyota.co.jp) actually offers a 10% Off discount for every member (if you rent a car 5 times within a year, you could enjoy 20% off).

So is it difficult to become a member?
Short Answer: It's Easy!
In short, remember these things:
a. Click Orange Button to proceed
b. Take a look at point 1.5, 2.5, 2.7, 2.8
In fact, the registration process doesn't require any identity verification at all! You just need to fill in the forms (with fake identity), and boom, you'll become a member immediately & enjoy the discount.
The only thing that you'll be struggle with, is that the whole website are all in Japanese. Well, no problem. This is a guide which will lead you through the process.
1.1. Go to the right hand corner for Sign Up.
1.2. Click here to proceed.
1.3. Scroll down and click the Orange Button.
1.4. Type in your email address here. (No worries. No need of Japanese email accounts)
Open the verification email that they send you, and click the link inside to verify your email address.
1.5. It is a bit silly. You could directly copy all the examples into the input fields, and process perfectly!
If you are really worry about the fake information, for safety, just put your real name in the first 2 fields
For 2nd field, you may use "English to Japanese name converter" (http://www.sljfaq.org/cgi/e2k.cgi)
3rd field - Gender (Left means Male, right means Female)
& 4th field - Birthday.
Fields in Red are compulsory. Green are optional.
The painted fields in blue is Login Username & Password respectively. You have to type twice for the password.
The last field is to choose whether you want to receive promotion emails from them or not. Right means will not receive.
1.6. Click the Check-Box is agree Terms & Conditions, then click the Orange Button.
1.7. Click this confirmation button at the bottom
Boom! You've finished the registration! Now you can enjoy a 10% discount for rental car!
2.1. Click the orange button to go to the reservation page.
2.2. Click the circled button for making reservation Choose you pick-up & return shop.
2.3. After choosing an appropriate shop, click Orange Button
2.4. Now you've chosen the pick-up & return shop and date time. Let's choose a car by clicking the circled button.
2.5. You may choose whether they give you a car in the class randomly, or choose your preferable car directly(pay more of course). Then click the Orange Button.
2.6. Now you can click the Orange Button again to proceed.
2.7. It is a crucial one. It is the insurance column. I strongly recommend you to choose the most expensive one, as it would cover all the fees, even if you total loss the car(touch wood). In fact, accidental compensation in Japan is really expensive. For every lamppost damaged, you need to be charged for almost USD 150,000!
2.8. Here is whether you pay the rental fee in shop (upper one), or prepaid the fee online with credit card. (lower one)
Click the Orange Button to proceed.
2.9. If this shows up, that means your car isn't available. Yet, you could always try to search the same car by changing another shops (even within the same territory). It could be available in other shops!
2.10. You can always click the right-bottom button to change your reservation. (Even after the reservation has completed)
2.11. Finally, click the Checkbox and the Orange Button.

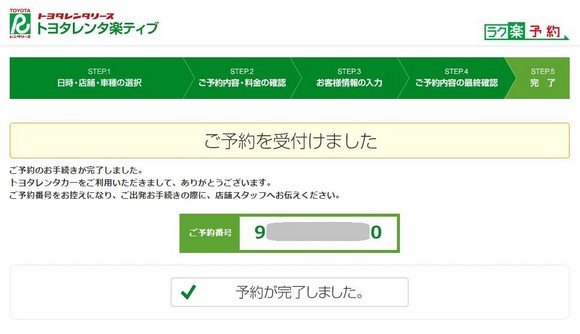
2.12. You've successfully made a reservation! Please keep the Reservation ID inside the green box.
I hope you'll find this guide useful. Enjoy your trip!
Welcome to Steem @mattopolitan I have upvoted and sent you a tip
Thanks @bottymcbotface! I dropped steemit for 2 days and I just come back as TGIF. Hope I'll be more familiar about steemit, and really become a part of the community in the future :)
Welcome to Steemit @mattopolitan :)
Make sure to participate in this weeks giveaway to get known in the community!
Here are some helpful tips to get you started:
@reggaemuffin, the creator of this bot is a witness. See what a witness is and consider voting for the ones you feel are good for steem.