SLC S23 Week1 || Geometry with GeoGebra: Points, Lines, and Angles
Hello everyone. A new season of Learning Challenges has begun this week and I decided to join @sergeyk's Geometry class. You can check it here and give it a try SLC S23 Week1 || Geometry with GeoGebra: Points, Lines, and Angles.
Let's get started!
Thumbnail from Pixabay


| What is geometry? When and why did it appear? How did you study geometry in school? Were you familiar with any geometry software? |
|---|
What is geometry?
Geometry is the branch of mathematics that studies the shapes, sizes and properties between points, lines, angles, planes. It is used in architecture, design, astronomy and many more other domains.When and why did it appear?
It appeared in ancient civilizations as a practical need for measuring land, building structures and track stars for navigation purposes. It later got developed by other mathematicians.How did you study geometry in school?
I started studying in early school years from the basic of points and their coordinates to triangles, circles and their respective properties to 3D shapes.Were you familiar with any geometry software?
I can't say that I am familiar with the software used for this but I used MatLab in university for a year or so.


| Explain different geometric primitives (point, line, angle, segment, ray) and illustrate them in GeoGebra. |
|---|
Let's start with the POINT. A point can be defined as a location in space that has no size or dimension (length, width). It is represented as a dot and and labeled with a capital letter: A,B,C and so on.

Next, we have the LINE. The line represents an infinite number of points extending in both directions. It has no endpoints and only one dimension. It is represented by 2 capital letters AB or a lowercase letter line l.

The SEGMENT is part of a line that has 2 endpoints and has a fixed length that can be measured. It is usually represented by 2 capital letters, which represents the endpoints: A-B. Let's see an example:

Next, let's talk about a RAY. The ray can be defined as part of a line that has ONE fixed endpoint and extends infinitely in a direction.
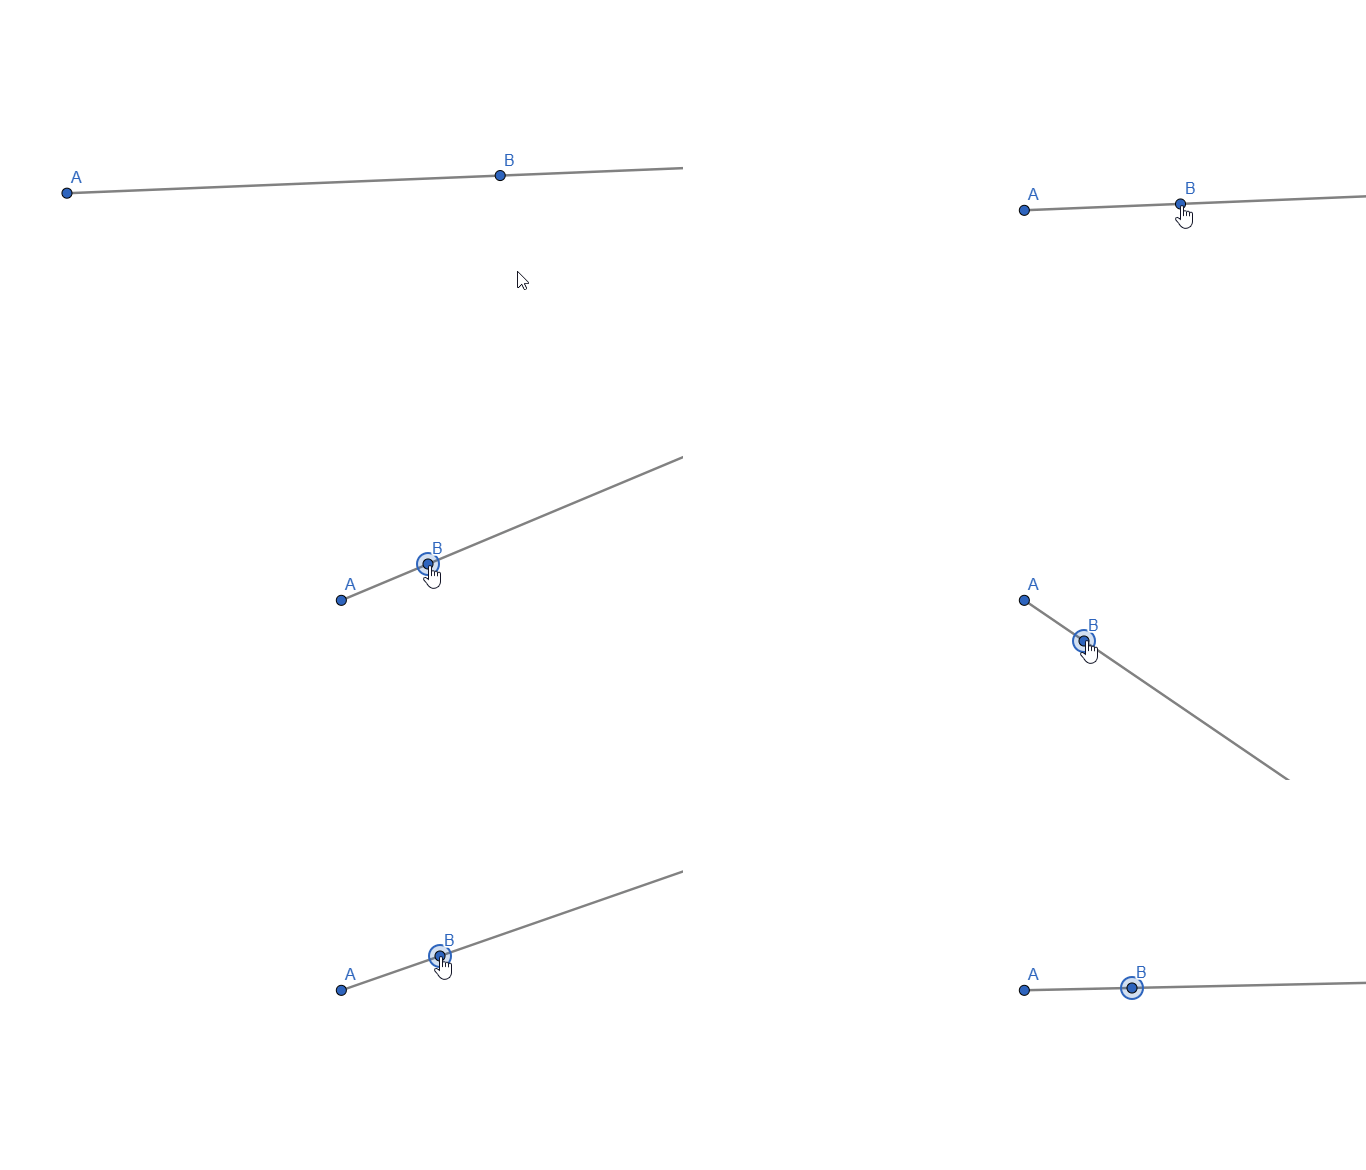
Live representation
And finally, the ANGLE. An angle appears when 2 rays share the same endpoint. It is measured in DEGREE.


| Construct an arbitrary angle, then extend one side to create a supplementary ray—show that the sum of adjacent angles is always 180 degrees. |
|---|
| Construct an angle with two supplementary rays—show that the resulting vertical angles are always equal. |
Let's start with the first part of the task. To do this, we first have to add the 2 rays, extend one side and measure the angles between them. Similar to what we did in task 2. This is how everything looks:

Now, if we move the AC ray, we can see that the angles change but will always sum to 180o:
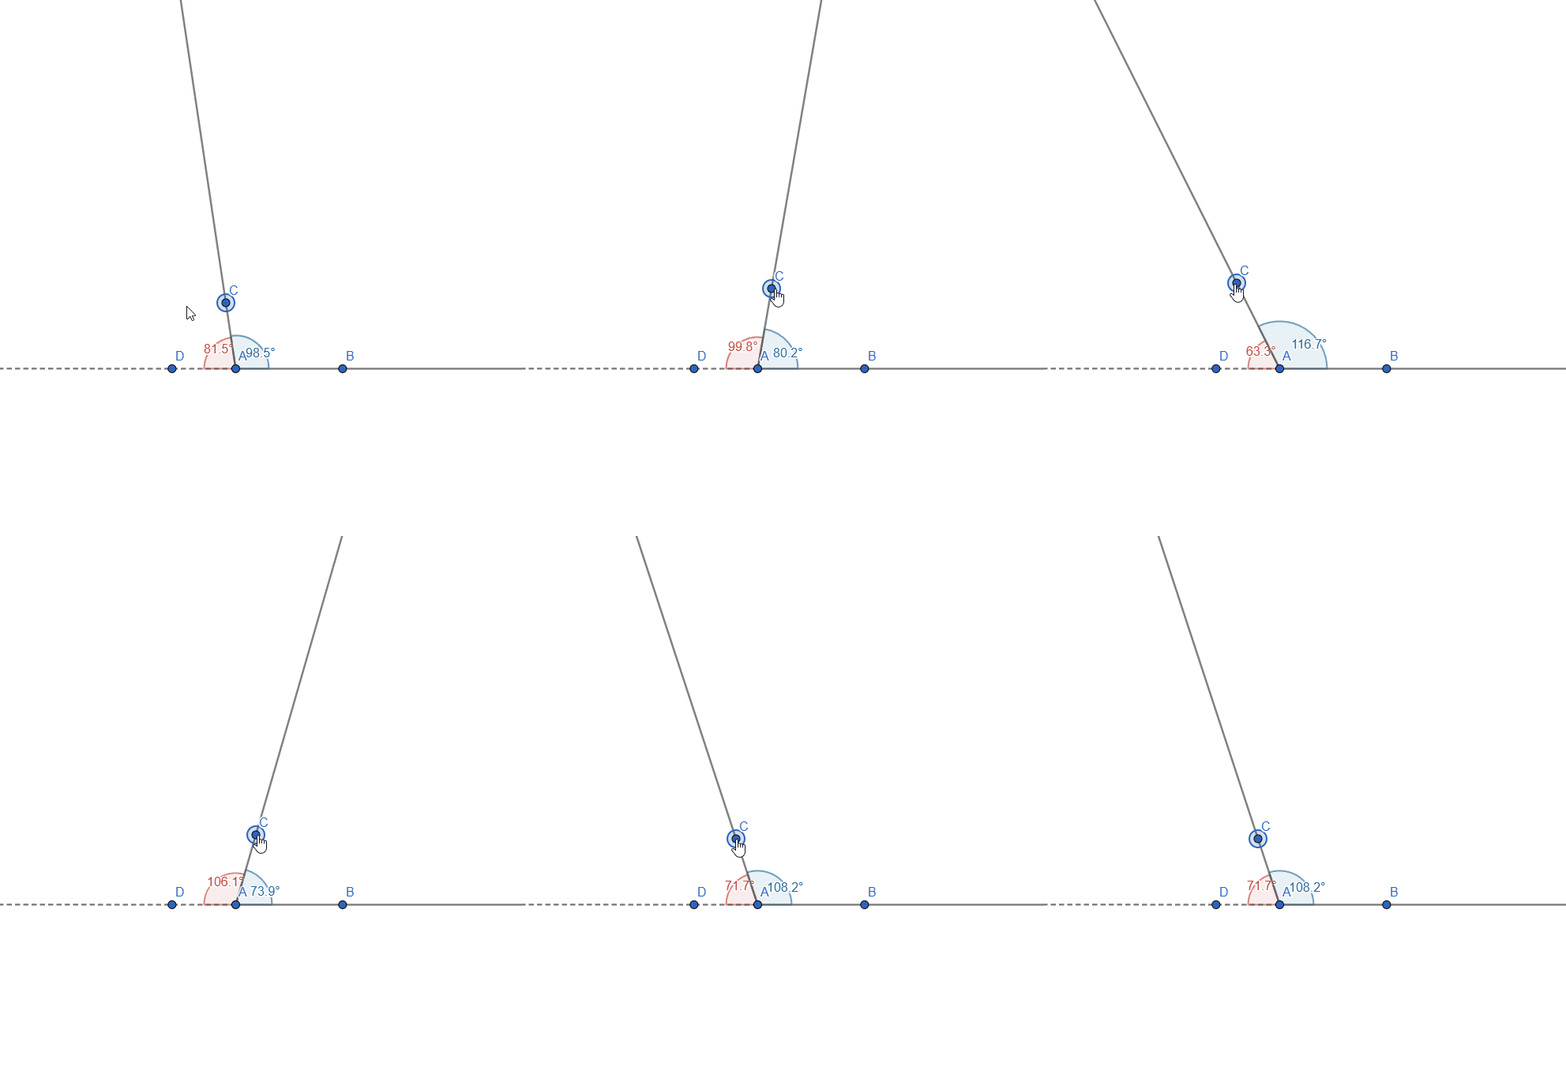
Live representation
Now on to the second part of the task:
- Construct an angle with two supplementary rays—show that the resulting vertical angles are always equal
For this part, I constructed 2 rays, AB and CD, that have a point of intersection E and measured the angles:

By moving the rays, we can see that the opposed angles always have the same value:
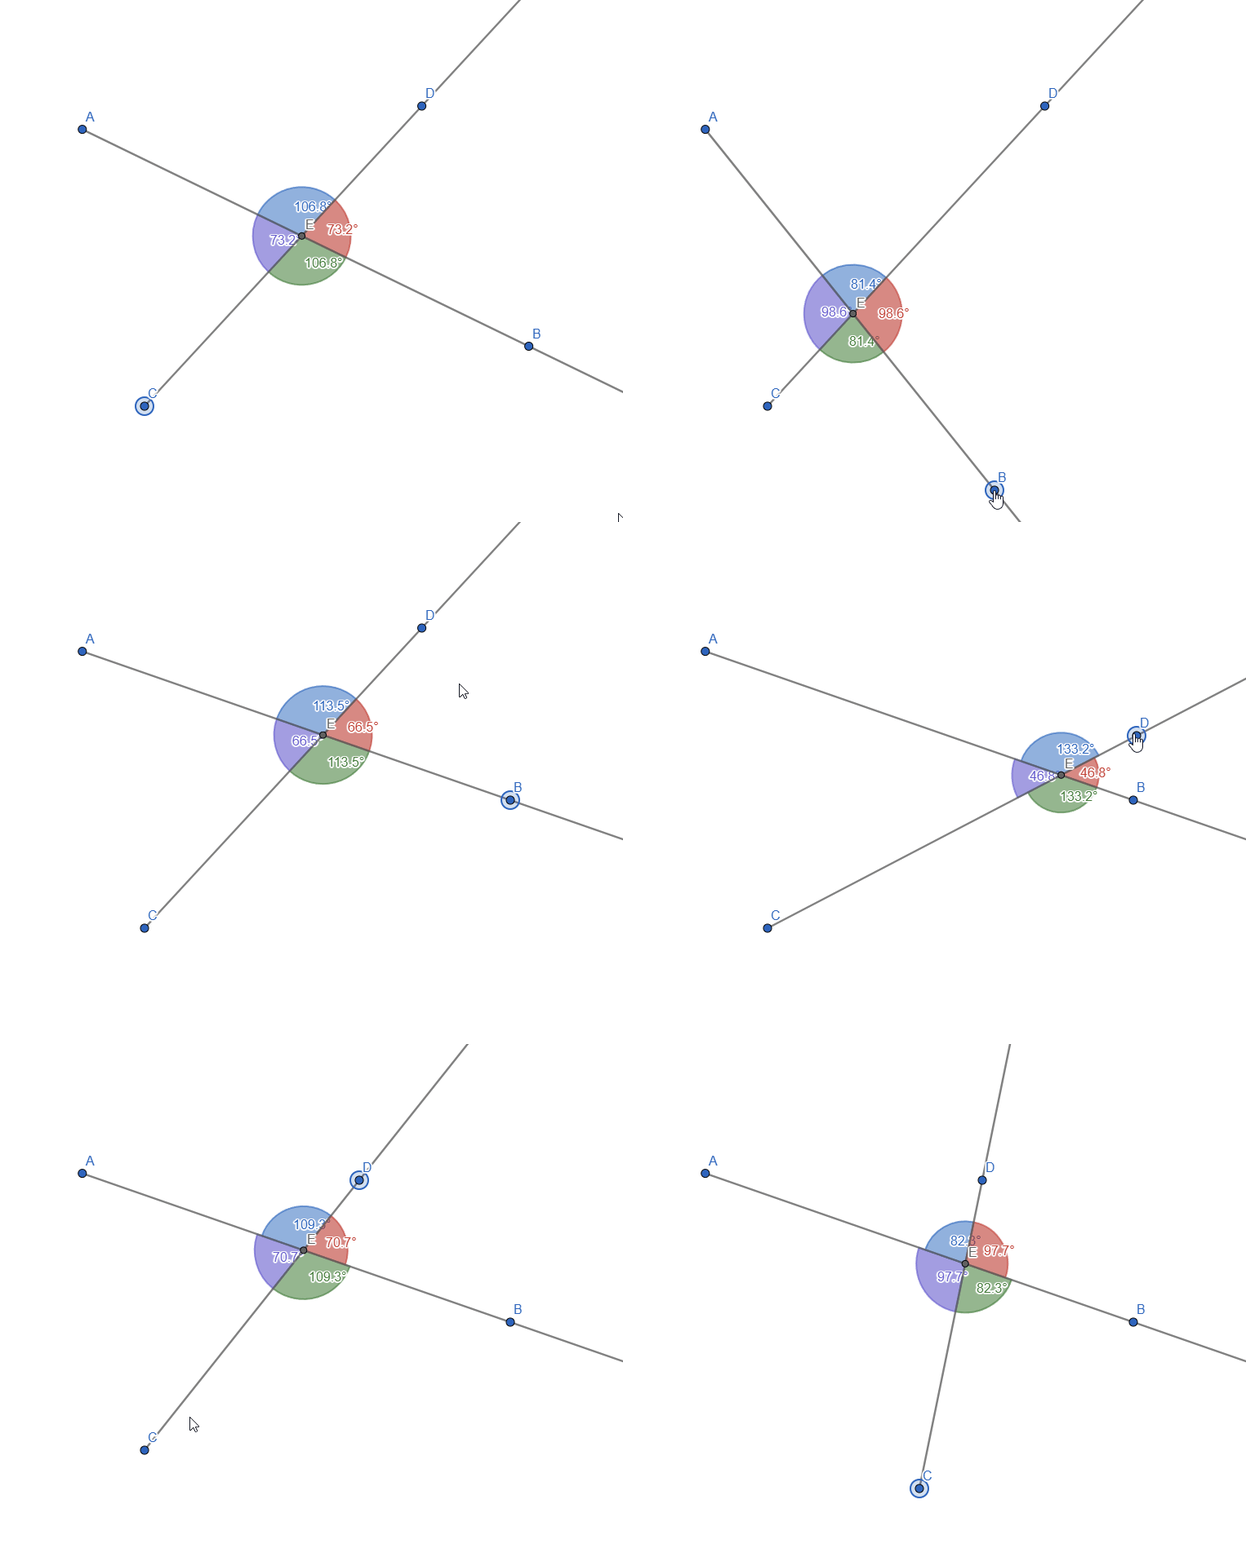
Live representation


| Construct parallel lines and perpendicular lines. |
|---|
| Construct two lines intersected by a third line (a transversal). Label the angles on the figure (using letters, numbers, or colors). Name the pairs of angles that have special names. |
Parallel Lines
Two or more lines that have the same distance between them and never intersect are considered parallel.
To make them, we start start with one line and a point outside of it. Next, it's as easy as selecting the Parallel Line Tool, click the existing line and the point and voila, we have parallel lines:

Constructing Parallel Lines
Perpendicular Lines
Two lines are considered perpendicular when the angle of their intersection is 90o.
To construct perpendicular lines in GeoGebra, we have to start the same way we did for parallel: with a line and a point outside of it:

Next, we select the Perpendicular Lines Tool and click the free point and the line, generating a perpendicular line to the first one:
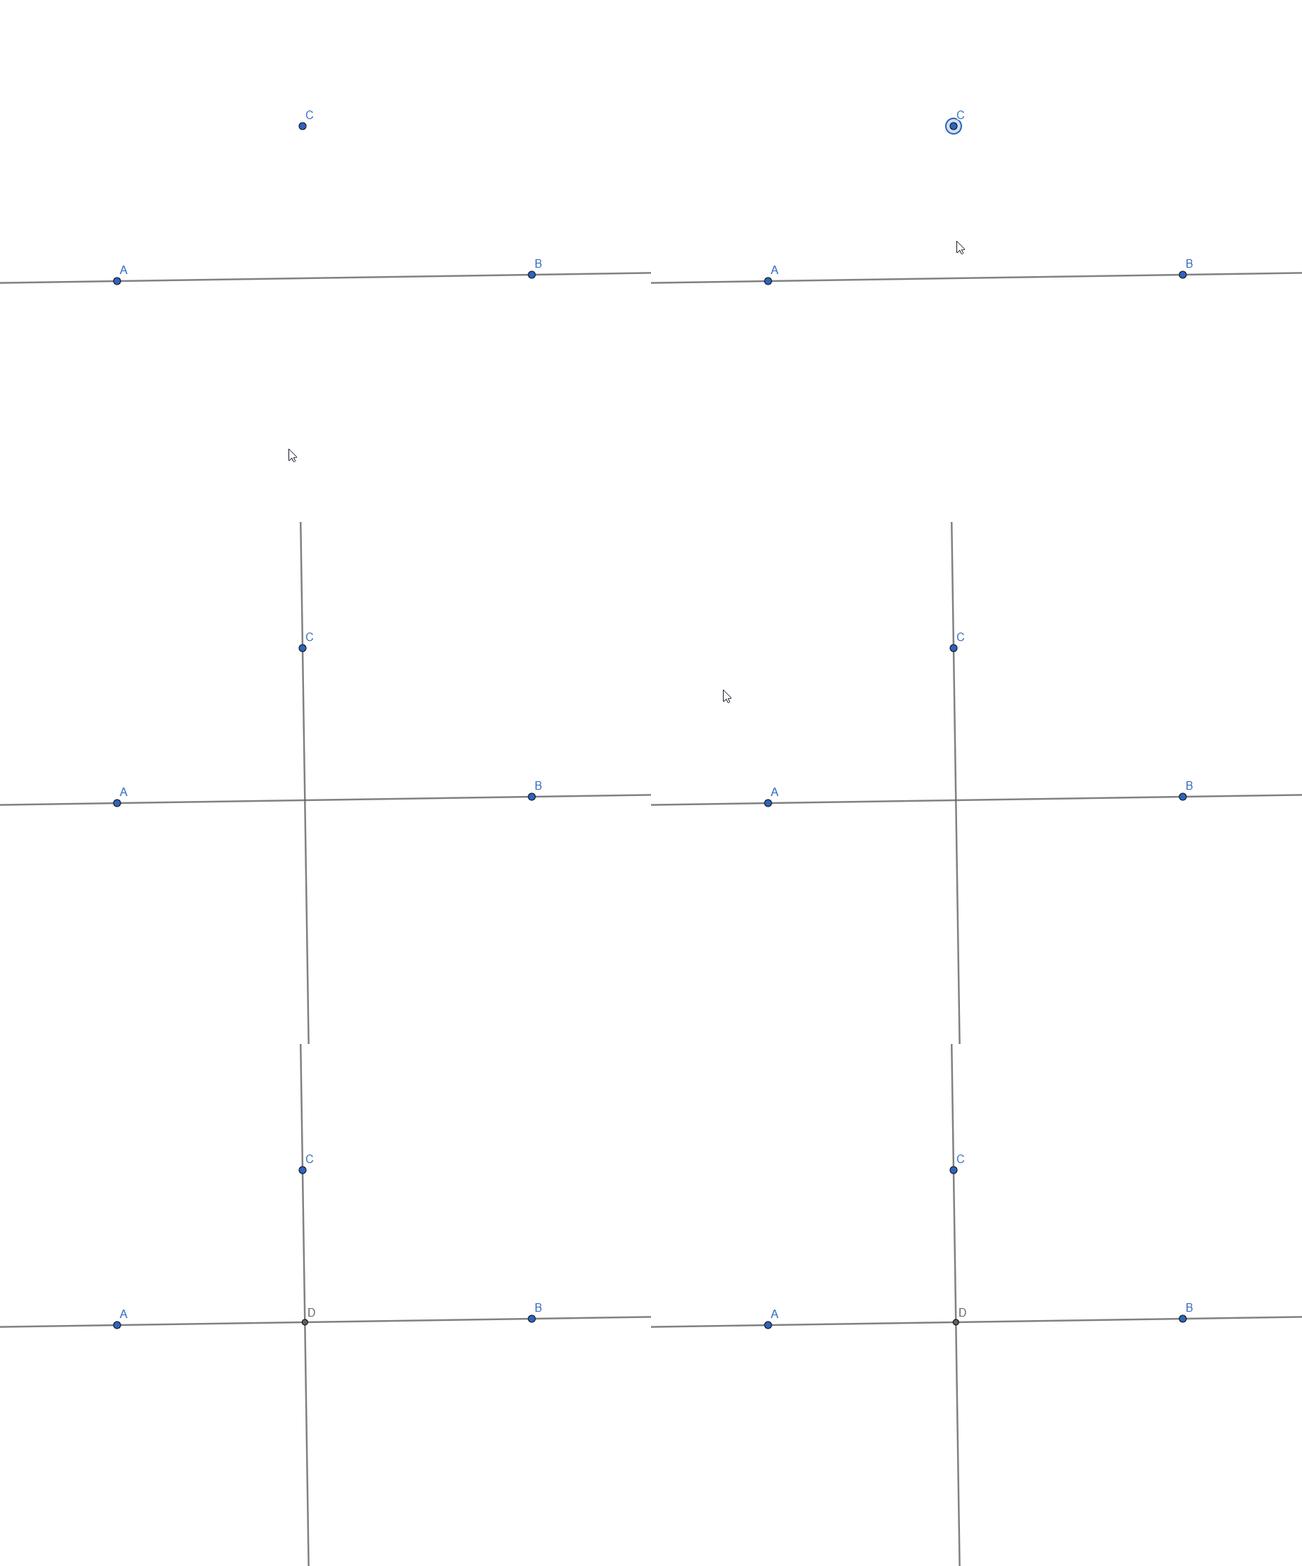
Constructing Perpendicular Lines
We can also check the angle if we want to make sure the representation is correct:

- *Construct two lines intersected by a third line (a transversal). Label the angles on the figure (using letters, numbers, or colors). Name the pairs of angles that have special names.
I started by creating the 3 lines and marking the point of intersections:

Next I added the angles and did a bit of stylization for a better distinction between them:

Now let's create the table for specific angles:
| Angle Type | Angle |
|---|---|
| Vertical | Angle 1-Angle 4; Angle 2-Angle 3; Angle 5-Angle 8; Angle 6-Angle 7 |
| Adjacent | Angle 1-Angle 2; Angle 1-Angle 3; Angle 3-Angle 4; Angle 2-Angle 4; Angle 5-Angle 6; Angle 5-Angle 7; Angle 7-Angle 8; Angle 6-Angle 8 |
| Interior Same sided | Angle 3-Angle 5; Angle 4-Angle 6 |
| Interior Different sided | Angle 3-Angle 6; Angle 4-Angle 5 |
| Corresponding | Angle 1-Angle 5; Angle 2-Angle 6; Angle 3-Angle 7; Angle 4-Angle 8 |


| Construct the intersection of two segments. Ensure that the intersection point is always displayed, even if it does not lie on the segments themselves. If the intersection point lies outside the segments, represent this with dashed lines. |
|---|
The first step is easy and similar to what we have done so far. I created the 2 segments and put the intersection point:

As I couldn't find a better alternative, I enabled "Allow Outlying Intersections". For the dashed line, I added 2 new segments: one from B to E and one from D to E. Styled them to be dashed line and this is how it looks:
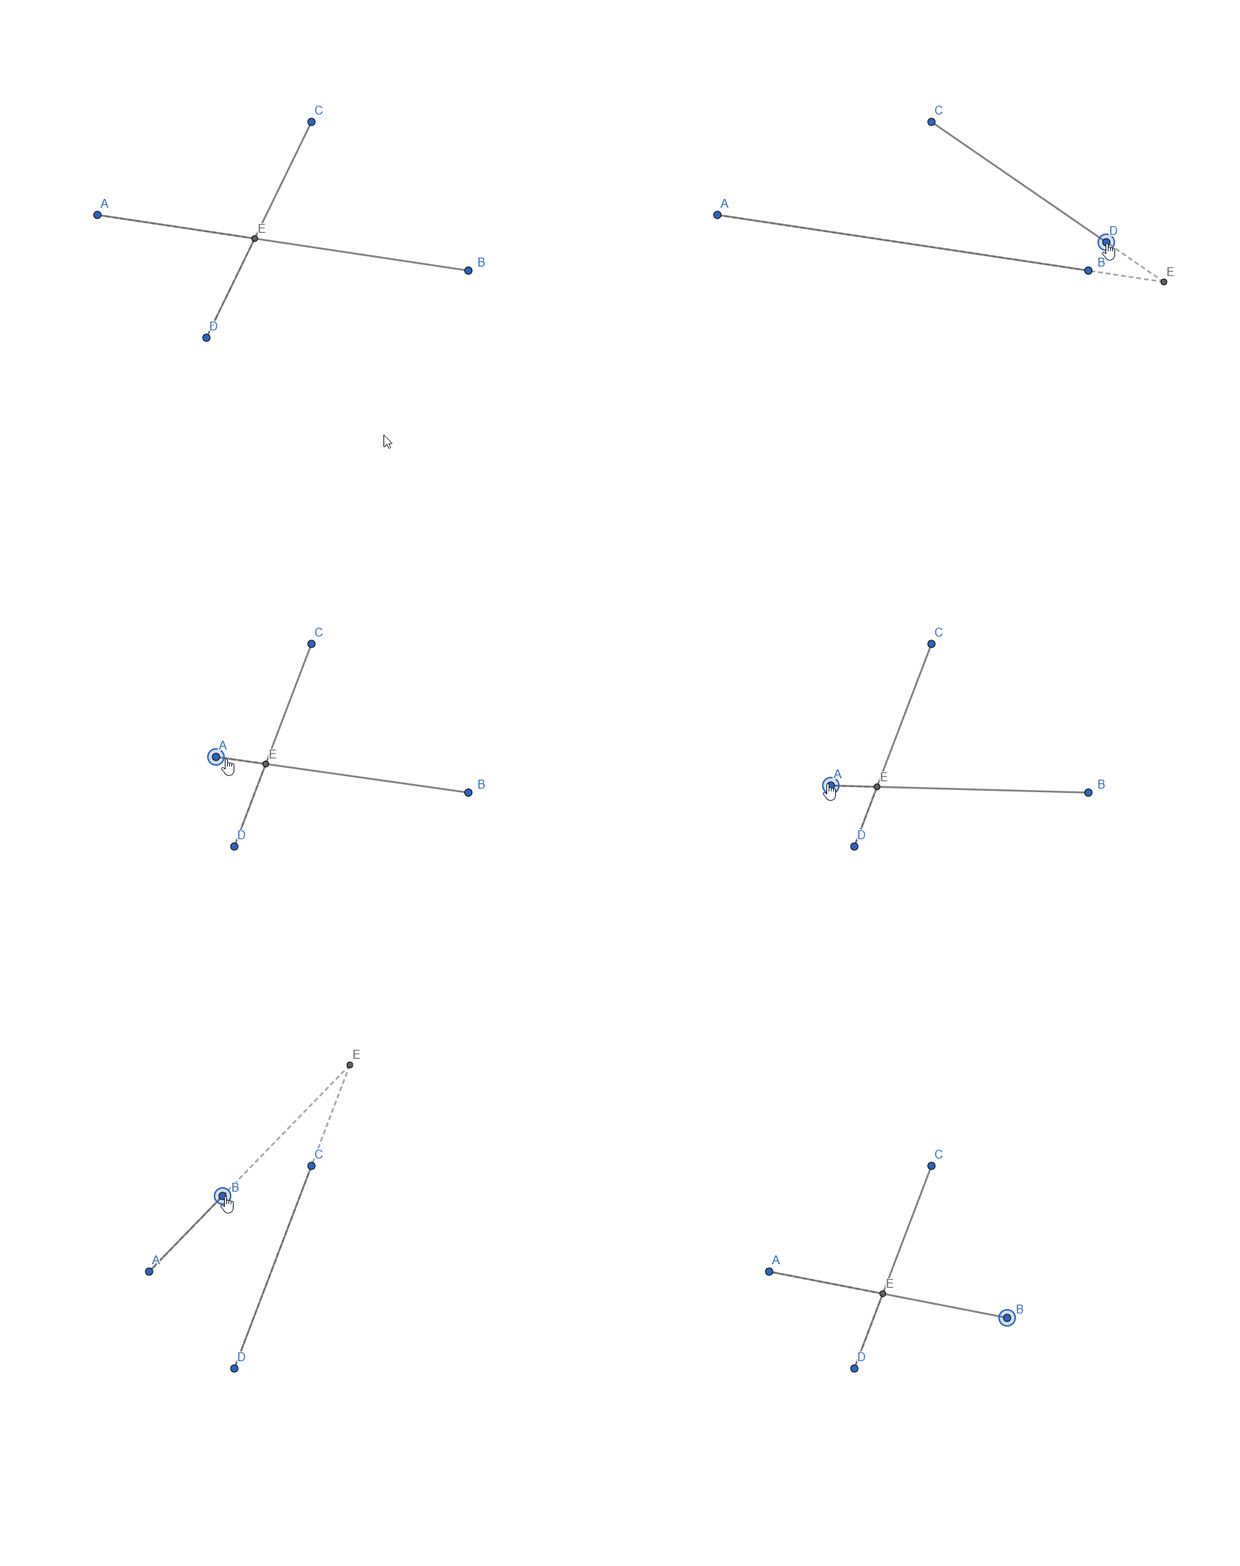
Live representation

As always, thank you for reading and I'd like to extend an invitation to @radudangratian and @cmalescov to take part in this.
See you next time!
Just a thank you for a tireless participation in something that lifts the spirits... well... 😎
Thanks! Can't wait for more!