SC-S26W1/Video Editing, Getting Started
Today I am very happy to join Steemit Challenge Season 26, Week 1 where we are learning the basics of video editing using the CapCut app. This first week is about understanding the app, getting to know its basic tools, and creating our first edited video using the techniques taught in the lesson.
I decided to use my own videos and pictures from our Pre-Independence Day celebration at my college. The real Independence Day is on 14th August, but since that day was a holiday, our college celebrated it a bit earlier with a small event inside our classroom. I felt that these moments were perfect for this challenge because they are full of joy and patriotism.

Edited by Canva, All pictures and videos are taken by my cellphone Techno Pop 5
I had already downloaded the CapCut app, so I opened it and on the home screen I clicked on New Project. As soon as I clicked, my phone gallery opened and I could see all my videos and pictures. I carefully selected the ones I wanted to include in my project a total of five short videos and two pictures.
It automatically numbered them according to the order in which they would appear in the final video, but I also rearranged them to match the sequence I had in mind for my story. This step was important because it allowed me to control the flow of the video, starting with the decorations, moving to the cake cutting moment.
 |  |
|---|
Before importing everything into the timeline, I used the trimming option because one of my videos was longer than I needed. I clicked on the video, used the scissor icon, and adjusted the start and end points to keep only the most relevant part. This kept the video short and more focused.
 |  |
|---|
Once all the media was imported, CapCut showed it in the timeline view. Here I could see the exact order of my clips and images, and I used the play button to preview the sequence. While watching, I noticed that one of the clips was very similar to another one and made the video unnecessarily long, so I selected it and used the delete option to remove it.
 |  |
|---|
Next, I moved on to setting the Aspect ratio. In the tutorial it was suggested to use 16:9, which is the standard horizontal format, but when I applied it, my clips looked smaller than I wanted. To make the video look fuller on the screen, I selected the 4:3 aspect ratio, which gave it a nice framed look and better filled the space. This made the visual experience better for viewers.
 |  |
|---|
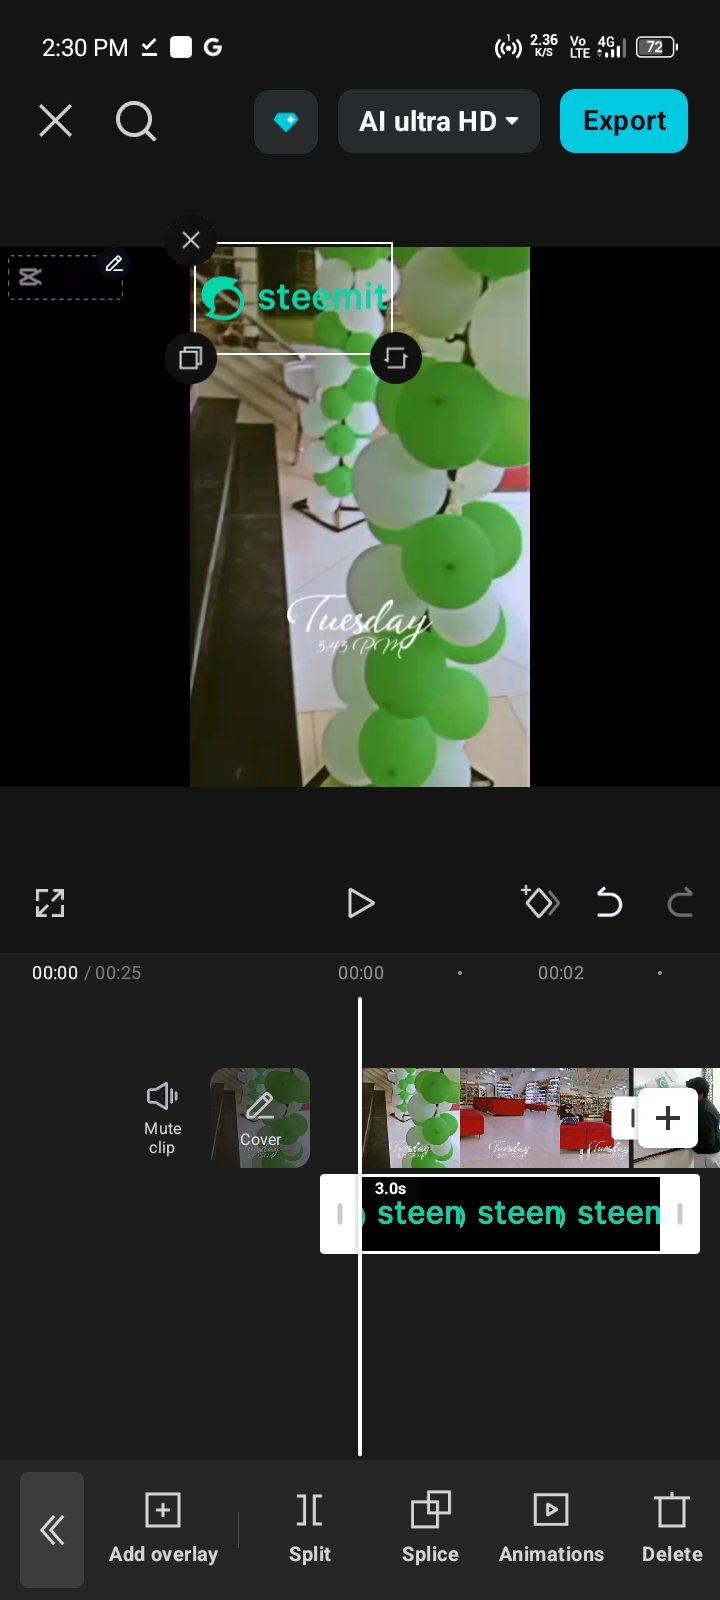
After setting the aspect ratio, it was time to add the Steemit logo overlay. I clicked on Overlay from the menu, then chose Add Overlay. My gallery opened again and I selected the Steemit logo that I had downloaded earlier. Once the logo appeared on the screen, I resized it with my fingers and placed it neatly in the top-left corner.
 |  |
|---|
To make sure it appeared in the entire video, I dragged the overlay layer in the timeline so that it matched the length of my whole project from the first second to the very end. This gave the video a consistent look and also made it clear that the work was for Steemit.
 |  |
|---|
 |  |
|---|
Since we haven’t yet learned about adding background music in this week’s lesson, I decided to mute all the original sounds from my clips to keep the video silent. This was done by selecting each clip and using the mute option in the menu. With everything looking and playing exactly how I wanted, I moved on to exporting.
 |  |
|---|
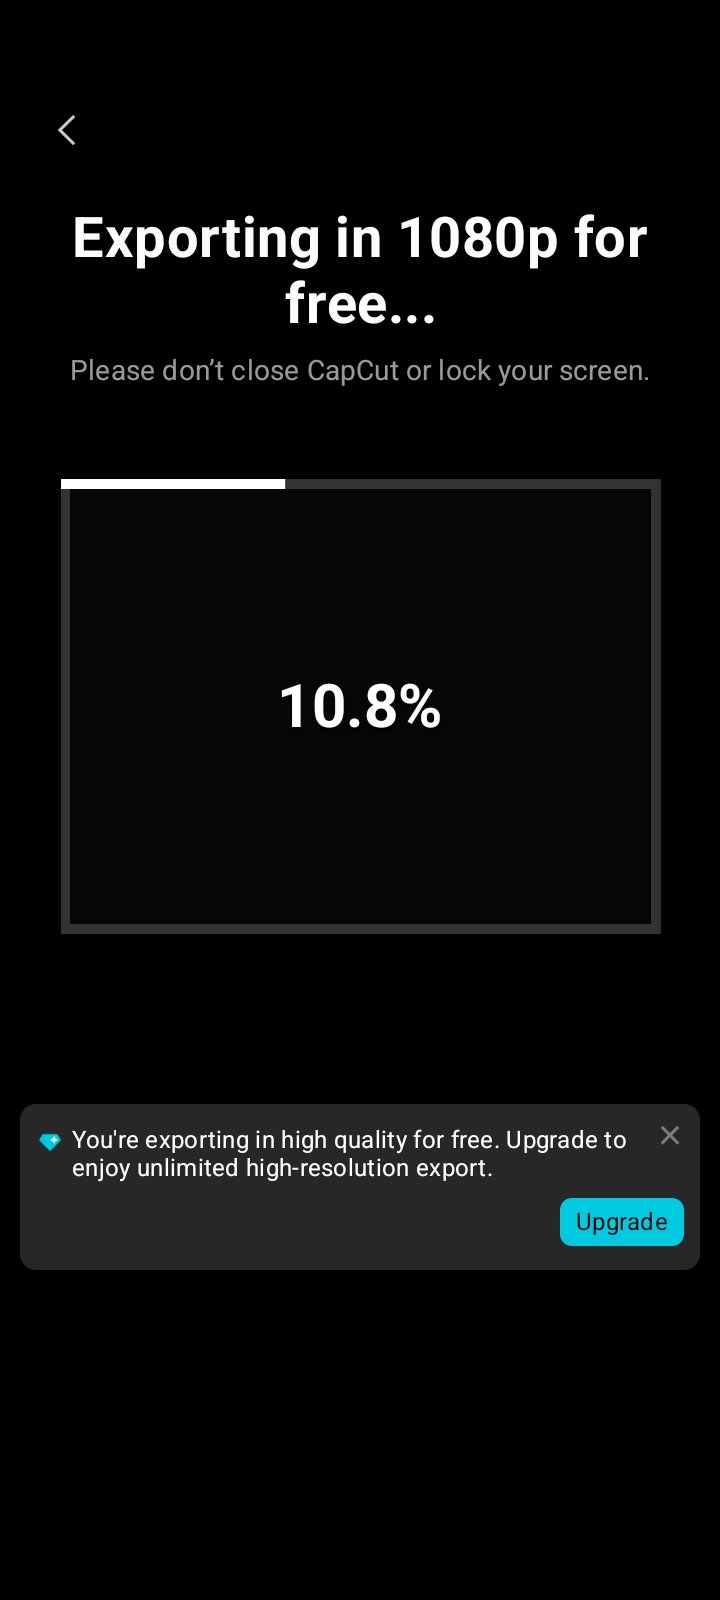
I clicked on the export button at the top of the screen, selected 1080p for high quality, and saved the video to my phone. CapCut also gave options to share directly to platforms like TikTok and Instagram, but I decided to upload it to my YouTube channel so I could share the link here
 |  |
|---|
I am proud that I followed all the contest rules, used only my own original images and videos, and applied the exact tools taught in the lesson such as importing, trimming, cropping, changing aspect ratio, adding overlays, muting audio, and exporting in high quality. I enjoyed every step of the process and I look forward to learning even more advanced tools in the upcoming weeks.
You can watch my final edited video here:
If you notice any mistakes or have any tips for improvement, I would be happy to hear them. Thank you for reading my post, and I hope you enjoy the video as much as I enjoyed making it.
That's it from today’s blog. I hope you liked it. With best wishes. Now I would like to invite:
@neelofer, @norat, and @mesola to participate in this amazing contest.
Thanks a lot for reading.

Curated by: artist1111
Thank you so much for your support 🤗🌼🌸