The Diary Game | Date: 6th March 2025 | I learned how to paint the walls.
 Thumbnail Image
Assalamu Alaikum to all friends. Ramadan Mubarak to all. Hope you all are well. So on the occasion of Ramadan, we thought we should do boundary coloring of our mosque. The walls of the mosque have not been painted for a long time, so I and my uncle thought that the walls of the mosque should be painted. So I bought all the colors from the market. Before this, all the walls should be cleaned with sand, so I started rubbing the walls of the mosque. See how our wall looked like before painting in the picture below.
 Picture of the wall before scrubbing
Before cleaning or scrubbing this wall we needed a stone so we collected a stone. The rough and hard surface of the stone is effective in removing stubborn stains, moss or dirt from the walls. Basically before applying new paint or plaster on the wall, the surface is smoothed and prepared by rubbing with stone. Polishing with stone makes the wall surface hard and even, suitable for long-lasting paint or plaster. I think sanding with stone is easily available and affordable in our village compared to electric sanding machine. So I made a short video on how to rub with it.
 Grinding stone
 The wall is rubbing
Basically this wall has to be rubbed for a long time. It didn't take me long because I had another person with me. Moreover, we were scrubbing only the part to be painted. We will only paint the front part of the mosque so we cleaned that area for a long time. So see how shiny the walls of the mosque look after you clean them.
 Smooth after rubbing
After rubbing for a long time the thing became very nice and smooth. So should I wash it with water? The motor was next to the mosque. From the motor we connected a very large pipe. Now we pulled this pipe and brought it near this wall and then we cleaned all the walls by washing them with water. The speed of the water was high, so the dirt that was on the wall due to washing with water or the sand that was due to erosion fell off.
 Wall is being washed with water
 Walls are shiny after washing
 I saw by hand that the wall was smooth
Now it has to be dried in the sun for some time, then we returned home from there and then it was noon. Since it is the month of Ramadan, you should go to the mosque early. We showered on time and freshened up and went to the mosque and offered Zohar prayer. After praying, I returned home from the mosque and spent some time on Steemit.

Then in the afternoon I called my uncle and told him to paint. So I went to his house and the paint was kept in their house. The color we originally bought was Weather Coat. Weather Coat (Weather Coat) is a type of premium quality exterior (outside) paint that is specially made to withstand adverse weather conditions. It is usually waterproof and long lasting thereby protecting the walls from rain water, sun heat, dust and moisture. It was a bucket. Along with it was a blue colored medicine. If we mix a bottle of this blue medicine in a bucket, everything will become blue, which we will color the entire wall. I have shown below the steps to mix them.
- Step-01 :- First I collected a bucket of weather coats. I took it to an empty place and kept it.
| Weather coat |  |
|---|
| Weather coat price | BDT 1100 | 78 Steem |
|---|
- Step-02 :- Then I collected a blue colored medicine called Piditint.
| Blue color liquid |  |
|---|
| blue colored medicine | BDT 60 | 4.28 Steem |
|---|
- Step-03 :- Now I poured the weather coat into a big bucket. So that the amount of color can be increased and it is convenient to give color.

- Step-04 :- Now I pour the blue medicine over the weather coat. Then I mixed it well by hand. After a while it turned completely white to blue in color.

- Step-05 :- This time I collected a medium size roller for painting. With the help of this ruler, the color can reach any edge of the wall very easily and can be painted around.
| paint roller |  |
|---|
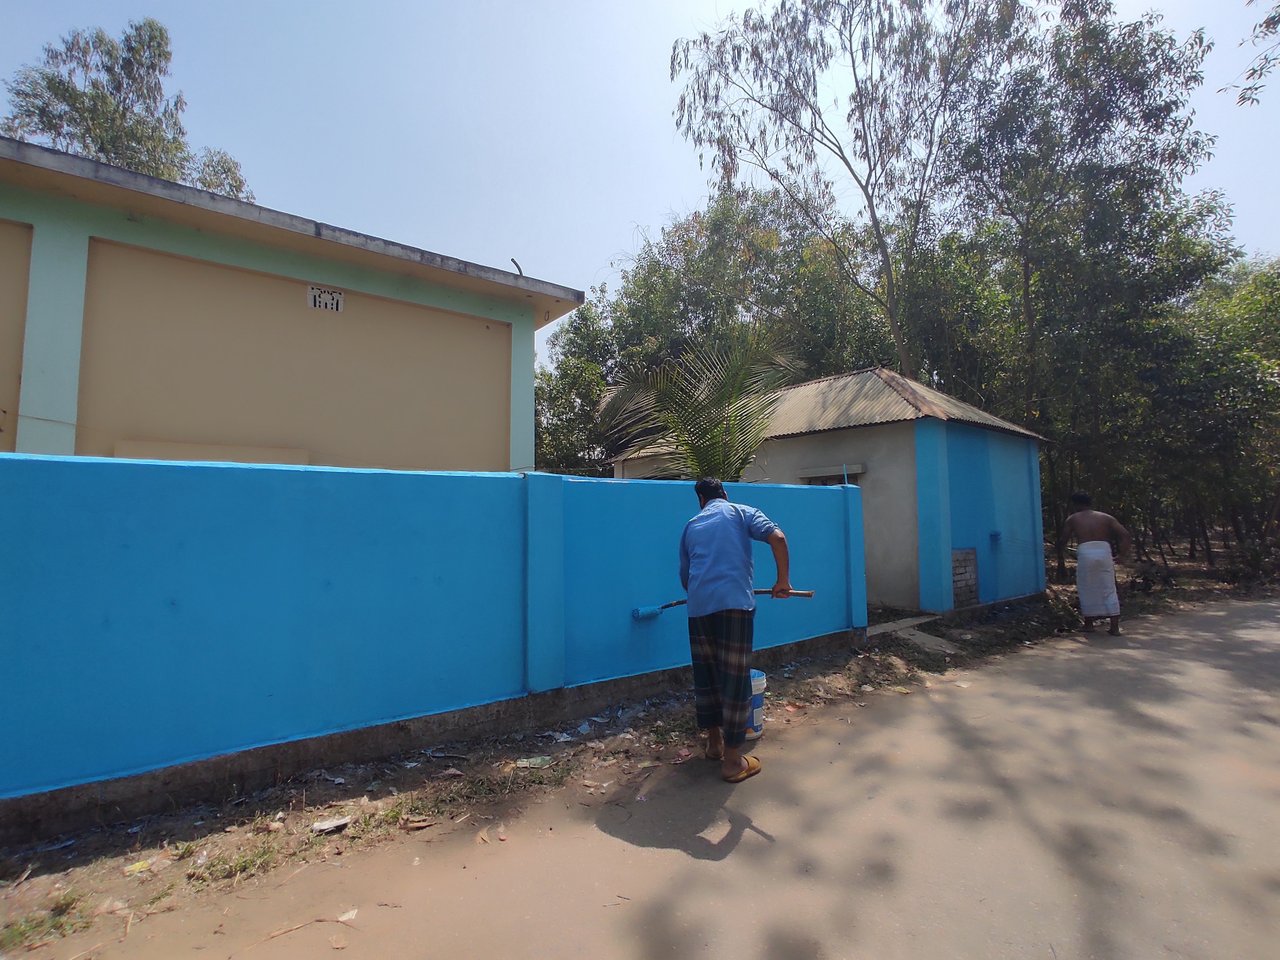
- Step-06 :- Now the painting will begin. So we started painting from one side of the wall. The color may appear light initially, but the next time the color will become thicker. I had another person with me painting it and I took a picture and video.
 Giving the first layer of color

- Step-07 :- I was also coloring like this. Afraid I was a little far from them so I wrote steemit on this side of my wall. Because it's a symbol of love on my steemit. Although after a while this writing will no longer exist but I expressed my feelings before.
I wrote STEEMIT text
- Step-08 :- The upper part is almost painted. Now the lower part is where the roller will not reach. That's why I painted the lower part with a small brush to fully understand the color. See how I paint in the video and pictures, then the wall is almost done with the first step of painting. I left it in the sun for a while.

 First layer of paint
- Step-09 :- Then, as a final step, another layer of paint should be applied on top of it. This would thicken it up and reveal a clear blue color so the person with me very skillfully painted another layer. I also helped him paint.
 Giving second layer of color
 After coloring, drying in the sun
 The final blue color is ready
It does, however, dry out in the sun for a while. So you can see that this color has darkened even in a little sun and it doesn't look that dark in the picture but in reality it came out with a darker coloring.
After a while I put my hand on the newly painted blue wall. I had some paint on my hand and I stood in front of the paint and took a picture. It was great when we did so much on our own and gained a new kind of experience.
 Final layer of color

This is how we painted the walls of our mosque beautifully. Many people appreciated seeing us painted. They said it was beautifully painted. After that I prayed and had Iftar with everyone in the evening. Later that night I posted on the Steemit platform. Thus after some time I finished all my work. Then I wrote a learning challenge. Thus when the night got deep I chatted with my friends for a while after finishing all the work I went to sleep and ended the day like today.
Note: I'm in huge trouble, no pictures or anything is uploading from my steemit account. When I try to upload something, it says UPLOAD FAILED, but the picture resolution is really low. I uploaded the image from another Steemit account and copied the text of that image here. (This account is only used to check uploads.) It is very painful for me. Request to steemit team to solve my problem. Maybe there is a technical problem with my account. Steemit developers can fix it for me if they want. 🙏🙏

https://x.com/Maxpro51412/status/1898255945270280551?s=19
Team Steem Peacocks 🦚
Congratulations! Your post has been upvoted through steemcurator07.Thank you very much @afzalqamar for your kind support. It means a lot for me. I am grateful to you. Good luck.
The mosque wall has not been painted for a long time. In the month of Ramadan you thought to do the paint on the boundary of mosque. It would be a very good deed. I really appreciate it. You do your work with full attention and offered prayers. These are the good work for gaining the pleasure of Allah Almighty. You spent a good day. May Allah accept your prayers. Stay blessed!
You took the time to read my post and make such a wonderful comment. I thank you very much for that. May all your hopes be fulfilled. 💜
My pleasure!