Creating an Electrical Series Board

Hello friends, I'm glad to present present my practial work in accordance to the given task in regards to this week learning material.
The material was impactful and the teacher did well to elaborate on all part that my seems challenging.
Here I'm expected to present my knowledge on creating an electrical series board. Without further ado...
| Task 1: |
|---|
A. Make a series board and share the technique of making it in at least five steps with drawings.
| Answer |
|---|
Creating a series board involves precise connections and careful handling of components in order to ensure proper functionality and safet, below is a detailed explanation of the steps I followed to complete the series line work.
Step 1: |
|---|
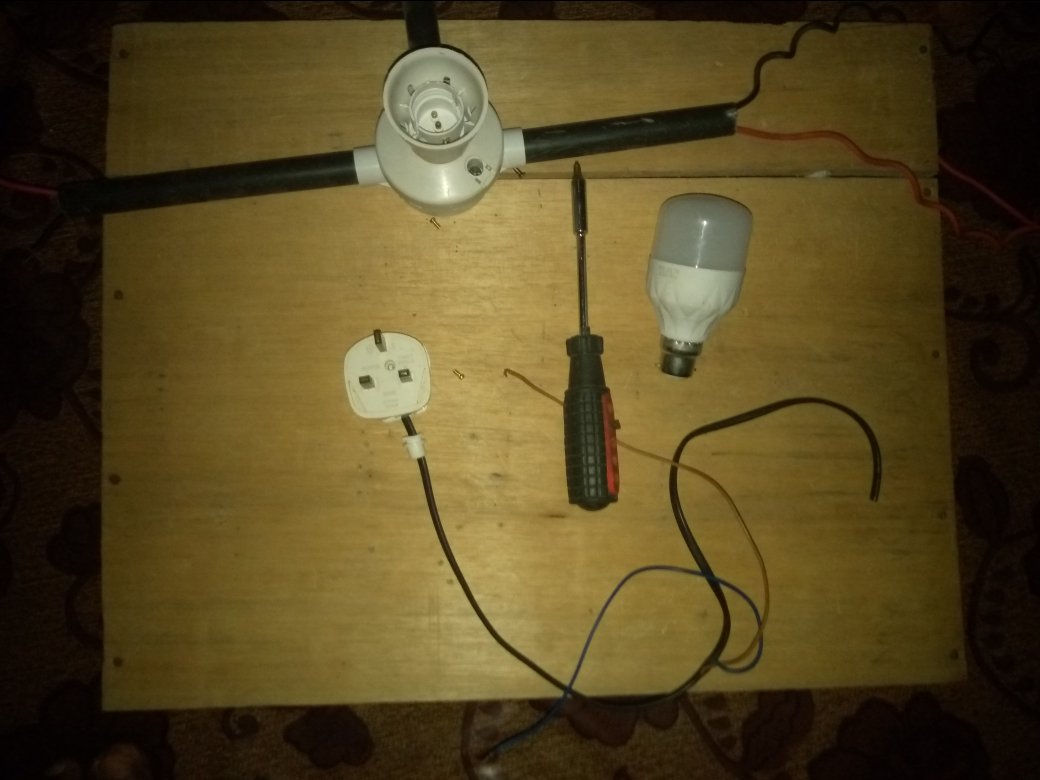
I started by ensuring that all the necessary tools and materials were ready and within reach, the items I used included a 12watt white bulb, a screwdriver for securing bolts to the wooden board, a lamp holder for the bulb, 10-13 feet of cables and a 3-pin plug. Proper preparation was crucial to avoid interruptions during the process.
Step 2: |
|---|
|
|
|

Step 3: |
|---|
|
|
|


Step 4: |
|---|
|
|
|


Step 5: |
|---|

Finally I supplied 200 volts of power to the two pin plug, after verifying that the connections were correct I connected the 12-watt bulb to the lamp holder, upon powering the circuit the bulb lit up successfully indicating that the series line work was completed correctly.
By following these steps with precision and care I successfully completed the series board setup, each step was critical to ensuring a functional and safe circuit from preparation to final testing.
I’m about to unveil the drawing of my series board which is crafted to be not only simple but in accordance to my steps, It’s designed with clarity in mind so anyone whether you're just starting can follow up to understand my connection.

| Tasks 2: |
|---|
B. Check with two electrical or electronic device series boards and show results.
| Answer... |
|---|

immediately I was done with the series board, I took things a step further by testing it with two electrical or electronic devices in my house In this case, I used my charger and my desktop adapter to examine how they interact within the series configuration.

I connected both devices separately, one after the other to the board then carefully observing how they respond to the setup, measuring key performance indicators and noted it flow properly. my light turn one after connection my charger
This will allow me to dive deeper into understanding how the series connection affects the devices efficiency, voltage distribution and it overall performance. This testing phase is where the real magic happens as I explore how the devices react in this unique configuration
| Task 2: |
|---|
C. Check with a short piece of cable in a series board and show the result.
| Answer... |
|---|
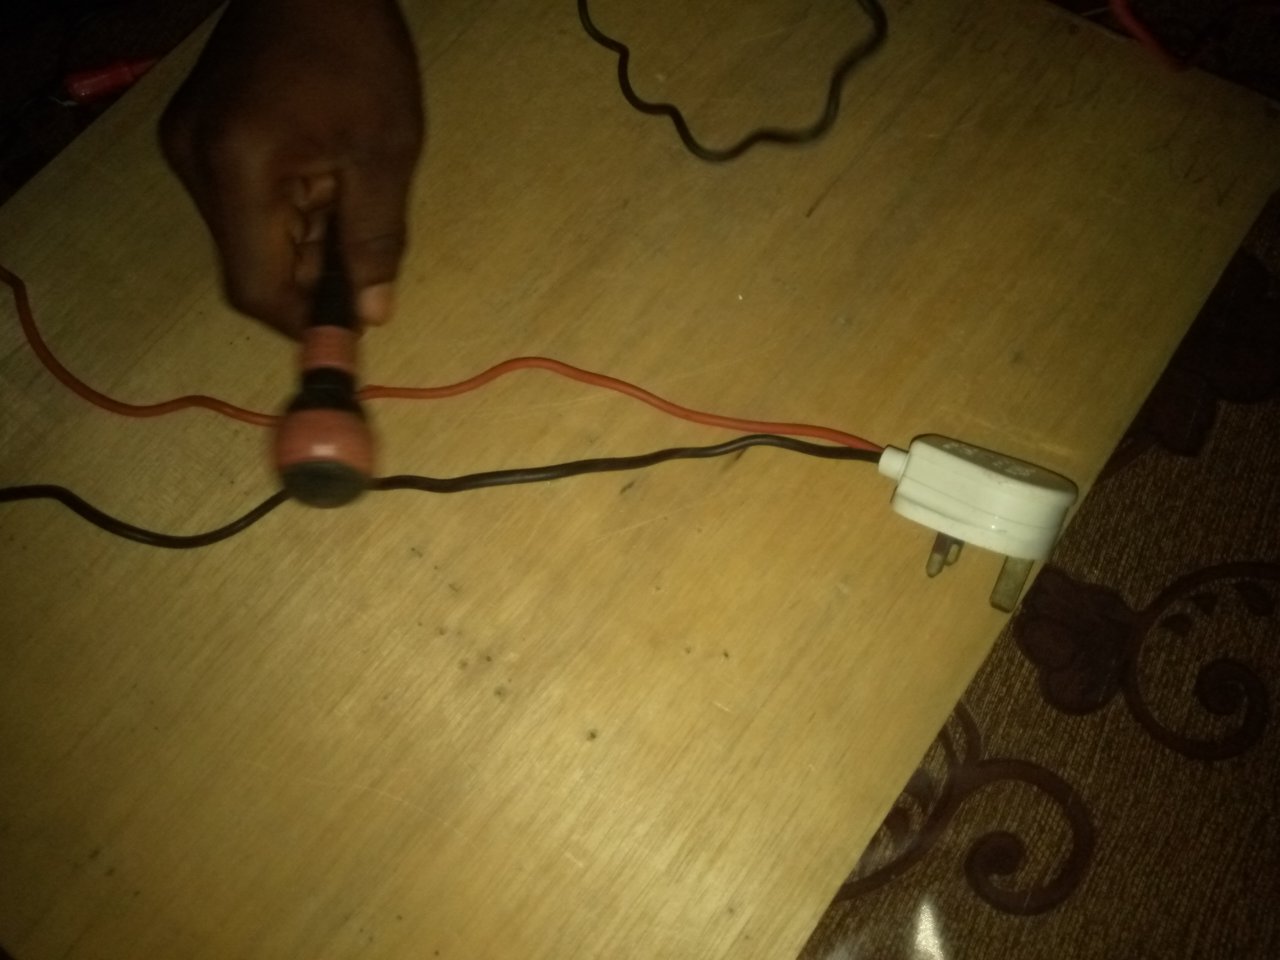
In the final phase, I checked the functionality of the series board by using a short piece of wire to test its connectivity and overall performance.
This simple yet effective check confirmed that the board is working perfectly as the wire seamlessly completed the circuit, I’ll share the results of this test demonstrating how even a small adjustment like this can validate the board efficiency. This approach worked flawlessly for me and I’m excited to show you the outcome in the below picture.

Thanks you all for your time. I won't learn alone, so I invite @preshy001, @samuelnkenta and @godswillpeter to participate in this contest. I'll be looking forward to reading your entry thanks.

We support quality posts and good comments Published in any community and any tag.
Curated by : @edgargonzalez