"Let's do some creativity- WEEK 6 (Making paper craft with colored paper)".
Hello Hindwhale Community Friends
How are you, Steemit friends? I hope you are all well. Alhamdulillah I am also well. Contest alert!! HWC contest #137 Week 7: "Let's do some creativity" competition organized by @jyoti-thelight mam in the Hindwhale community. Individuals all possess unique abilities that set them apart from one another. Steemit is an open platform to share all those skills with everyone. This week of the competition, I will share the steps to make a wallmet with colored paper. I hope you will like my paper wallmet.

Materials required for making a wallmet:
| Materials |
|---|
| Cardboard |
| Colored paper |
| Glue |
| Scissors |
| Anti-cutter |
| Paper |
Wallmet-making process:
Step 1:
First, I took 3 colored papers. I cut the papers into squares of the same size. I will fold the papers along the middle and give them a triangular shape.
 | .jpeg) |
|---|
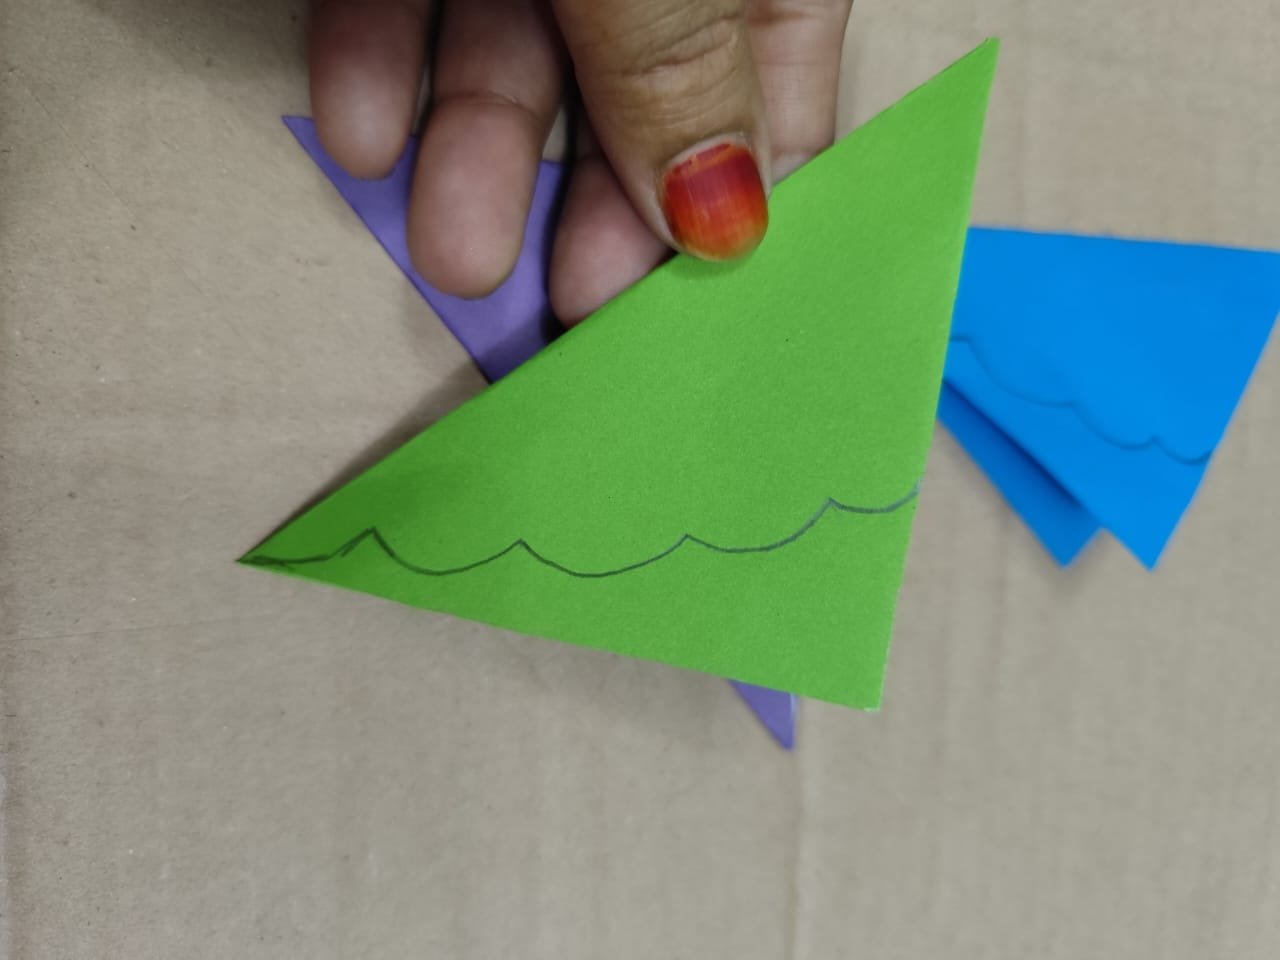
Step 2:
Then, I made wavy marks on the folded paper with a pencil. If I cut the marks with scissors, a beautiful design will be created.
 |  |
|---|
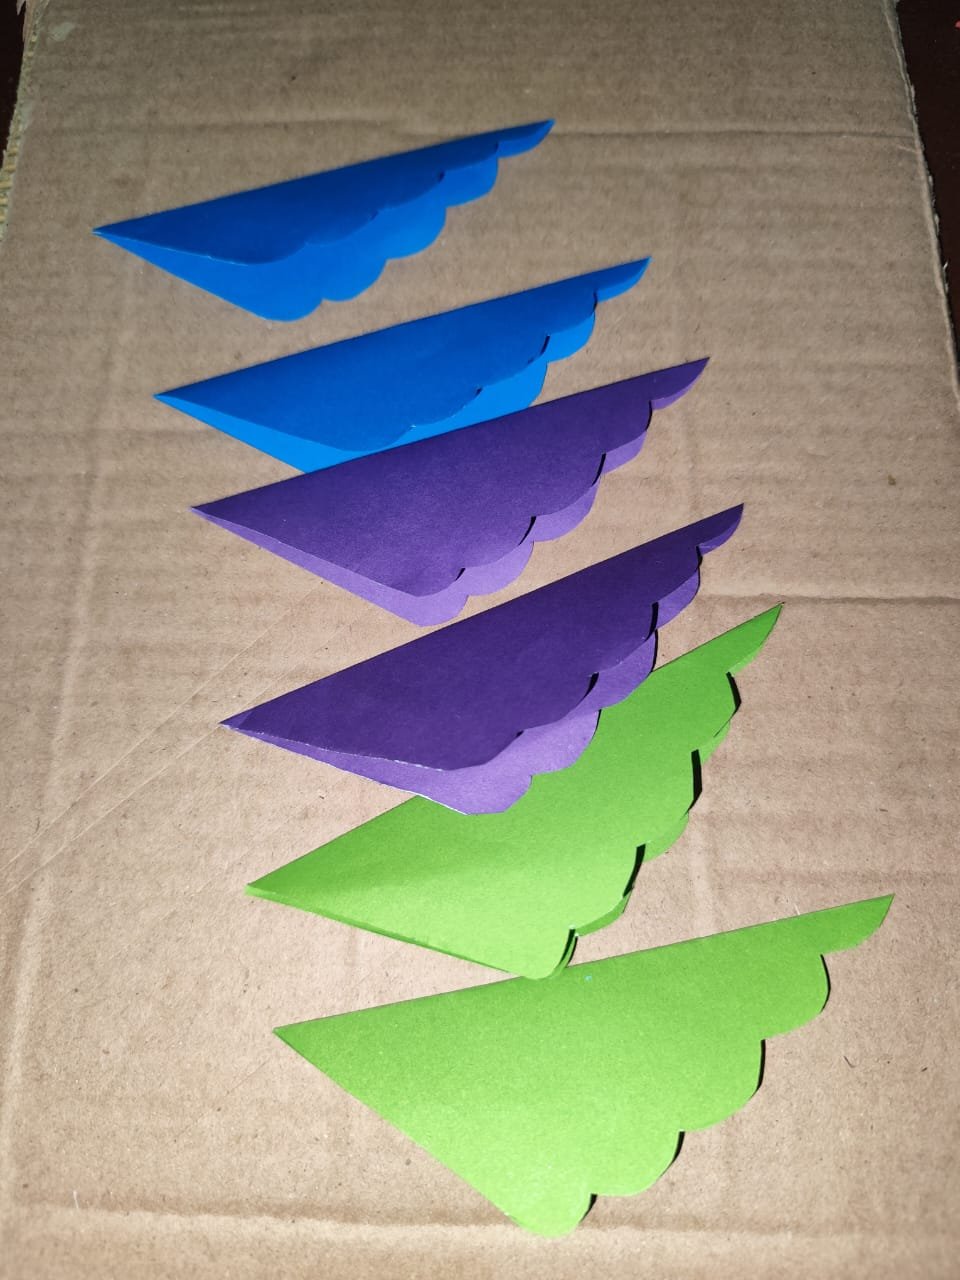
Step 3:
After applying glue to one side of the paper, I applied the other side of the paper to the glue with light pressure. Currently, the paper will form a con. Similarly, I will make all the papers corner-shaped.
.jpeg) |  |  |
|---|
Step 4:
I took a cardboard and drew a round circle with a marker. Then I cut it out with the help of an anticutter to make the wall.
.jpeg) | .jpeg) | .jpeg) |
|---|
Step 5:
To complete the hanging part of the wall, I cut the white paper thinly. Then I glued it to the cut round cardboard. I made a hook with thread to hang the wall.
.jpeg) | .jpeg) |
|---|
Step 6:
The prepared paper corners will now be adhered to the cardboard with glue. I attached green paper corners on both sides, purple paper corners on the top, and blue paper corners on the bottom. When the round part of the cardboard was completed, I completed the lower part by attaching the paper corners to the hanging part below.
 | .jpeg) |  |  |
|---|
Step 7:
Once the paper corners were attached to the cardboard, I gently placed some glue on each paper corner. Now my wallmet is complete.
.jpeg) |  |  |
|---|
| Final Presentation: |  | .jpeg) |
|---|
.jpeg) | Selfie With My Creativity |
|---|
These paper wallets can be made at home according to your preferences. There is no alternative to paper wallets to decorate our house very easily and at a low cost. Colorful paper wallets will enhance the beauty of our house.
.jpeg)
Thank you so much mam for your valuable support.