Electrical Tutorial||Converting a broken low-cost LED bulb into a new high-quality AC/DC LED bulb costs only 5.8 Steem.
Steemian Friends,
Today, I will show you my first LED bulb project. I learned from Steemitblog's Home Repair Club and started working on my new project today. Today, I will convert a 15-watt, 5.5-stem-worth broken LED bulb into a good, usable LED bulb worth 40 Steem. So, let's get started.

Design By Canva
First, I take a 15-watt AC/DC broken bulb. In our country, the price of this broken bulb is 5.5 Steem or 100 taka(Local Price). First, I open the top of the bulb. Then, I see a low-cost DC battery inside the bulb and an electronic circuit. I have shown it below through pictures and video.


Then I saw a cheap DC battery and realized that it was damaged because it was swollen. I separated the battery from the circuit. I have shown the swollen battery below.


I bought some AC/DC circuits and batteries from the electronics shop. I removed the batteries and electronic circuits from the old bulbs. I have given the price of the new electronic circuits and batteries below.
| 1 | LED Bulb Set(AC/DC) | 1 Pcs | 15 Taka(Local) or 0.8 Steem |  |
|---|---|---|---|---|
| 2 | Battery(3.7 Volt) | 1 Pcs | 45 Taka(Local) or 2.8 Steem | .jpg) |
| 3 | Electronics Circuit | 1 Pcs | 40 Taka(Local) or 2.2 Steem |  |
| Cost of Making an LED AC/DC bulb | 100 Taka(Local) | 5.8 Steem |
|---|---|---|
| Cost of new LED AC/DC bulb | (700-1000)Taka (Local Price) | (40-57) Steem |
I saved 35 Steem by making the LED bulb.
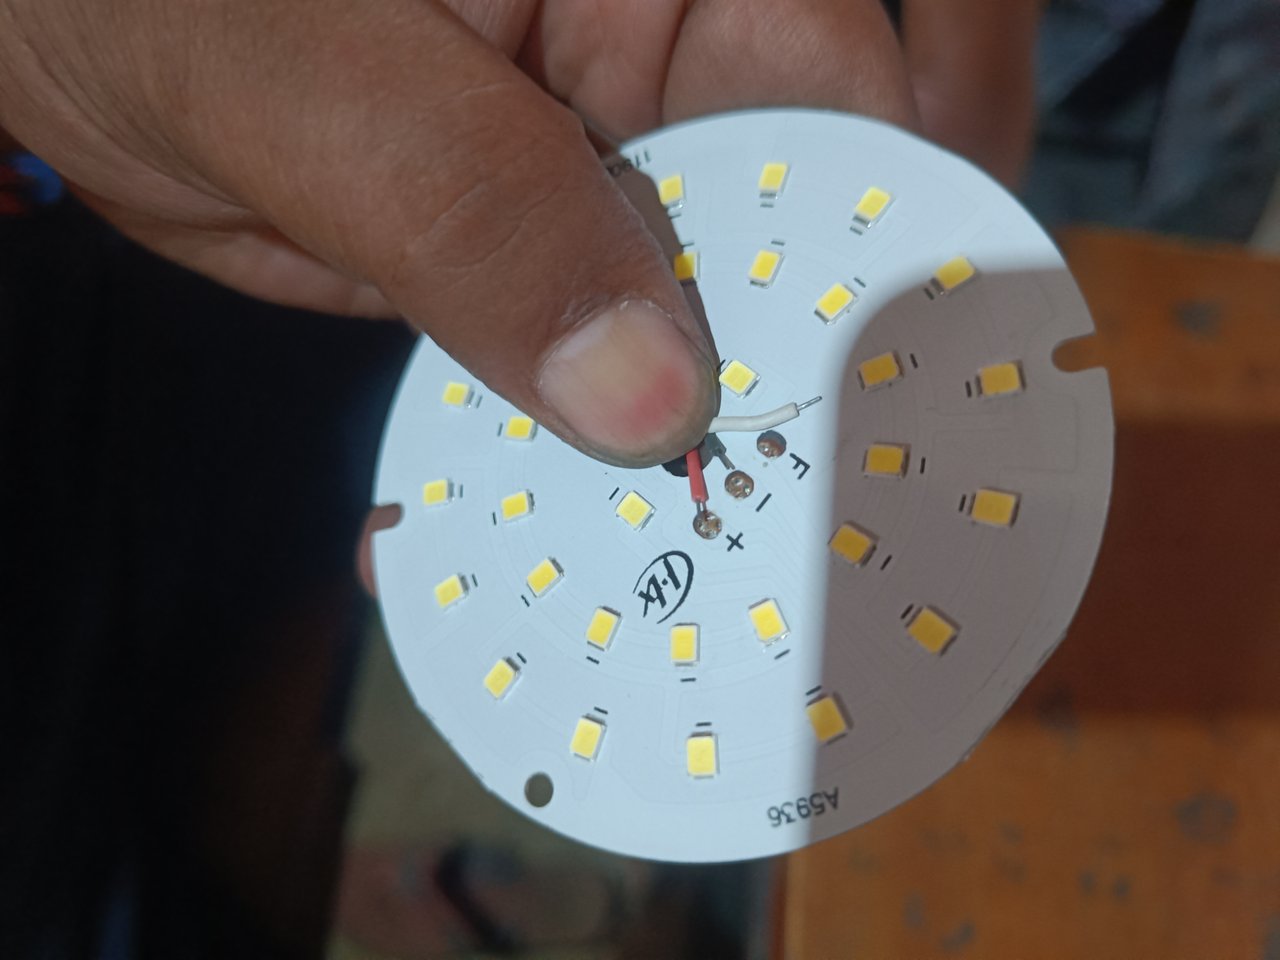
I see three wires at one end of the electronics circuit and two wires at the other. I connect the three terminal wires of the electronics circuit to the positive, negative, and F ends of the LED bulb board using a soldering iron. I have shown this through pictures and videos below.


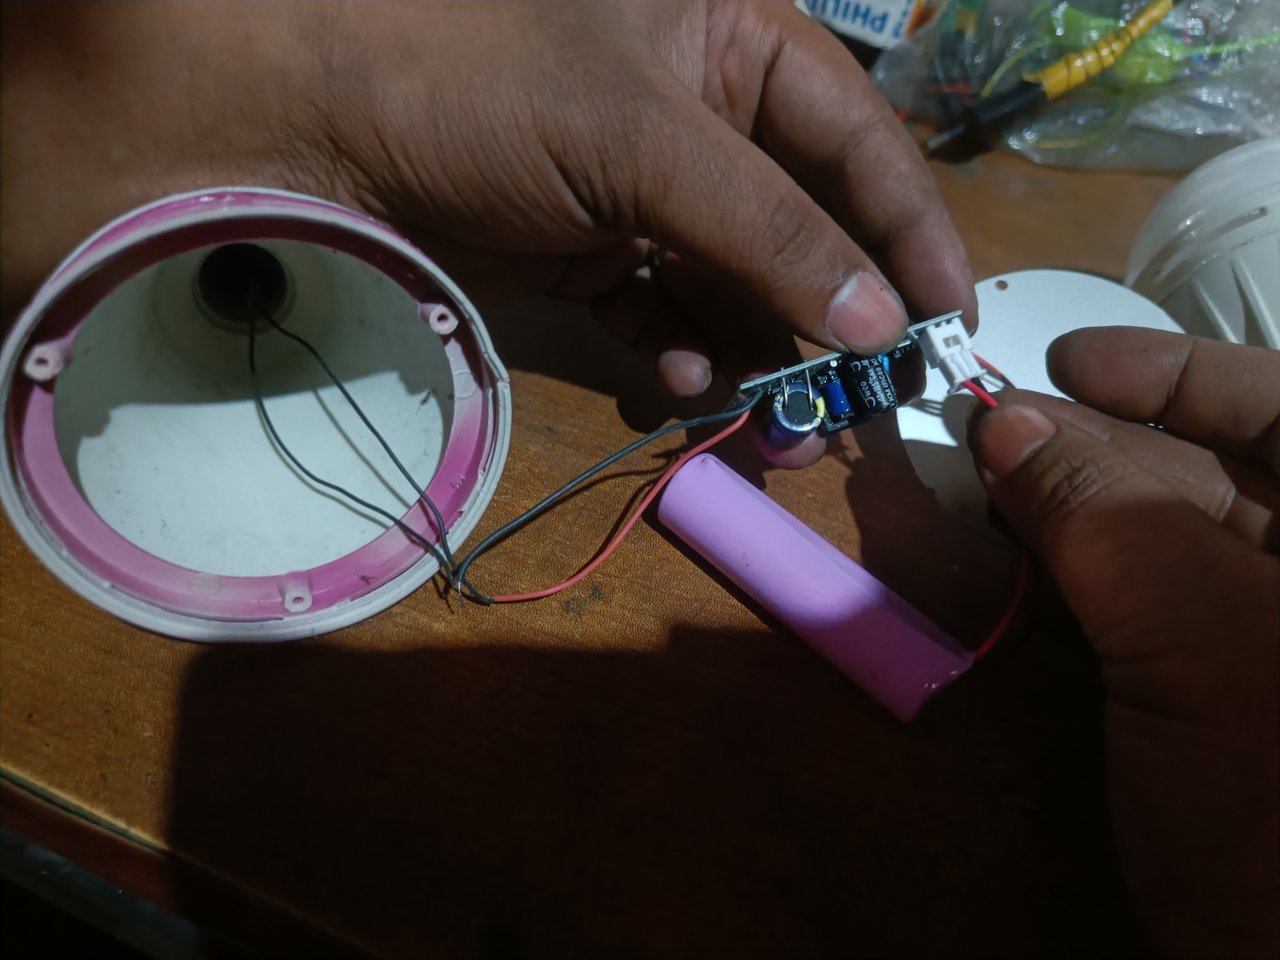
Then, I connect the two wires from the other end of the electronics circuit to the positive and negative ends of the AC end coming from inside the bulb. I have shown the picture below.

Then, I put the DC battery in the electronic circuit's connector. My bulb is finished, so I lit it and checked it before doing the fittings. I have shown it through the video and pictures below.

Then, I set up the electronic circuit, battery, and LED inside the bulb and checked it with a series board. I am very happy that my project is successful. From now on, I can convert old, low-cost, broken bulbs into high-quality AC/DC bulbs that will be very long-lasting and durable.
I currently have many broken bulbs. I repair 3/4 bulbs every day, sitting in the office. I can fix any broken bulb at a very low cost. If I repair bulbs like this for a few more days, I will be able to repair bulbs faster.


This is my Twitter share link :
https://twitter.com/mahadih83660186/status/1915330546462343356?t=OsTuiuVWR-pHQufUF8UXUQ&s=19
Hi, Greetings, Good to see you Here:)