DAY 1 || Learning how to Install Extractor Fans or Expeller and doing a Video Advert

Monday morning talking about me while I'm making money. This is the lyrics of a song by one Nigerian Musician. I wasn't making money though. I just finished my exams last week and would be having 3 months break all to myself. What a relief in disguise? So my first day of break, I took to joining my neighbour to learn electricals so when I'm building my own house, I'll know the cost, materials, nature of materials, brand and types of wire used in cables, switches and circuits breaks.
He was the one that actually brought up the idea and I bought it. My going there was primarily to do video coverage but it turned out to be different. I'm learning a new school while doing video coverage for the man to use and advertise his business. I'll tell you how my day went. It was 2 days ago when I left to his place after preparing myself in the best of my ability. On reaching his house, I met a scene where his neighbours were gathered, contemplating who nearly stole from them last night.
The person was a window man and fortunately a lady had sufficient evidence to prove that someone used the window to steal the phones as there was light overnight.
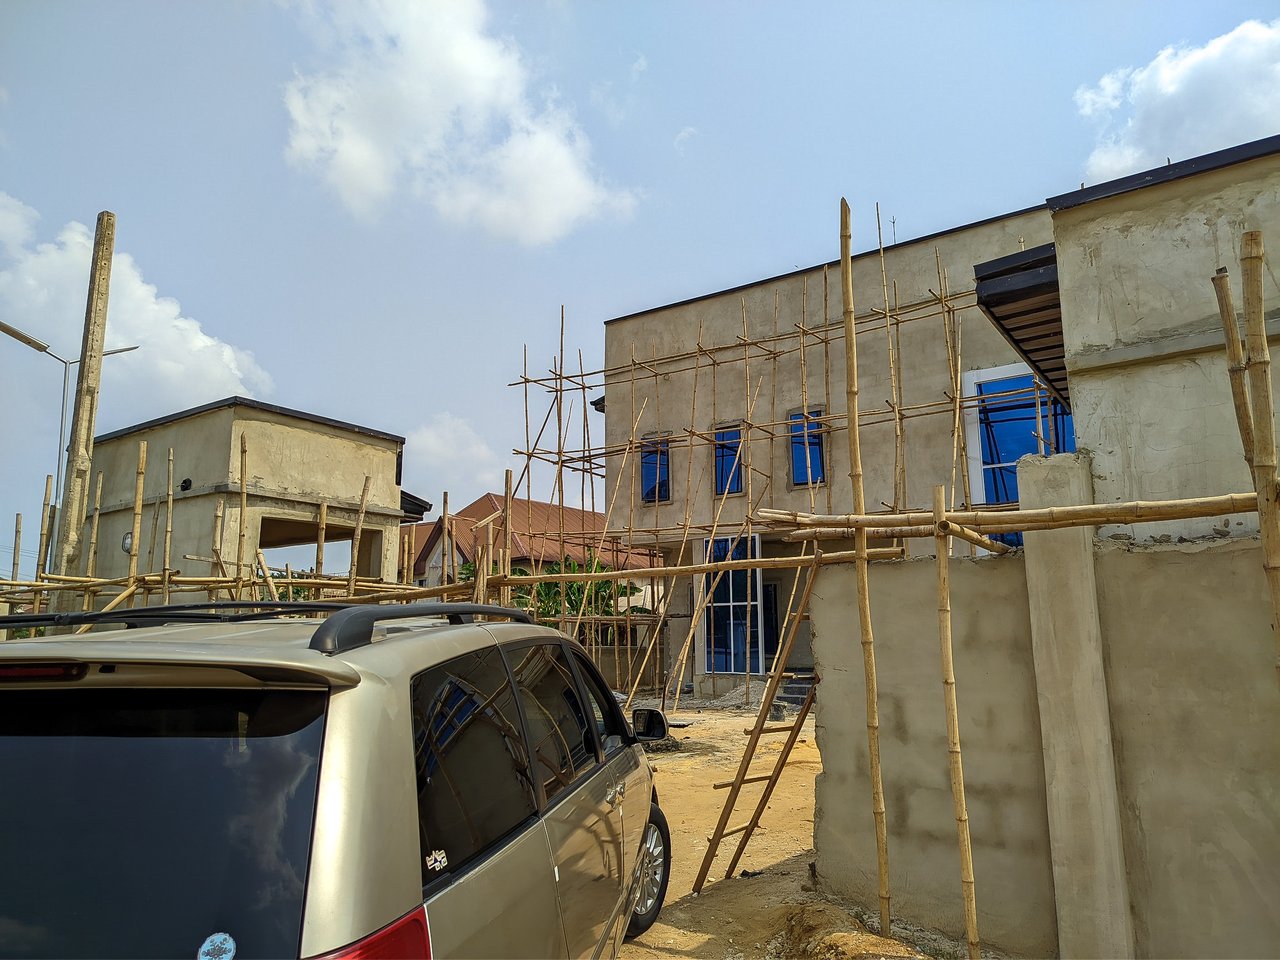
The situation delayed our leaving for work early. I just had to be patient with the man while trying to settle what's on ground. We then left home to the site. The site is adjacent state secretariat in Uyo. This is the location via atlas map. We boarded a vehicle who took us down there and in my mind I was like, this is the first time I'm doing this. I was expecting worse interactions as there's always that one Boss who shouts and complains in every site.
On getting to the site, it turned out different. The engineer I charge took interest in me after introducing myself as a content writer and student. He told me how having multiple streams of income or skills have kept food on his table today. The man look harsh but very friendly and understanding. His attitude towards me made me feel safe and welcomed. My neighbour handed me fully into Engineer's hands and we started work.

We do call him Engineer DE Solar while my Neighbour is called Engineer Assam but for formality sake, we address them as Engineers. This is the exterior and interior of the site. It's actually a workspace for someone's business. I wasn't present when wiring and connection of sockets were done. I was writing exams in school. Now I'm done. I'll learn one of two things which would expose me to places I can gather information for my project defense. I exchanged pleasantries with other apprentices and workers.
Installing Expellers or Extractor Fans in Toilets |
|---|
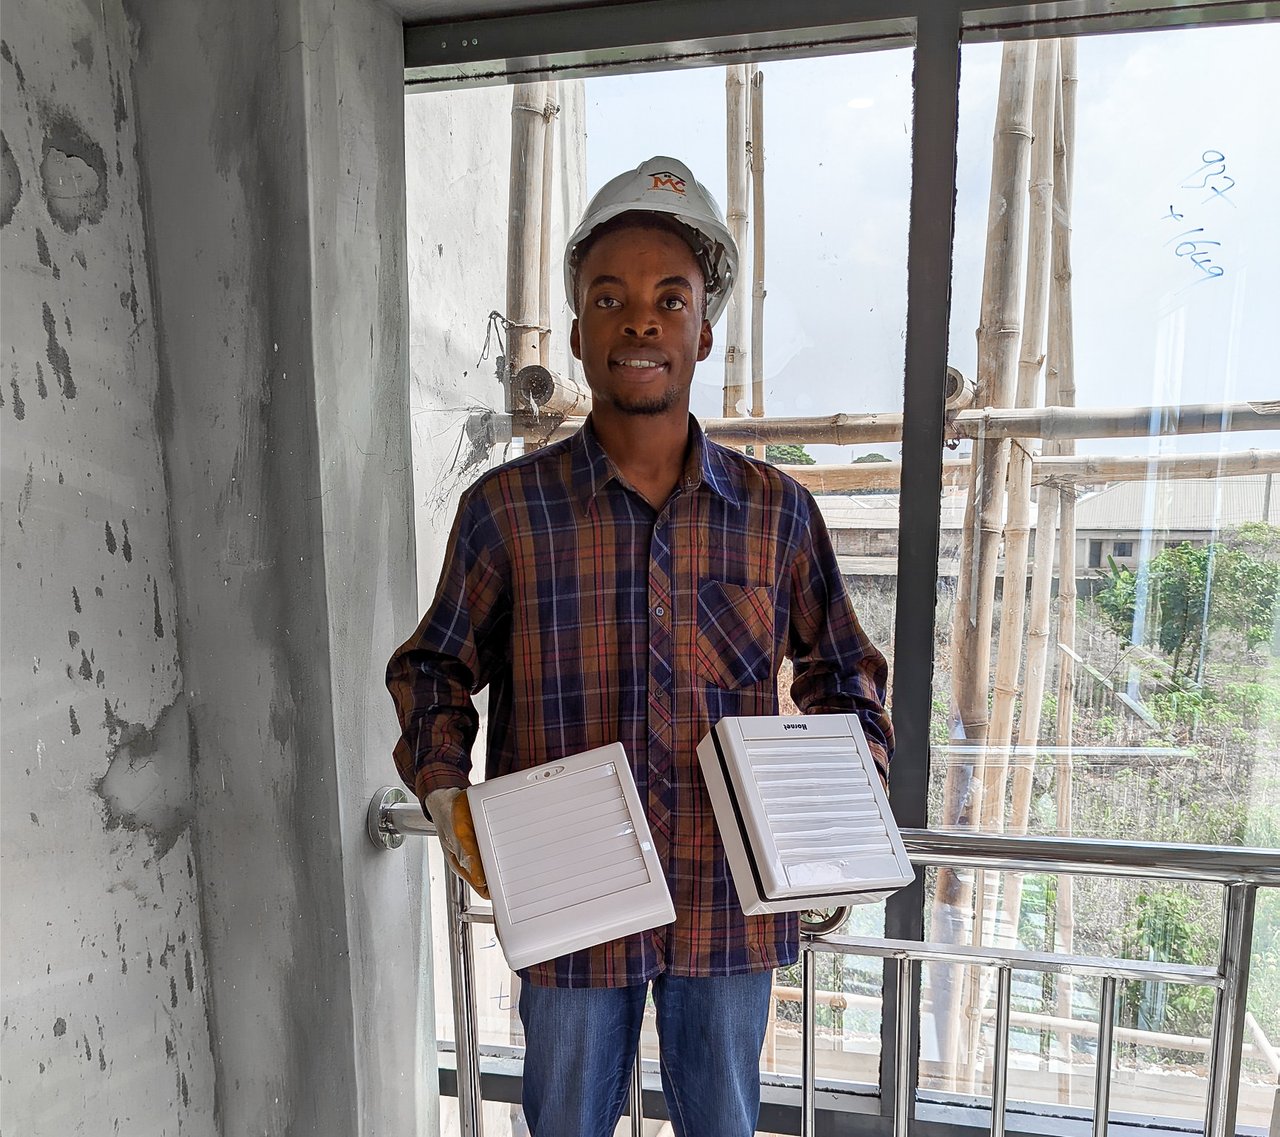
This was the first thing I was told to focus on and learn. It was actually my first time knowing that the name of this thing I usually see in commercial buildings is expeller or extractor fan used as a ventilator device to remove stale air from the toilet. It expells the odors that pollutes the toilet when one uses it to the exterior which can be blown away by breeze.
It's more like a AC but still classified under ventilation. The brand name for this Extractor fan is Hornet. It can also be installed in kitchens and some rooms used for storage of utility. These are a few specifications before unpacking it for use.
| Name of device | Extractor Fan |
|---|---|
| Size | 6 - 6 inches used for small spaced bathrooms. |
| Model | 6Am - 6 (150MM) |
| Brand | Hornet |
| Dimension | 230×200 LB |
 |  |
|---|---|
 |  |
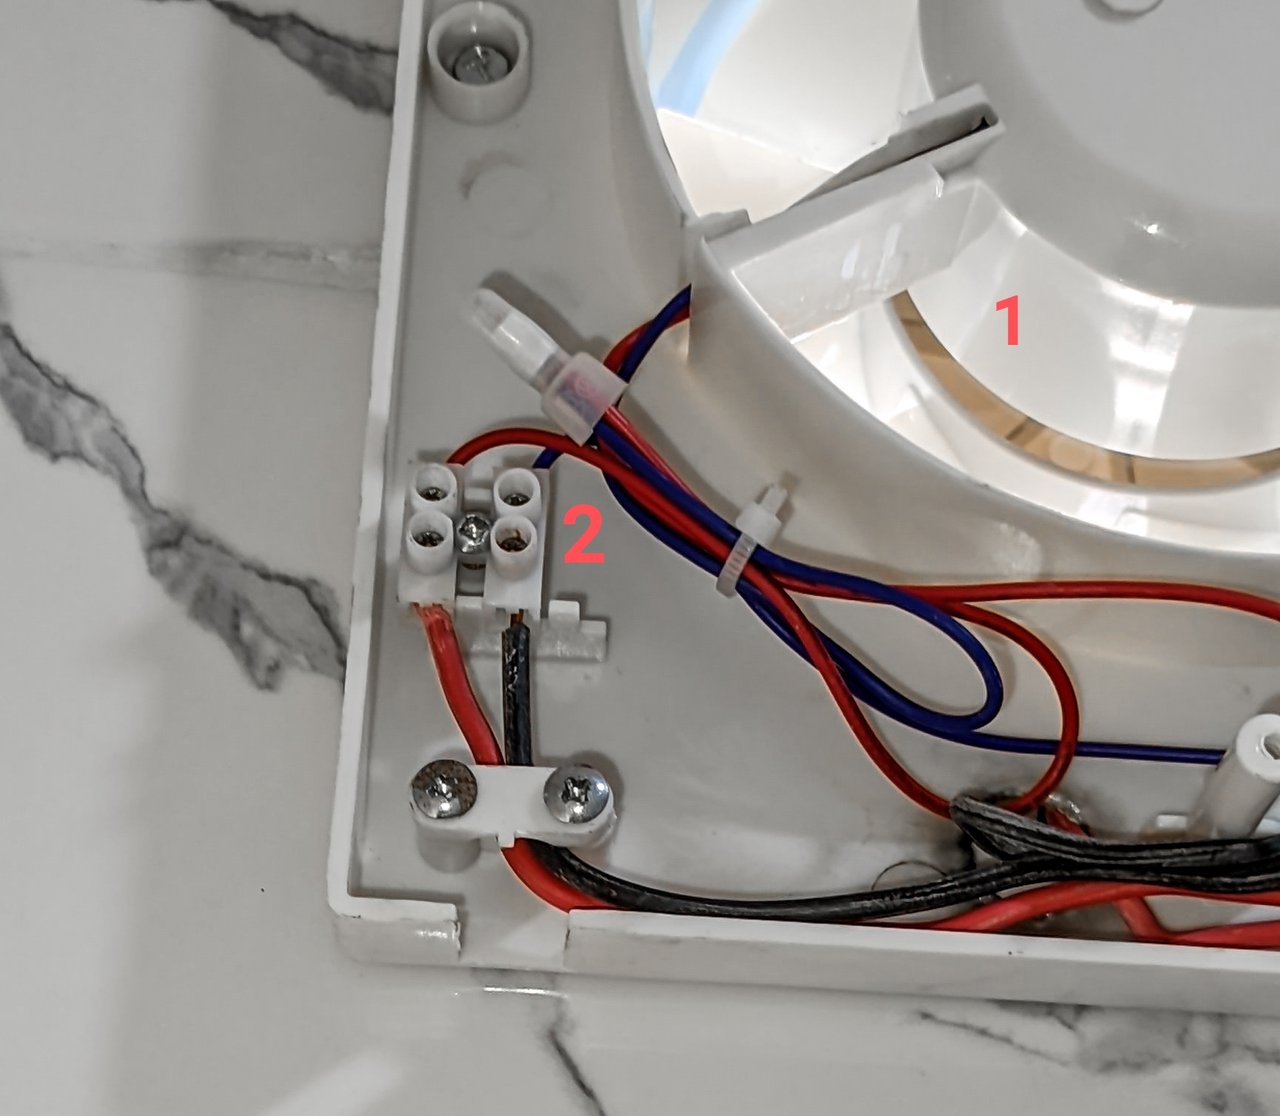
I then uncoupled it to remove it's parts. The picture below shows the parts of this ventilator device. It doesn't have much pieces. Just three braces which is the fan body enclosed by the expeller windows or front and back Grille for internal and external usage. For specification, I'll be pointing some parts on the body of the fan for proper understanding. This is a front view of the fan body. It has blades which is seen as 1, terminal seen as 2, motor seen as 3, cable seal seen as 4, Pull cord seen as 5, cord connector seen as 6.

 | |
|---|---|
 | Front and Back Grille |

Precautionary Measures before Installing |
|---|
The below are a few things you need to know when installing the extractor fan. As an installer, you can choose to wear safety gloves for comfortability since you're dealing with electricity to avoid electric shock. Even though the workers there didn't use gloves as they have been used to the work already and are conscious of their safety, I used mine..
Ensure to check the hole or area where the fan would fit it. Try fitting it in to see if the 6×6 unit will fit in properly and also check proximity to power outlets and ducting path to ensure no obstructions in work.
Safety Googles are needed when adjusting the space for the fan to fit in to avoid small stones damaging the eyes.
Wear a strong boot or foot wear as working barefoot when dealing with electricity can lead to shock.
- In an instance where there's power supply you can't interrupt, using your testing bulb will help you know if electricity is passing through the wires. If the bulb turns on, you can do yourself a favour by turning off the switch for comfortability in work.
Check the supply of air in the bathroom to ensure that it's enough for both the fan and combustion appliance
Read the instructor's manual properly before installation
 |  |
|---|
Installation Proper |
|---|
Installing an extractor fan requires reasoning and practiceability. You need to think out of the box because you're not just installing the fan, you're also solving problems whenever you encounter such. This is what Engineer De Solar Told me. He didn't address me by my name but rather used Eyen Uyo, meaning child of Uyo. The name sounds sweet though. He took me like a son to him and then told me all I needed to do. The tools needed for this work includes.....
Screw driver of different types both the Star headed and the flat.
Drilling machine
Hammer and Chisel
Screws and Fishers to fix the fan on the wall
Plumb and tape for checking accuracy of placement and for measurement.
Testing Bulb and plier for checking current flow and for peeling wires.
Ladder and filing saw
| |
|---|---|
 |  |

These are the tools we used for the installation of this extractor fan. I unpacked the device and kept it one place while watching as a fellow worker installs it. I was there to assist with giving tools and supporting the ladder.
He first of all checked if the hole created for this expeller would fit the size of the expeller which is a 6×6 inches expeller. The unit area which house the blade didn't fit in properly as there was an overlap. He used his hammer and chisel to remove barriers of any sort from obstructing the free movement of the fan and he also created a downside hole for the wire to pass through when the fan is placed.
|  |
|---|---|
|  |
The reason for this is to avoid overlapping the wires or constraining it when the blade supporter is placed. The guy then used a lighter to create an opening for the wire to pass through. This opening is what I labelled earlier as 3. After doing so, he checked the wires if there's light by using his testing bulb to check if there's electric current flowing through. The bulb did shine so the socket was turned off to avoid electric shock.
After ensuring the blade fits in properly and the wire is protruded out freely without being pressed, he showed me how to use the plumb to check if the fan is fitted well. One may stay up and doesn't easily determine if the fan is shaped well. With the plumb, it would be easier to know the sides well. This is a picture of the plumb.
After getting the accuracy in placement, he took to screwing the blade supporter to the wall before using the protruded wires to fit it into the terminals. The wire is live and neutral. The red is live and the black is neutral. There's a labeling on the terminal to know which wire goes in properly.

 |  |
|---|
After fitting the wires in its terminals, he checked if the fan is working by dragging the push cord downwards. If it turns, it's working properly. If it doesn't, it's either the wires aren't fixed well or the problem is from the switch as there's a switch attached. You can either use the switch to operate it or you use the push cord which is clipped to the connector... After ensuring it is working, you take the front Grille which has an active clamp for the operation of the cord connector and clamp it well.
|  |
|---|
Failure to fit in the clamp with the connector, the blade won't rotate if the push cord is dragged down. We then screwed the back of the Grille to fit into the blade holder.
I learnt a lot about the installation and also researched on the brand and which brand is best. There were five toilets to install these Expellers. I couldn't stay up till the end of the installation as the tilers were still working on the walls which obstructed our work. I was also shown switch connection which can defect the movement of the blade. There's what we call branched connection which I'll bring to your notice in my next post.
 |
|---|
These are pictures to give you expo on the connection of switch. It was time to go home so I had to do coverage of the wiring and cables connection of the place. This is the full video and the Engineer here is my neighbour. This was how my day ended, learning how to install extractor fans or Expellers.....The pictures are mine. Watch out for my next post as I talk about these switches and cables.
Dated: 10th February, 2025
Good job!
Thank you.
Congratulations! This post has been voted through steemcurator09 We support quality posts, good comments anywhere and any tags.