SC S24W1: Animals // Turtle
As-salamu Alaikum.
Hello Steemians! Hope you all are doing well. Today, I am participating in an amazing Steemit Challenge S24W1: Animales, organized by honorable @jesusnunez .
Here is: Contest Link .
Let’s get started!
Sketch of Turtle |
|---|
 |
|---|
Designed with Canva Pro

 |
|---|
 | A Glimpse of My Turtle sketch |
|---|
Drawing Tools
🟥 White Paper
🟦 HB Pencil
🟧 2B Pencil
⬛ 4B Pencil
🟩 Cotton Bud
🟨 Pencil Sharpener
🟪 Eraser
⬛ Ruler
🟨 Protractor
✏️ As explained in this first week, you'll need to choose your favorite animal (you're free to choose one of those explained in class, or any other that hasn't been explained) and make a sketch that helps you maintain the shape and proportions of your drawing. The steps for making it will be shown and explained step by step.
The challenge features pictures of various animals, and almost all of them are my favorites. However, among them, today I have chosen the turtle. Today, I will share with you a step-by-step sketch of a turtle. Without further delay, let’s see how I created the turtle sketch.
🐢 Step I
 |  |
|---|---|
 |  |
To make the turtle sketch, first, I gathered all the necessary materials. Then, using a pencil, I drew a large oval shape. After that, I used a scale to draw a line right through the middle. Using a 2B pencil, I then drew another smaller oval shape inside and placed a tiny circle within it because I planned to draw the turtle’s eye there.
🐢 Step II
 |  |
|---|---|
 |  |
 | Turtles neck |
|---|
Now, I flipped the paper and, with the help of a bowl, created an outline towards the lower part of the small oval shape for the turtle’s neck. Afterward, I straightened the paper and moved the bowl slightly upwards to draw another curved outline above. This was the outline for the turtle’s neck.
🐢 Step III
 |  |
|---|---|
 |  |
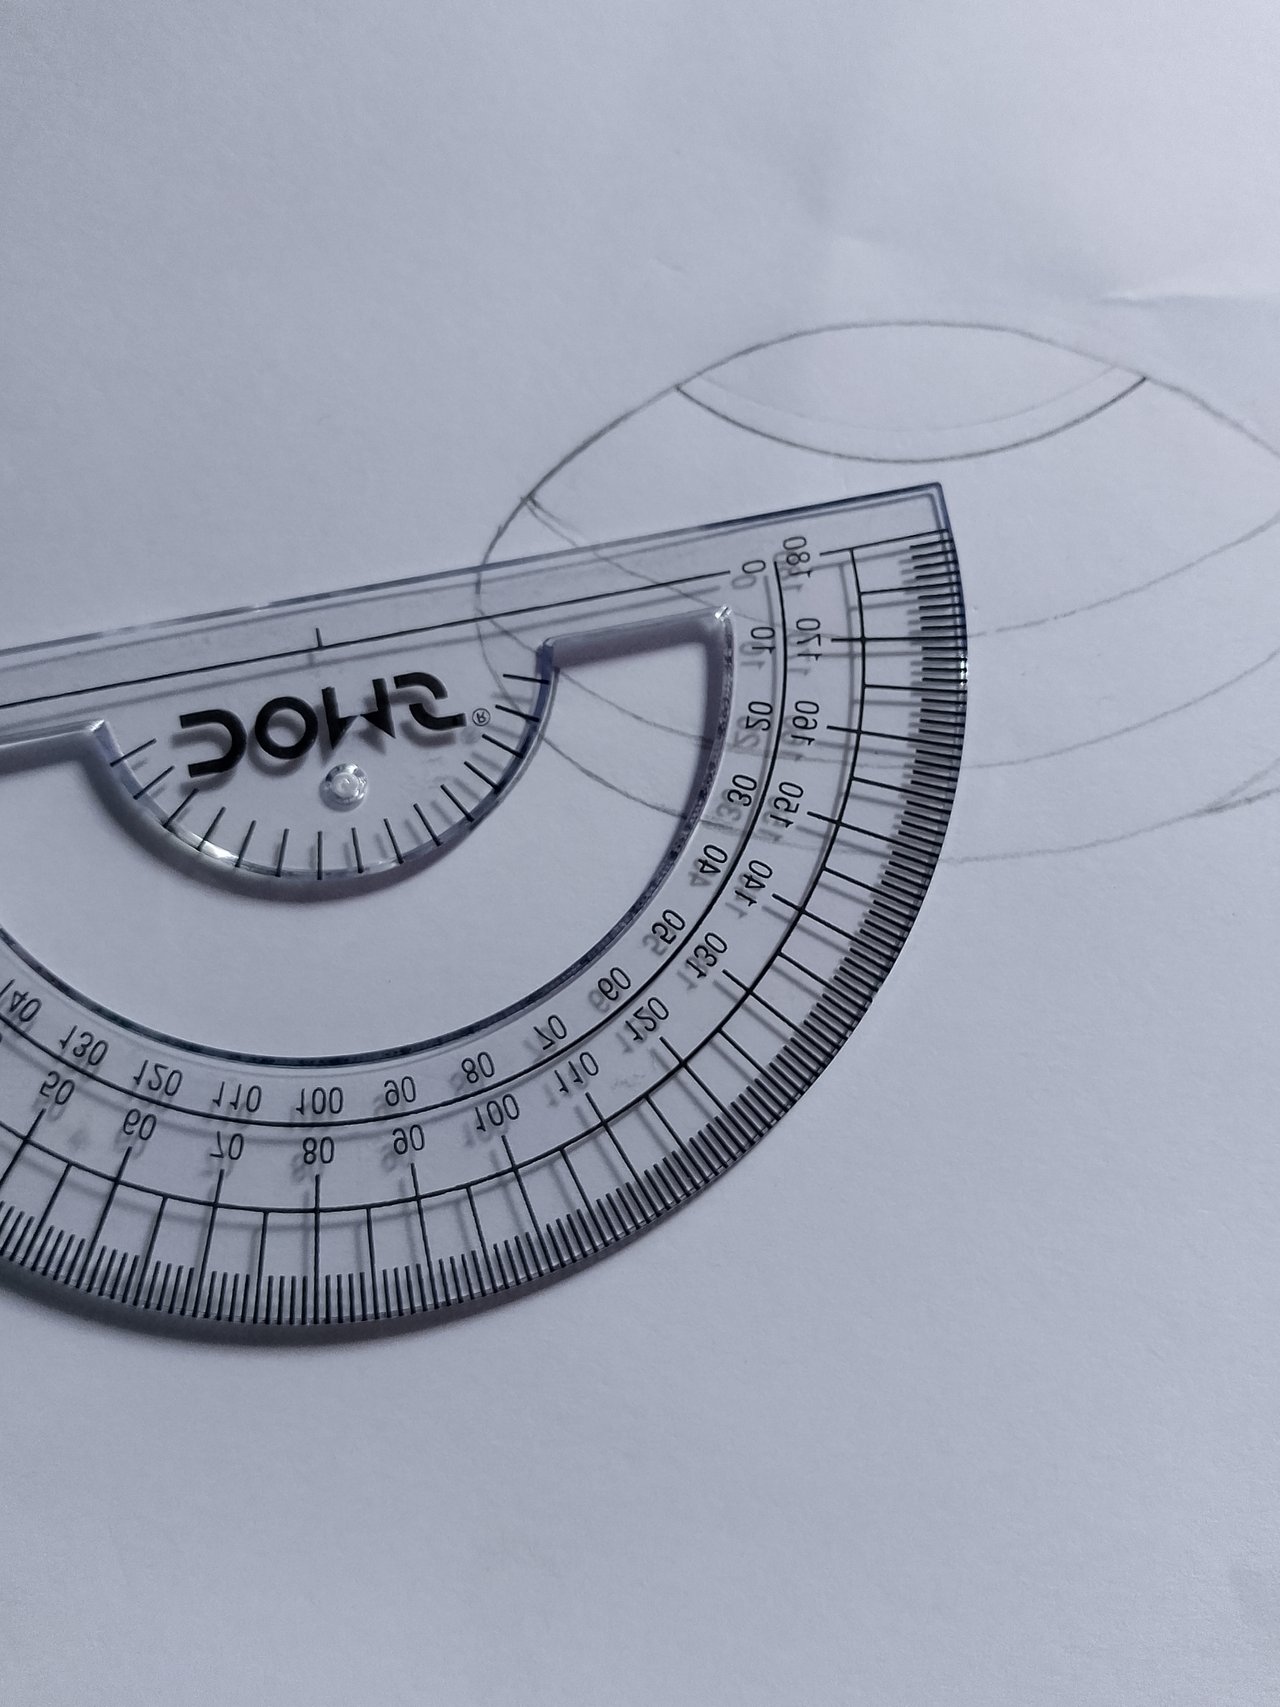
Then, I placed the bowl toward the upper part of the large oval shape and drew lines. These were outlines to create the turtle’s shell. Similarly, I gradually made outlines downward inside the large oval shape with curved lines. Several curved outlines were completed inside the large oval part.
🐢 Step IV
 |  |
|---|---|
 |  |
 |  |
|---|---|
 |  |
 |  |
|---|
Next, using the bowl, I drew the turtle’s hind legs. Then I outlined the front legs. After that, I drew a small tail at the back side of the turtle.
Afterward, using the bowl, I added some lines on the shell to define its shape. Then I designed the backside part of the head with the pencil and nicely drew the head portion. Here, I also sketched the eye and mouth shapes of the turtle.
🐢 Step V
 |  |
|---|
Now, I outlined another small front and hind leg of the turtle. After that, I lightly sketched the claws on its feet. I erased any extra lines I had drawn using an eraser.
🐢 Step VI
 |  |
|---|---|
 |  |
 |  |
|---|
To show the shell’s shape on the upper body of the turtle, I now drew slightly curved outlines with the pencil. This way, the real shape of the turtle’s body would appear. I erased any extra lines with an eraser. Then, to define the shell shape, I drew square shapes on its body. While drawing these squares, I also erased any extra lines with an eraser. Towards the very bottom part of the turtle’s body, I created another slightly curved outline. The turtle’s full outline was now complete.
Now, using a scale, I drew thin lines inside the square-shaped parts. The reason for drawing these thin lines was that I would leave these sections blank when coloring later.

✏️ Apply simple shading to the sketch you created earlier to give your drawing a more realistic look. Show and explain the steps for creating it.
I have successfully drawn the picture of my desired animal. Now, to make this animal look more realistic, I will add shading using pencils. For shading, I will use 4B, 2B, and HB pencils. The reason is that in some areas I will make the color very dark, and in some areas, I will keep it lighter.
🐢 Step I
 |  |
|---|
 | Start to Shade of the shell |
|---|
First, I start shading the turtle’s shell. As you can see from the picture, I have used a 4B pencil. The reason is that I will shade very darkly along the sides of the shell. I shade the square-shaped parts of the shell by sliding the pencil sideways. I have shaded very carefully here because I have left the middle part slightly white.
🐢 Step II
 |  |
|---|
 |
|---|
Then, step by step, I shade along the sides of the square shape parts on the upper and lower sections of the shell, first adding dark shading. After that, I color each shell section. I have completed shading the two steps of the upper part of the shell.
🐢 Step III
 |  |
|---|
 | Completed the shell shade |
|---|
Now, at the very bottom where there is a part of the shell, I shade it using the pencil. You can see that I have left a little white part in the middle of each shell section to make my turtle sketch appear more realistic. The shell part of the turtle's body has been colored with pencil.
🐢 Step IV
 |  |
|---|---|
 |  |
 |  |
|---|---|
 |  |
 |  |
|---|
 | Sketch of Turtle |
|---|
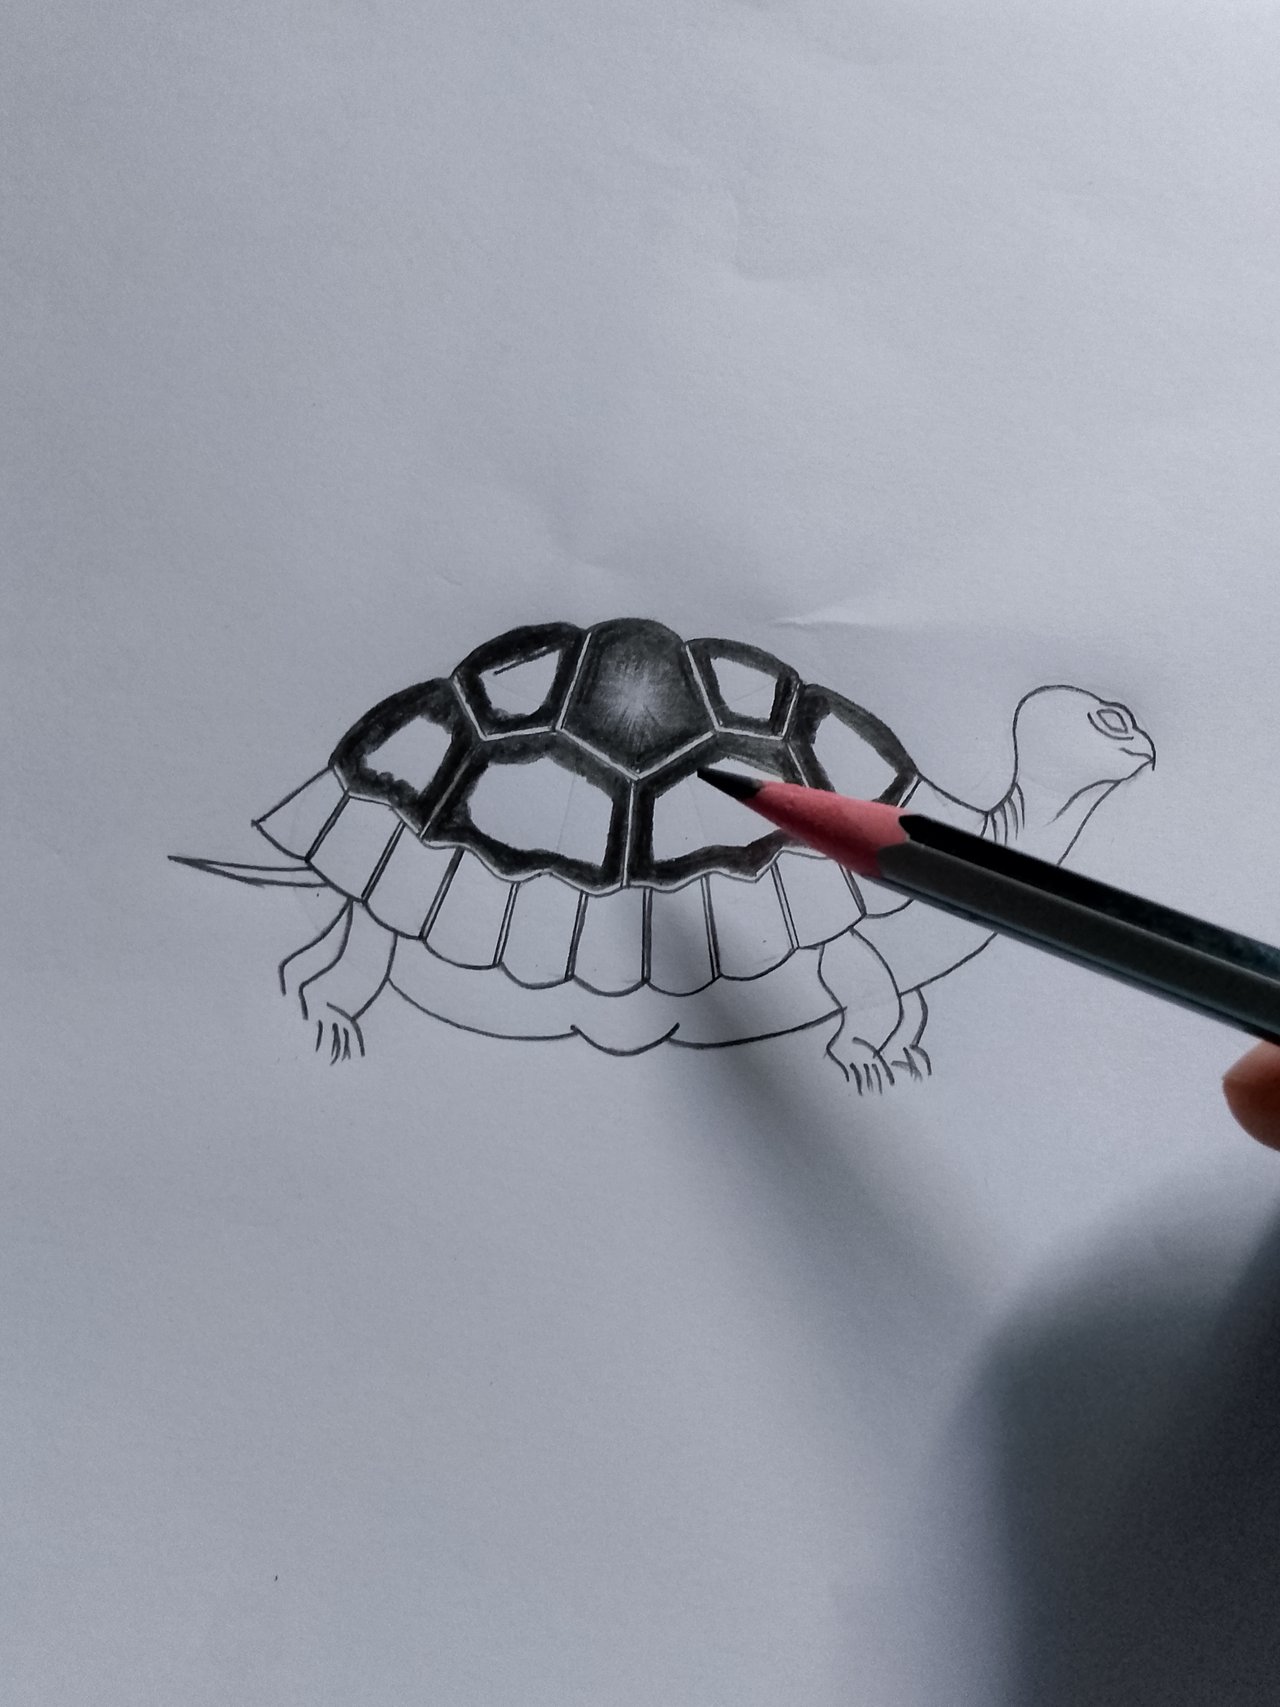
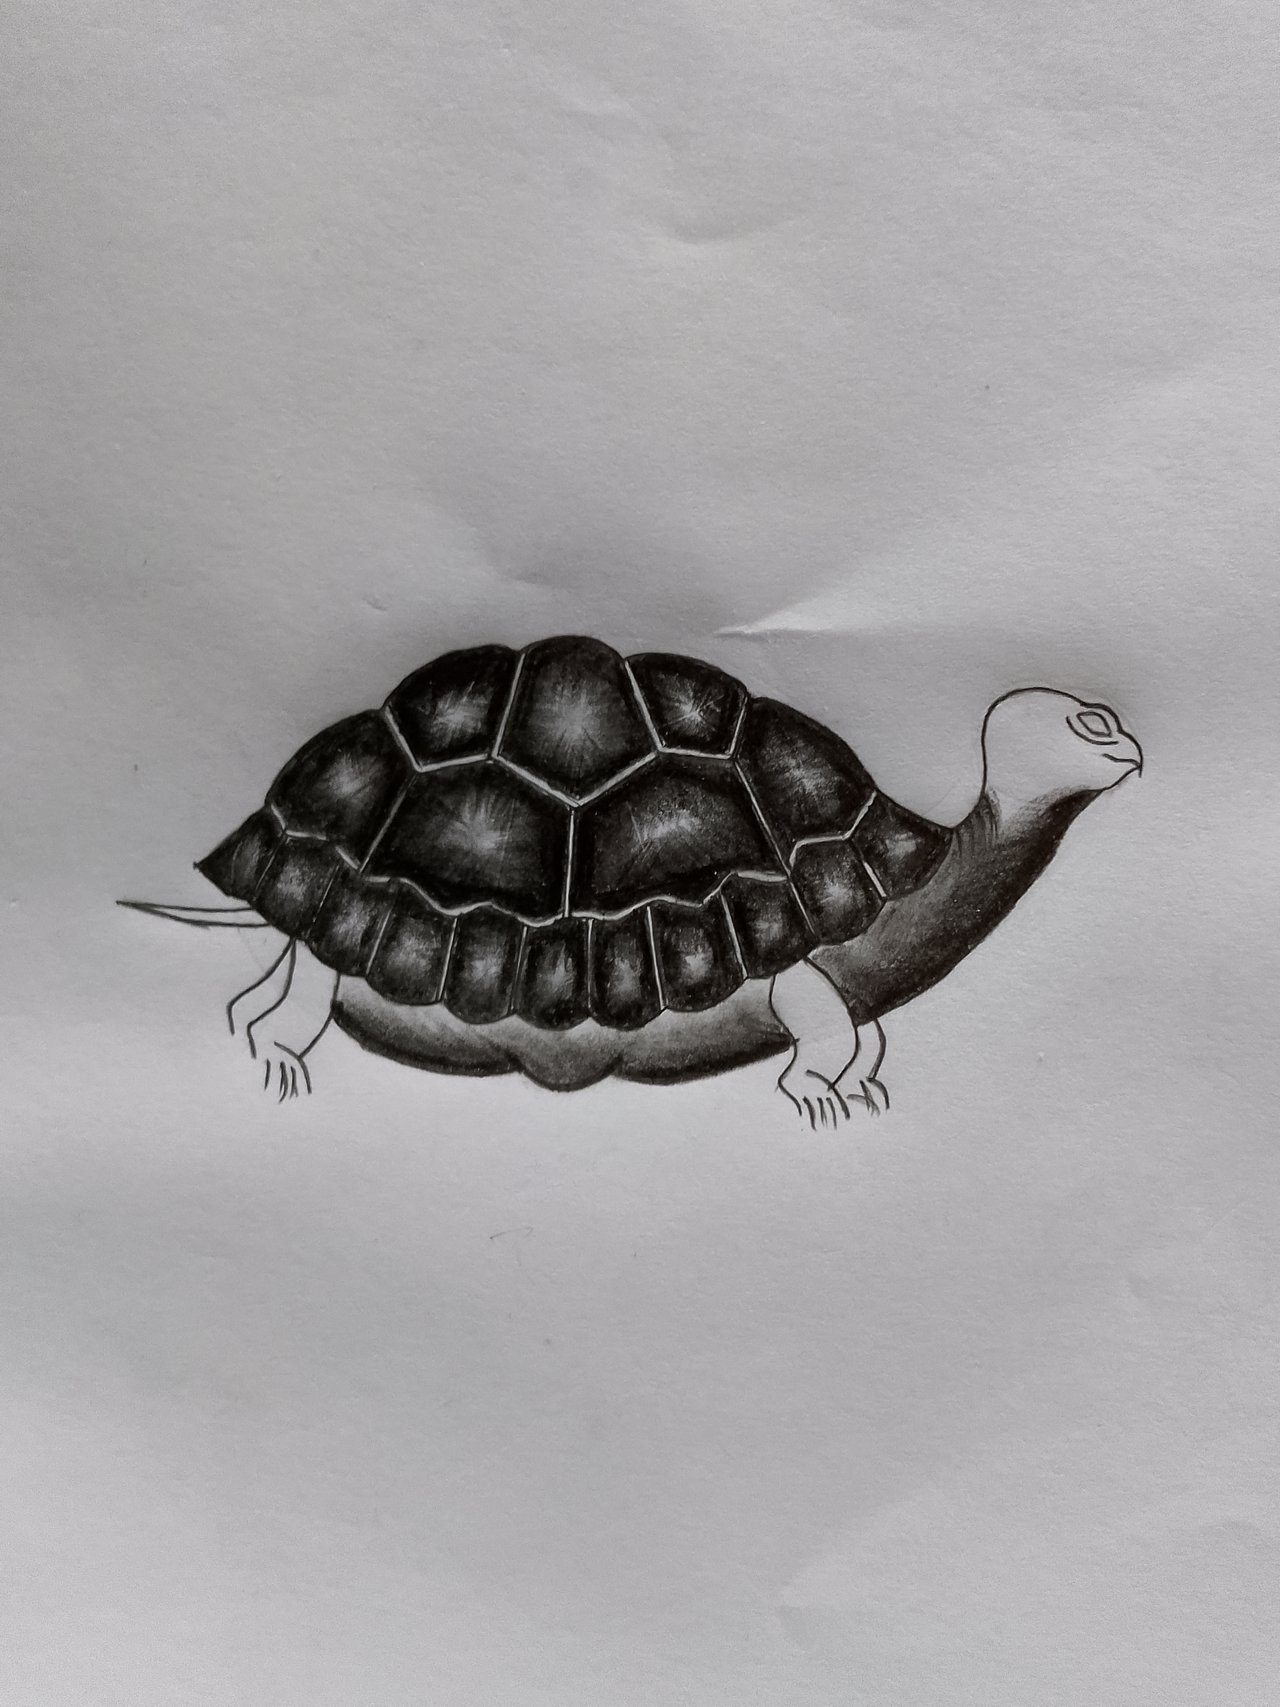
Now I shade with a pencil along the lower body outline and neck of the turtle. Then, I create a light black shade on the bottom part with the pencil. After that, using a cotton bud, I smooth out the pencil shading nicely at the bottom part. Then I add dark shading on the face, head, and eyes area. After that, I shade the tail part darkly. Finally, I design and shade the turtle’s front and back legs with dark shading. The turtle sketch is now complete.
✏️ Show a selfie of yourself with your drawing, which must include your username and the date it was created.
 |  |
|---|---|
Now I write the username and date on a paper and capture a photo of the turtle sketch. Then I take a selfie with my drawing.
Here are photographs of the turtle sketch shared:
 |
|---|
|
|---|
✏️ Leave a recommendation or suggestion for other users who helped you with this challenge, or an open question for other participants or users who visit your post.
For those users who want to participate in any art or sketch contest, I would recommend using good quality paper and good quality pencils before starting the artwork. This will make your art look much better. When we create any artwork, we must try to do it patiently. If we rush, we won't be able to bring out the beauty of the sketch properly.
Image Information |
|---|
| Device Name | infinix |
|---|---|
| Captured by | @arjinarahman |
| Sketched by | @arjinarahman |
I invite the following users for the contest
@sailawana
@cruzamilcar63
@nuraini1975

Upvoted! Thank you for supporting witness @jswit.
https://x.com/arjina_rahman/status/1916199866583420974
Terima kasih, sukses buat sayang
Jajakallah Khairun... Take my love dear💚
Excelente creación pictórica, amiga. Es impresionante la nitidez, la perfección que logra de una tortuga a través de unos cuidadosos trazos y un juego de claroscuros bien aplicados. Le deseo el mayor de los éxitos.
I am at a loss for words to express my gratitude for your praise. It is truly a blessing for me that you liked my turtle sketch so much, sir. Please keep me in your prayers.💚
Cuente con ello...
Thank you for supporting @wox-helpfund
Your post is manually rewarded by the
World of Xpilar Community Curation Trail
BottoSTEEM OPERATED AND MAINTAINED BY XPILAR TEAM
BottoSteem
Robust Automations on STEEM Blockchain using the Power of AI
https://steemit.com/~witnesses vote xpilar.witness
"Become successful with @wox-helpfund!"
If you want to know more click on the link
https://steemit.com/@wox-helpfund ❤️
wow what a beautiful picture.!! it's looking awesome... highly appreciated friend
Thank you so much dear.take love💚
¡Hola! Que gusto que te hayas animado a participar en el Steemit Challenge: Explora tu creatividad con el dibujo artístico, en su semana 1.
Observaciones y recomendaciones:
Realizaste el boceto de forma correcta, siguiendo minuciosamente el paso a paso, el cual además explicas bastante bien.
Al momento de realizar el sombreado lograste un muy buen degradado, especialmente en el caparazón, buen trabajo.
Libre de plagio ✅ | Libre de IA ✅
Sir, thank you so much for reviewing my post with such a beautiful comment. Your careful observation of each step makes me feel that my effort has been worthwhile. I am very happy to know that you liked the shading system of the shell . Please keep me in your prayers, Sir.💚