"SLC21/WK3: Managing Bleeding: The Basics of Controlling External and Internal Bleeding"
Welcome to my blog!
Let's get started with my views on bleeding and how best to stop it.
 |
|---|
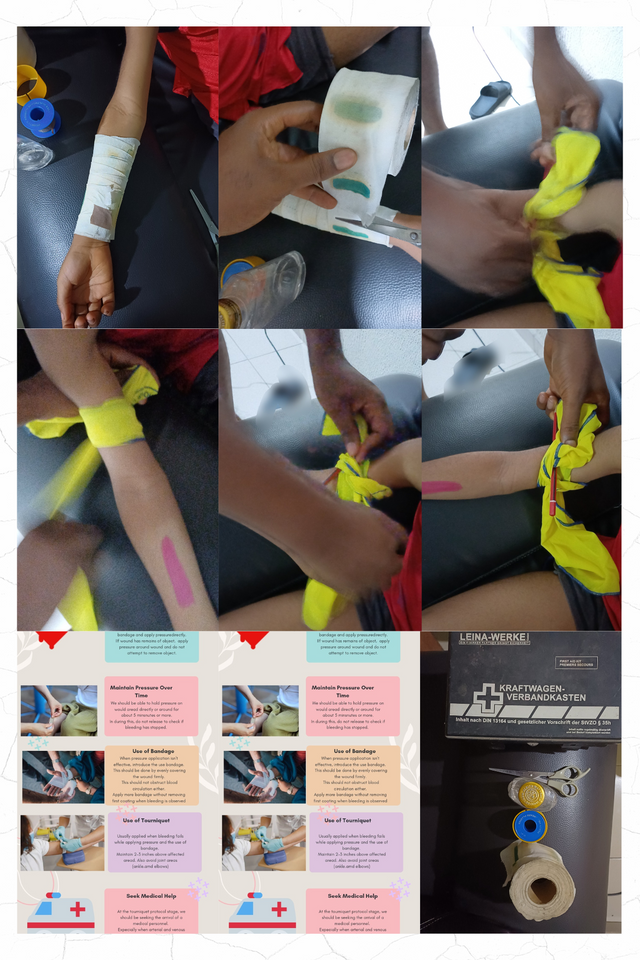
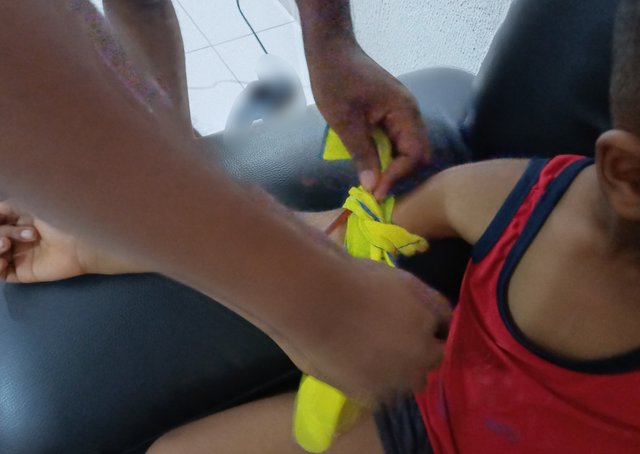
Steps I followed to Apply the Bandage
I will have at the back of my mind the DRABC protocol, which enables me to be safety conscious. Ceteris paribus, the victim is in a safe place, he's conscious, and also with a minor/moderate injury and bleeding.
I will gather my supplies.
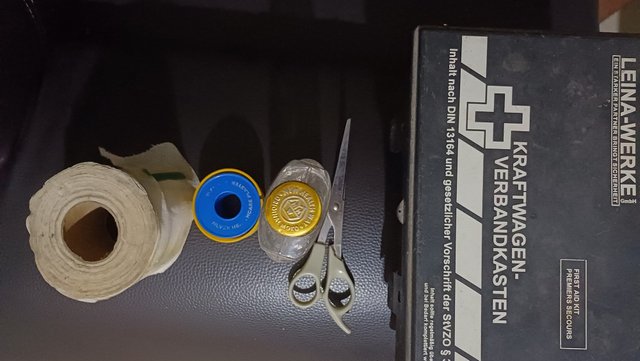
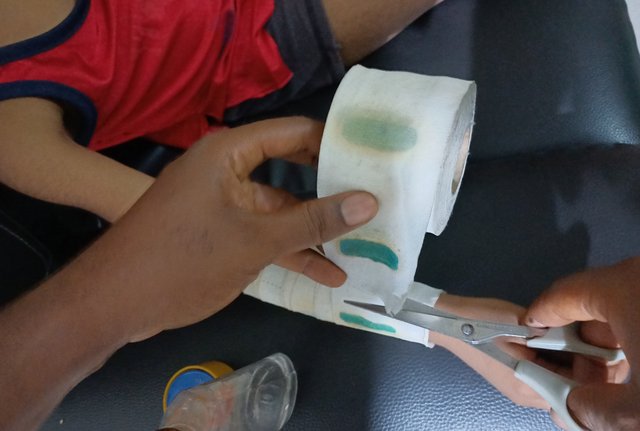
My supplies here are my antiseptic solution, cotton wool, scissors, and clean bandage.
Not forgetting, before touching the wound patient, I should be able to wash my hands to avoid any form of infection.Position the Wonded patient
Since the patient is conscious, it makes it a lot easier to position him well for treatment. He was placed in a comfortable position with his arm placed in a relaxed position.Assess the Wound and Apply Dressing
The bleeding area should be well assessed. Since we are handling a minor/moderate cut, there is the possibility of not being severe. I should be able to check for debris or dirt on sight. This should be cleaned off gently with an antiseptic solution or water.Applying Bandage on the arm
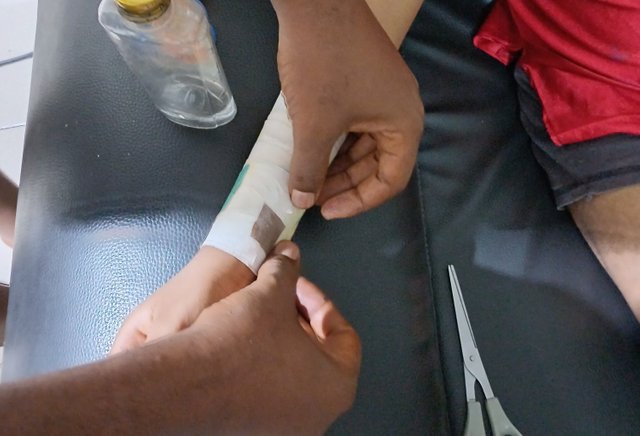
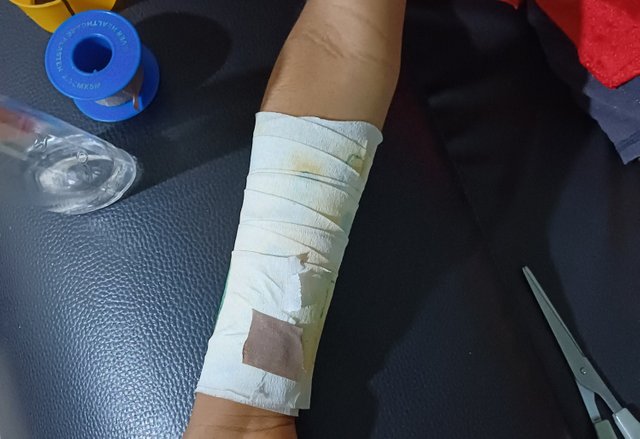
I took the bandage and applied it to the wounded area in a manner that all affected area was covered. This should be done to secure all areas while pressing down the edges tightly. But this shouldn't be done to obstruct circulation. The bandage tape should be used to secure the ends.Check for Comfort & Monitor Wound
I had to check by sliding my finger in between the bandage and skin to be sure this wasn't too tight and obstructing blood circulation. Should in case it's loose, we can apply more pressure by putting more bandage tightly. We should also check for redness and swelling to be sure the patient and bandage area are comfortable.
In case there is still observed bleeding; additional bandages should be done on top of the previous one without having to remove it. We can, at this point, raise the arm above heart level.
Steps I followed to Apply the Tourniquet
 |
|---|
I will gather my supplies.
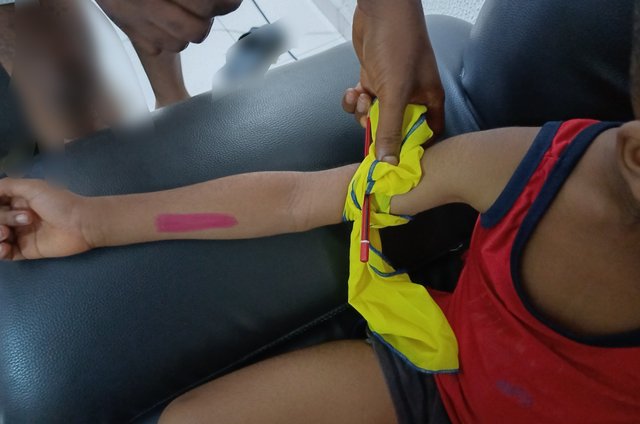
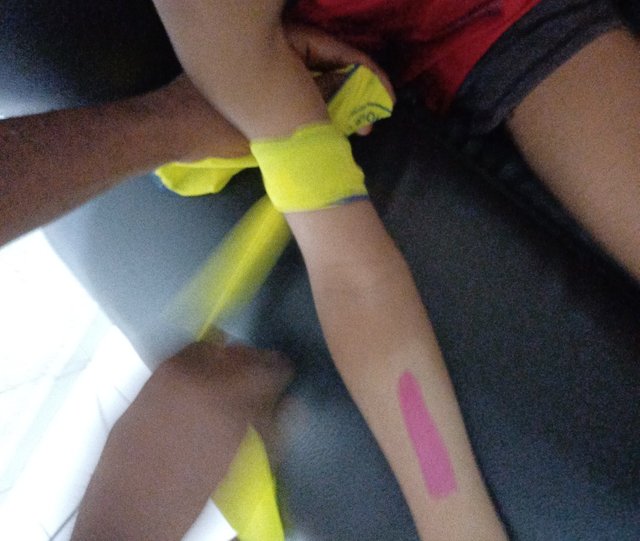
My supplies this time include clean wide cloth and a twist stick or object. We may avoid the use of tiny materials to limit skin damage.I will assess the situation to ascertain that direct pressure on the affected skin space cannot stop bleeding.
Positioning of the Tourniquet Cloth
This is another important part of this protocol as we have to know where exactly to place it. In doing so, we have to avoid joints. Ankles and elbows should be avoided while applying a tourniquet. This is done 2-3 inches above the bleeding area and the mentioned joint areas.Wrapping the Tourniquet with the Twist
This is done by firmly wrapping a single tourniquet cloth on the arm. The second wrapping should be done after the twisting object has been placed on top of the first wrap material.Twisting of Tourniquet
The twisting object is used in this case to twist the material until it achieves firmness and as well stops bleeding. It should be over-tight to stop bleeding but should be regulated while twisting is done.Secure the Tourniquet object
When nonbleeding is achieved, we can gradually loosen the twisting object but also secure pressure around the area with tape or cloth.Note the Time of Tourniquet protocol
We have to note the time by which this was achieved by writing it on a piece or bandage to enable quick usage by medical personnel on arrival.
How & When a Tourniquet Should be Removed
Ideally, a tourniquet should be removed by a medical personnel as we've already stated earlier. We could remember the need to "take a note". This is to allow for a medical practitioner to come to work with the available information.
When the patient is now in a medical facility where full attention is given by personnel, the tourniquet can be removed.
When bleeding had been controlled, making its removal necessary at that time.
To remove the tourniquet, this should be done gradually to observe if there are any bleeding signs.
When this is done by the medical personnel, the wound should be treated accordingly, and as well, look out for any signs or shock symptoms.
a) What steps should you take to control the bleeding?
I should have one first thing at the back of my mind which is "D"RABC. I should prioritize the safety of both parties here.
Since this is a case of bleeding heavily, I should be able to seek emergency services or ask standby to help call for help immediately. I concentrate to attend to the patient.
A wounded person should be well placed on the ground to reduce incidences of collapse and fainting. Limbs can be raised to allow for. Easy flow of blood and oxygen.
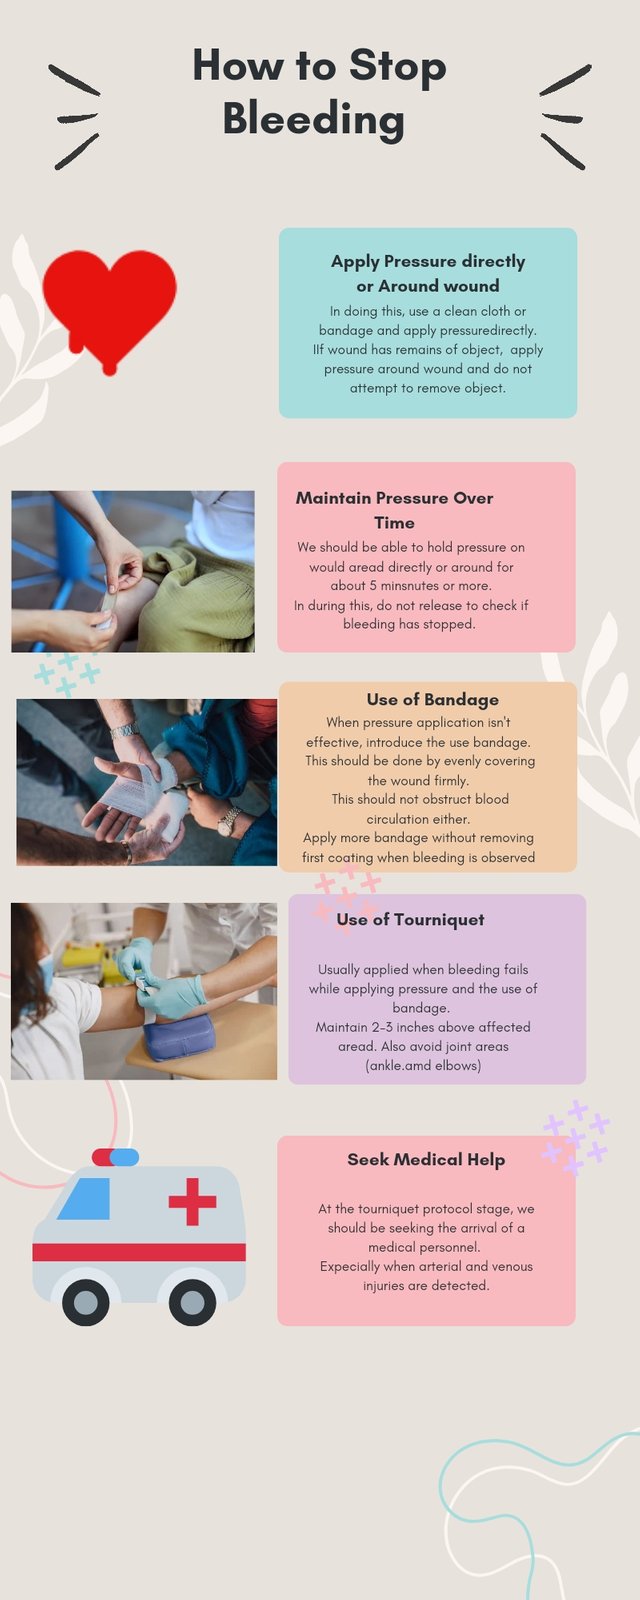
I should be using a clean cloth at this time to apply pressure on the wound to help stop bleeding. This I will do and hold firm for minutes to initiate clothing.
But if I observe sharp objects trapped in the wounded area, I do not need to apply pressure directly on the wound but rather around the wounded area. We should avoid removing this sharp object so as not to trigger more blood pressure. Best handled by the medical personnel in a controlled facility.
Even when I observe blood soaking the layers of cloth used, I should be able to add more layers rather than removing them. Remember, we do not need to remove pressure on this area until we achieve clotting and nonbleeding.
In all of this, my attention won't be out from the victim's breathing pattern; this is to help check for shock, unconsciousness, etc. Let's don't forget DRABC and CPR protocols.
b) How would you assess whether the bleeding is arterial, venous, or capillary?
When I observe blood pressure that resonates with the heartbeat, there is no doubt that it is arterial bleeding. This comes with a bright red blood type. We anticipate rapid loss of blood and this is risky and threatening if not stopped.
When we observe a dark blood bleeding type, that sputs uncontrollably, it is venous. Though it is less risky than arterial bleeding, it is still risky if not controlled.
Capillary bleeding is the least risky of them all. Darker type of bleeding blood that easily stops when pressure is applied to the affected area.
c) What would you do if pressure alone does not stop the bleeding?
I should quickly check if I am applying the pressure appropriately. Making direct pressure on the wounded area should be ascertained, but certain and still do not stop, then I should. Use the next option.
The use of a tourniquet is advisable immediately. We should remember to apply 2 to 3 inches above the wounded areas and as well avoid joint areas. Lets take a note of when this is intitated.
We have to maintain pressure through the use of the Tourniquet Cloth until medical personnel arrive. In all of these, we have to reassure the victim to be calm.
a) What should you do as a first aider to manage the situation?
I should have one first thing at the back of my mind which is DRABC. I should prioritize the safety of both parties here. When this is done, I should check for Responsiveness.
Since this is a case of bleeding heavily, I should be able to seek emergency services or ask standby to call for help immediately while I concentrate on attending to the patient.
If conscious, I should help place it on the ground where further movement is avoided. I should also watch out for breathing to ensure no fainting symptoms occur. However, when observed, the legs.should be raised above heart level for blood circulation to vital organs. CPR protocol should be anticipated if unconsciousness is in view.
####' b) Why should you avoid applying direct pressure to the abdomen?
Applying pressure directly on situations where internal blessing is envisaged is a No. This worsens injuries instead unlike the external bleeding scenarios. Vital organs may seem to be damaged if allowed
There is the possibility of increasing bleeding if pressure is applied in such scenarios. We do not want any more complications from what we already have before us.
c) What signs of shock should you look for, and how should you respond?
We have to look at the skin reaction around the observed damage area. Pale or discolored skin areas with a cold feeling, when touched, are symptoms of shock.
Fast breathing and heartbeat as a result of blood loss.
Dizziness and feeling of light head which also comes with confusion.
To respond to this, we have to seek help by ensuring an emergency comes. quicker
Position the victim by raising his legs about heart levels. This pushes more blood to the vital organs.
 |
|---|
Thank you, friends...
I am inviting @chilaw, @chant, and @wilmer1988.
Student Name: @xkool24
Overall Grade: 8.7
Plagiarism Check: Pass
AI Use: No
General Feedback: The student demonstrates a solid understanding of managing bleeding and procedures of controlling internal and external bleeding across diverse scenarios. Further improvement in providing detailed explanations and practical solutions in certain areas would greatly enhance the overall quality of the responses. Overall, good effort.
Thank you.
Regards,
@huzaifanaveed1
https://x.com/xkool24/status/1856160996848550282?t=PRKJpiUbBfkQjSjTTT7bGg&s=19