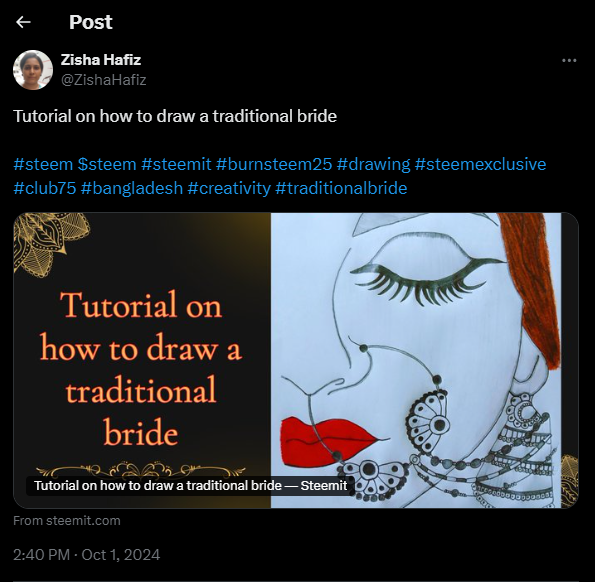
Tutorial on how to draw a traditional bride
Assalamu'alaikum everyone.
I am @zisha-hafiz from #Bangladesh
With my boundless and warm regards, I am starting my first post in the community of "The Creative Pulse". I wish all of your good health and prosperity who are going through my post. I would like to thank all the admin and moderators for creating this group and allowing us to show our smallest effort for this platform. Drawing gives a that much pleasure which I can not express through my words and also can not express by any words. Inn Sha Allah I will share my post here continuously and try my best to make some creative.
 |
|---|
I am not a professional but I try to draw by following YouTube videos. This really helps me a lot. Today I will share a drawing of a traditional bride which I am inspired by watching this video souce. But after watching this video I planned to make it a little different by coloring it a little because after all, it’s about a bride. So without any further delay, I am going to present my today drawing of a traditional bride.
| 🟪 A4 size White paper |
| 🟪 Pencil |
| 🟪 Eraser |
| 🟪 Shrapner |
| 🟪 Oil Pastel color - red, brown and black |

| 💖 Step - 1 💖 |
|---|
.jpg) |
|---|
.jpg) |
|---|
At the beginning of my drawing, I drew the left eyebrow of a bride. After that, I draw a line as her hair. Then I drew her sharp nose and beside her nose pin which is attached to her nose. Hereafter I drew her long eye along with her long lashes. I drew her left ear. Below her nose, I drew two lips. In the middle of her forehead drew a small bindi which enhances more the beauty of a bride.

| 💖 Step - 2 💖 |
|---|
.jpg) |
|---|
.jpg) |
|---|
In the second step, by attaching her nose pin drew a big nose ring as we see the traditional bride wearing at her wedding. Upon the big nose ring drew some kundon designs on it. I extended the nose ring to the end of her ear. In the middle of the nose rings make some more eye-catchy designs. I drew her ear shape and drew an earring.
| 💖 Step - 3 💖 |
|---|
.jpg) |
|---|
.jpg) |
|---|
In this third step, I extended her long earring designs. In the middle of the earrings make some more designs. From here I started sketching my bride. First I sketched her long eyebrow. The eyelids were lighty and the edges sketched it a little darker. Then I darkly sketched her eyelashes of her. Upon the eyelashes, I made a darkly thick wavy line as her eyeliner. The bindi upon her forehead I colored it with dark red color.
| 💖 Step - 4 💖 |
|---|
.jpg) |
|---|
.jpg) |
|---|
In this fourth step, I colored her wavy hair with a mix of brown and black colors. I started sketching the big nose ring of her I lightly sketched the right side. The nose and her face are also lightly sketched. Then I sketched the design on the nose ring darkly and the inner space sketch lightly. After that, I sketched the ear of her. I lightly sketched it and darkly sketched the line on it. The long floating earrings of her lightly sketched but the inner design I sketched it a little darker.
| 💖 Step - 5 💖 |
|---|
 |
|---|
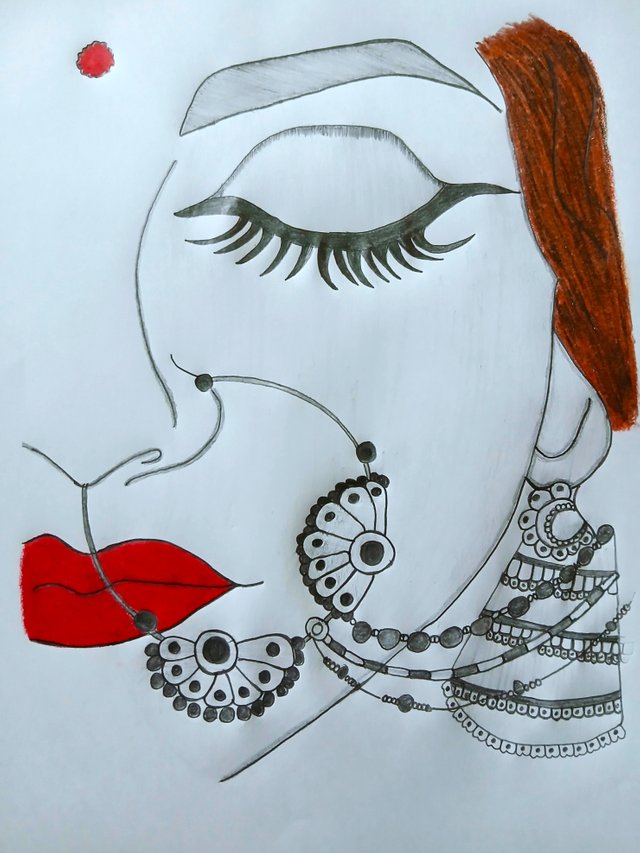
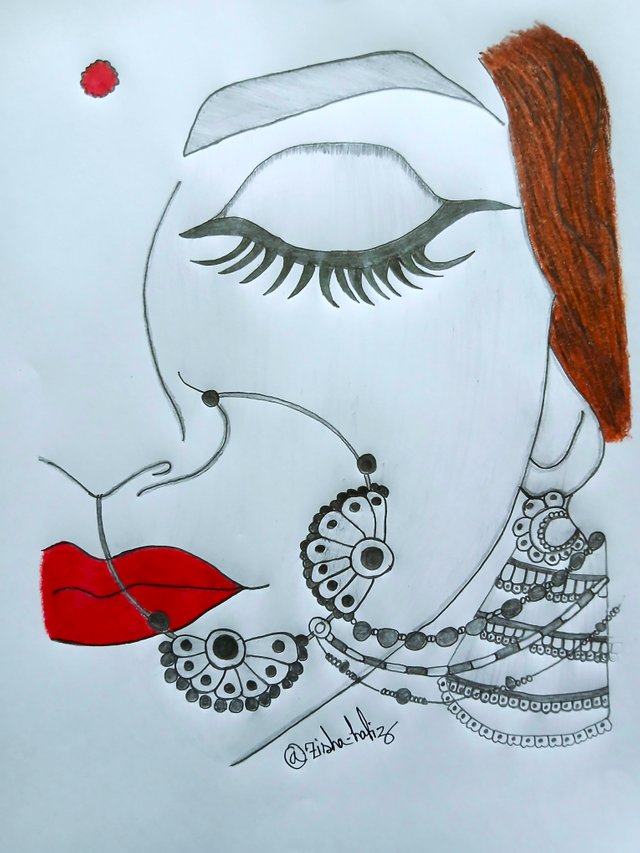
In this step, I darkly colored her two beautiful lips like roses with dark red color. This is how I ended up sketching and coloring my bride.
| 💖 Final Step 💖 |
|---|
 |
|---|
 |
|---|
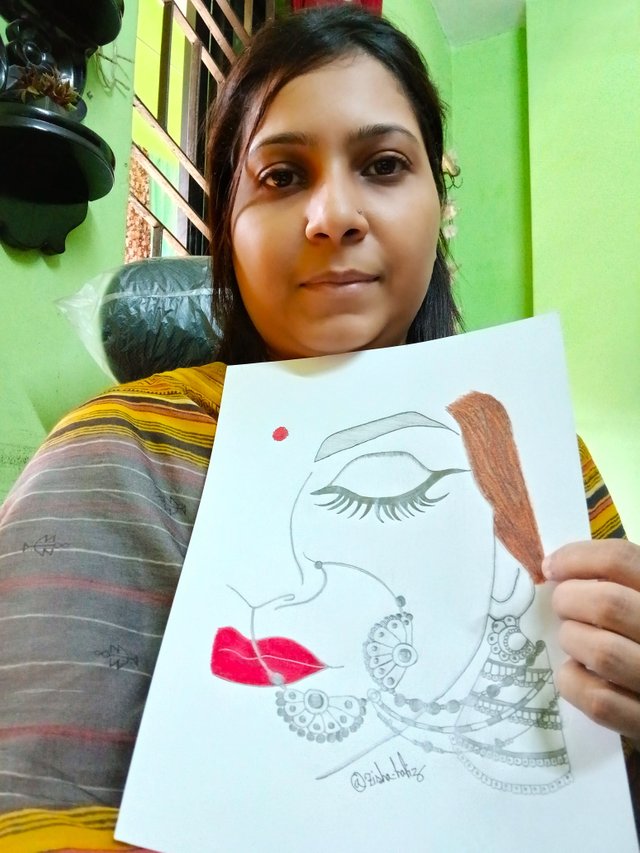
At the end, I wrote my username under the face of the bride. After finishing my drawing I took a selfie with the final result. I wish you all will shower your love on my this little effort.


X Promotion :- Tutorial on how to draw a traditional bride
Upvoted. Thank You for sending some of your rewards to @null. It will make Steem stronger.
Thank you so much Sir @damithudaya.
Wah bagus sekali gambar yang kamu buat, apalagi tutorial yang setail membuat saya ingin melakukannya juga saat waktu luang