A Baby Mermaid
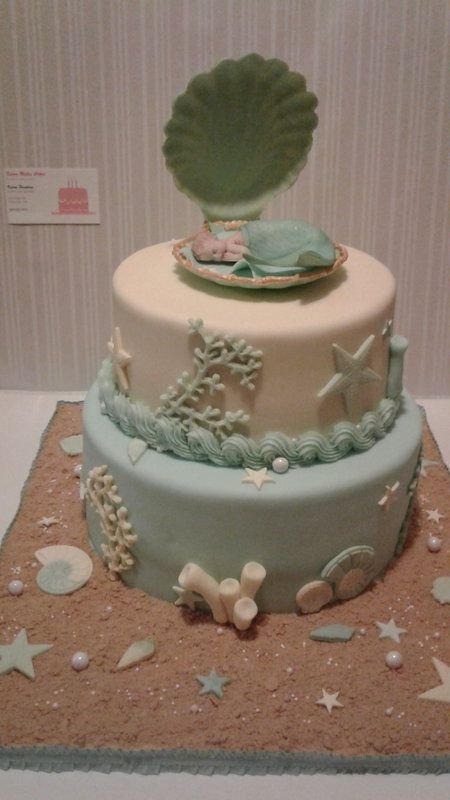
I had the pleasure this past weekend of making a cake for a mermaid themed baby shower. I've been a little preoccupied with babies lately since our son announced he and his wife are expecting another little one. Yay!!! I will be Nana twice now! (Baby #2 is due in May 2018.)
I was asked to make a specific topper for the cake (from pictures online) but the color and other details were left up to me. The mother doesn't know the gender of her baby so it had to be neutral colors. I chose pale yellow and aqua green. My client had sent several online pictures when she contacted me, so I had a pretty clear idea of what she wanted.

I started by making a sketch of the cake and drawing in the designs I liked most and what I felt complimented each other from all the photos she sent me. The decorative elements were made of fondant/gumpaste mixture, so they had to be started a few days ahead to allow time to dry. I used my Wilton silicone beach theme mold for the shells, starfish, sand dollars and coral. The smallest starfish are made with my star cutters. I blunted the tips a little with my finger and marked little dots all over the surface with the point of a modelling tool.
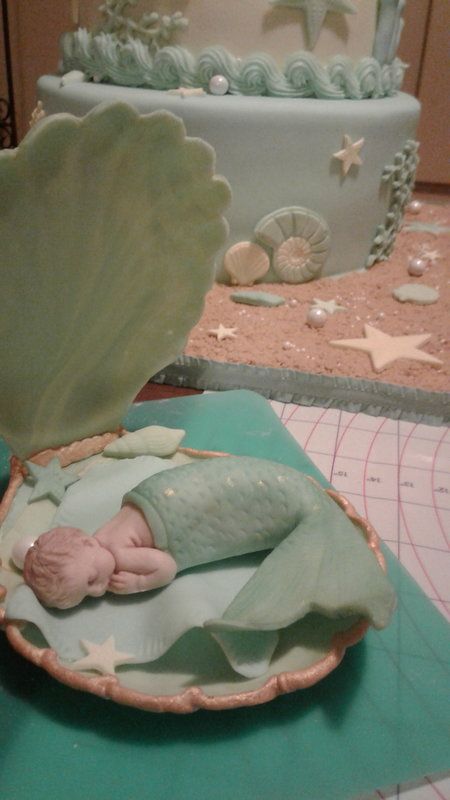
The topper had to be started early as well. I ended up making the baby mermaid twice because the tips of the fins broke off the first one while I was trying to dust it with edible petal colors for definition. At least I had allowed myself lots of extra time and got the second one finished without any panic. I liked the second one better!

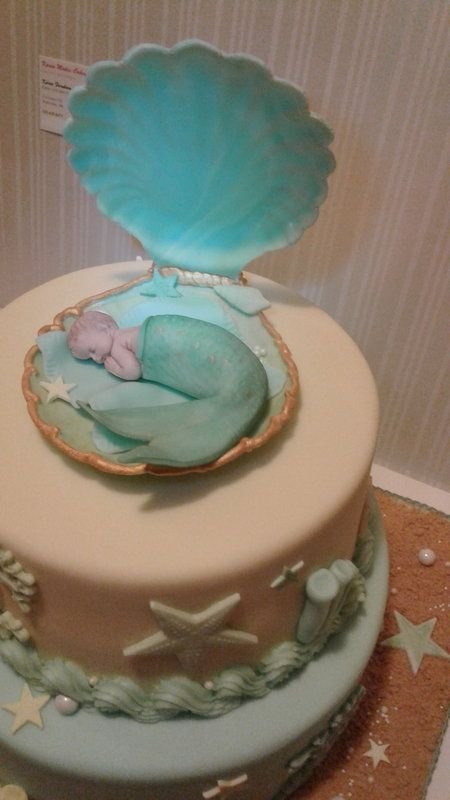
For the clam shell, I used a small silver tray I have had for ages to get the impression I wanted. After dusting the tray with a light coating of corn starch, I rolled out aqua green fondant/gumpaste very thin; almost translucent. Then I rolled out a very thin yellow and aqua marbled layer, very lightly moistened the green layer and laid the marbled fondant on top. I cut out a circle to fit the clam shell tray, placed it in the tray and smoothed it into the grooves of the clam shell. I trimmed the circle to fit the scalloped edge of the tray.
I left it a couple of days to dry, then I slipped it out of the tray and laid it over the bottom of a small bowl, placed upside down on the table, so the other side of the fondant shell could dry completely. It only took a few hours to finish drying and then I brushed some edible gold dust into the grooves on the inside of the shells and along the front edge. I piped royal icing along the back of one of the shells and propped the other one like it was a hinged clam shell. After it dried for a few hours, I piped a thin line of icing along the edge of the bottom shell, let it dry, and painted it with gold dust dissolved with a few drops of lemon extract.
The baby part of the mermaid topper was made with modelling chocolate in my small sleeping baby mold. I shaped the tail free hand. Using a Wilton round tip #2 I lightly pressed one side of the tip into the green fondant/gumpaste tail to make the scales. I made a few lines down each side of the fins for some definition with one of my modelling tools. I rolled a very small piece of the fondant/gumpaste to wrap around the top of the tail/waist of the baby to hide where the two sections came together. I used a mixture of green and light blue dust all over the mermaid tail to make it a little darker hue, then I brushed a little gold dust on the fins and a few random areas on the scaled tail. The baby's hair was dusted with a little cocoa, and a little bit of light pink all over. I mixed a little bit of cocoa with the pink to brush into the creases of the eyes, ears, arms and fingers, as well as along the waist line where the tail was attached.
The only other thing the topper needed was a blanket for the baby. I thinly rolled a piece of the aqua green fondant and cut out a square. Using the end of one of my modelling tools I marked a scalloped design along the edges. I draped the edges of the "blanket" over the handles of some of my tools and brushes to give it a wrinkled look. Once it was dried, I moistened the bottom of the clam shell, placed the blanket, then added a little water to the bottom of the baby mermaid and laid him/her on top of the blanket. I added a few pearl dragees and a white sixlet along with a tiny starfish and voila! Topper finished.

My client had requested gluten free cake so I also used gluten free graham cracker crumbs on the cake board for the "sand". Along with the shells and starfish, I sprinkled white sixlets, candy sprinkles and pearl dragees on the "sand" and also randomly place them on the cake.
This was such a fun cake to make. I hope you enjoyed my photos and details of my work. Thanks for stopping by!