SLC21/WK3 | Managing Bleeding: The Basics of Controlling External and Internal Bleeding
In the previous module, we covered CPR. I’m thrilled to welcome you all to Week 3 of Season 21 of the Steemit Learning Challenge! This module shifts focus to understanding bleeding and how to control it effectively. Managing bleeding is a fundamental skill that everyone should possess, whether it's a domestic helper at home, an office assistant, a server at a restaurant, or even a passerby. Knowing how to control bleeding can be crucial in emergency situations.
To be able to perfectly aid bleeding we must some basics of bleeding.
| Aspect | External Bleeding | Internal Bleeding |
|---|---|---|
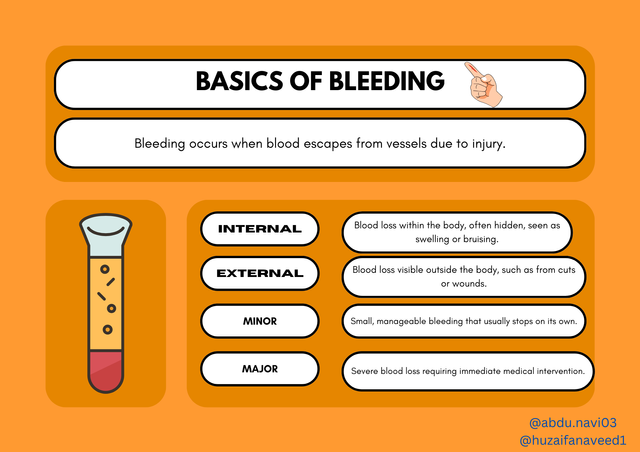
| Definition | It is the type of bleeding that occurs on visible areas of the body, like on the skin or through an open wound | This type of bleeding occurs inside the body and is not visible from the outside, only the hematoma colors (bluish/purplish color) can be seen. |
| Causes | External Cuts, abrasions, lacerations, puncture wounds, or traumatic injuries | Blunt trauma, Internal fractures (not causing skin injury), organ damage, ruptured blood vessels, medical conditions like burst ulcers or aneurysms. |
| Recognition | It is usually apparent by sight, Fresh blood (spurting or oozing from wound) is visible on the skin, wound, or clothes. | Although the blood is not visible but symptoms like bruising, swelling, pain, dizziness, fainting, or shock can be visible without an apparent external wound. Require medical imaging (CT scan, Ultrasounds) for confirmation. |
| Severity | This type of bleeding can range from minor to life-threatening, depending on the source, cause and location. | Internal bleedings are often more dangerous due to difficulty in diagnosing and controlling the bleeding without medical intervention. |
| First Aid Measures | Can help greatly in saving one’s life, Clean the affected area, apply direct pressure, use bandages, elevate the wound and in severe conditions apply tourniquet. If minor can be treated by first aider, but if major bleeding then surely medical care is required. | Although first aider can’t directly help the affected one, but can lower mortality by keeping the person still, calling emergency services immediately and monitoring for signs of shock. This type of bleeding is always managed by medical professionals, often requiring surgeries. |
CLASSIFICATION OF BLEEDING |
|---|
Managing external Bleedings as a first responder is the main objective of our class this week. External bleedings can be classified as minor or major bleeds.
| Aspect | Minor Bleeding | Major Bleeding |
|---|---|---|
| Definition | Small blood loss with minimal risk to life. These include bleeding from small puncture wounds like by a needle or thorn, cuts, abrasions, scrapes, or capillary bleeds. | Large amount of blood is lost, often life-threatening. These include traumatic injuries, amputations, severe laceration or gunshot wounds, minor skull injuries are also considered as major bleeding. |
| First Aid/Management | These are easily controlled with basic first aid techniques and hence no further hospital runs are needed. | Requires first aid plus immediate medical attention. |
| Management Steps | Management includes cleaning the area, applying direct pressure and a bandage, these are usually sufficient. | Necessary management includes cleaning the affected and side-by areas, applying direct pressure, tourniquet application, and monitoring for shock. |
| Pain/Discomfort | Minor bleeding causes minimal to no pain or discomfort beyond the wound area. | Major bleeding causes significant pain and discomfort; requires quick intervention to prevent shock. |
SEVERITY OF BLEEDERS |
|---|
To manage the bleeding, first we need to classify the situation we are going to manage, as if the bleeding is minor or major? If major then what’s the severity? Here’s a basic protocol that first responder needs to know to manage the casualty accordingly.
A) Locating Bleeder: First of all, first responder needs to know all the locations on the body that are actively bleeding, if the bleeder is a minor bleeder on non-visceral area like forearm, hand or leg region it is less severe, but if it’s on visceral area (neck) with massive bleeding it is categorized as most severe.
B) Amount of Blood Loss: Then check for how much blood has been lost, Large, continuous blood loss indicates severe bleeding.
C) Amount per Time: Rapid onset of large blood loss over a short period points to a higher severity. (for example, in femoral artery bleeder 1L of blood loss in 1 minute)
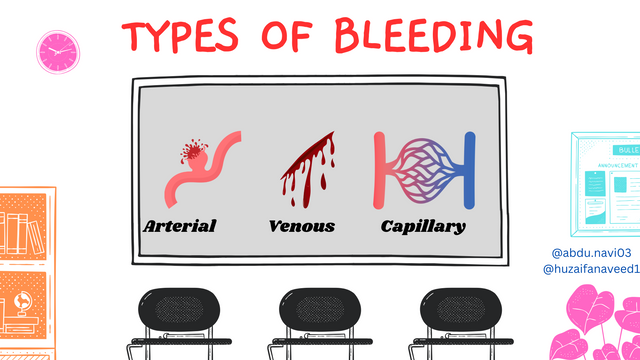
D) Flow Characteristics and Color of blood: Then check for flow and color of blood, it can help in distinguishing the origin of bleeder is artery, vein or capillary.
| Characteristic | Arterial Bleeding | Venous Bleeding | Capillary Bleeding |
|---|---|---|---|
| Source | Bleeding is from an artery. | Bleeding is from a vein. | Bleeding is originating from capillaries. |
| Severity | High, as it is life-threatening. If a larger artery (femoral on leg or carotid artery in neck) bleeds for 3-5 minutes, it can cause death. | Moderate to severe. | It’s of low severity, typically not life-threatening. |
| Blood Color | Blood is bright red. | Dark red blood. | Can be both, dark red or bright red. |
| Blood Flow | Spurting blood rhythmically in time with the heartbeat. | Steady and rapid blood flow from bleeder. | Slow and oozing blood flows from bleeder. |
| Initial Management | Clean the side-by area and apply direct, firm pressure with a sterile cloth/dressing. If pressure fails, then apply a tourniquet above the wound. | After cleaning the side-by area, apply continuous pressure with a sterile dressing. Elevate the affected limb if possible, maintain pressure until bleeding stops. | Clean the wound, apply pressure with a sterile bandage. |
E) Bleeding that Doesn’t Stop: If bleeding continues even after firm pressure, it indicates severity.
F) Shock Symptoms: symptoms of shock like Pale, cool and clammy skin, Rapid but weak pulse, rapid breathing, dizziness, confusion or loss of consciousness indicates that a lot of blood has been lost, thus a severe condition.
FIRST RESPONSE TO CONTROL BLEEDING |
|---|
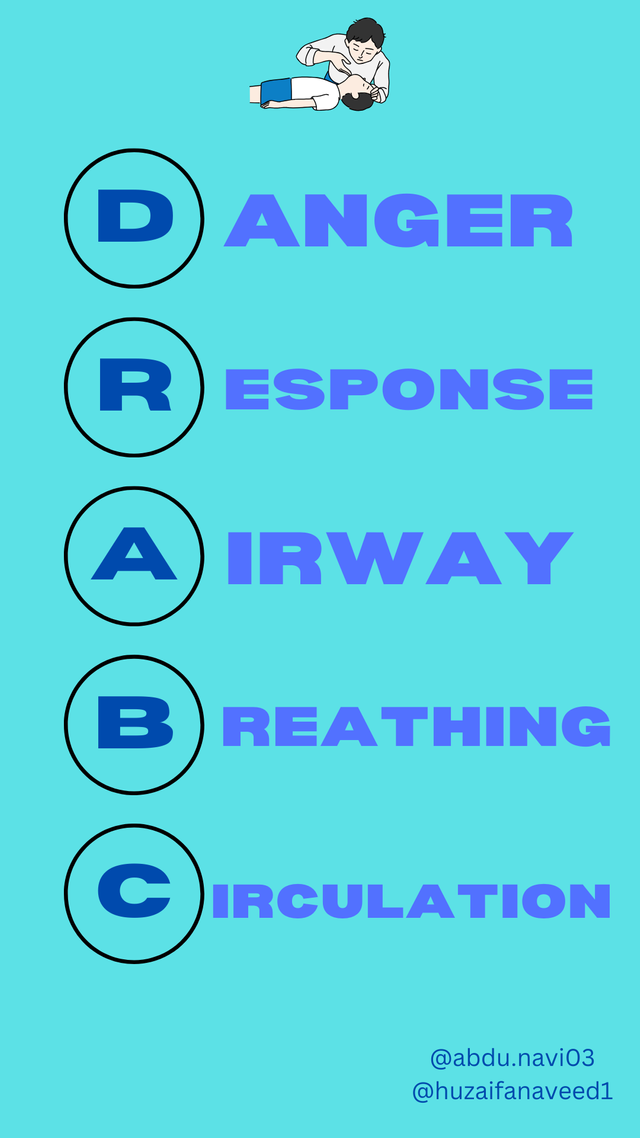
After learning the basics of bleeding, now we will move towards how to manage such conditions in which one is bleeding. Remember form the first ever module- the DRABC protocol, it will be adopted in every condition.
Follow DRABC Protocol:
Check for scene safety first, move the casualty to a safer area away from bleeding or injury causing substances. Ensure your own safety; wear protective gloves or use a barrier (plastic wrap or cloth) to avoid direct contact with the blood. Check for casualty’s response by tapping on their shoulders, check airways, breathing and circulation. Call for emergency services and summon them for help.
Position the Casualty
Lay down the person straight on the ground and if possible, elevate the injured area above the level of the heart to reduce blood flow. If the person is conscious and injury on limbs then ask the casualty to sit with back supported.
Expose the Wound
Then remove or cut clothing to clearly see the wound and assess the bleeding.
Do not remove the indulge objects:
If there’s an object that has caused the injury like dagger, knife, sharp glass or any other object, do not try to displace or remove that object as it can lead to more massive and uncontrolled bleeding. Moreover, do not apply pressure directly over the impaled object rather around the wound to control the bleeding.
Apply Direct Pressure
On external bleeders place a sterile cloth or dressing directly on the wound and press firmly with both hands. Maintain steady pressure without removing it to check the wound until the bleeding stops, because it can lead to incomplete blood clot formation.
Here are some conditions were applying direct pressure is prohibited:
1.Internal Bleeding: If you are suspecting an internal bleeding (e.g., abdominal trauma), do not apply direct pressure to the area you’re suspecting internal bleeding, as this could worsen the bleeding or damage internal organs.
2.Eye/Head and Neck Injury: If the bleeding is coming from the eye, avoid applying direct pressure to the eyeball, as this could cause damage to the already affected eye, instead apply gentle pressure around the eye. Same goes for skull.
3.If the bleeding is from a large artery (such as the carotid or femoral artery), although direct pressure can be applied but it is not effective enough to stop the bleeding. In such cases, it is better to apply a tourniquet to control bleeding.
4.Suspected spinal injury: If you are suspecting a spinal injury (neck or back injury) avoid applying pressure to the bleeders as it can exacerbate the injury.
5.Severe burns: Direct pressure should not be applied to the burnt area of the body, even if its bleeding massively.
6.Use a Pressure Bandage
If bleeding continues, even after applying pressure then wrap a bandage tightly over the dressing to maintain a tight continuous pressure. Ensure it is snug but not so tight that it cuts off circulation.
It is crucial to learn how to apply the bandage in different parts of the body, the applying method and wrapping methods are modified according to the area where bandage is applied, In this module we will learn how to apply bandage on forearm.
STEPS TO APPLY BANDAGE ON THE FOREARM |
|---|
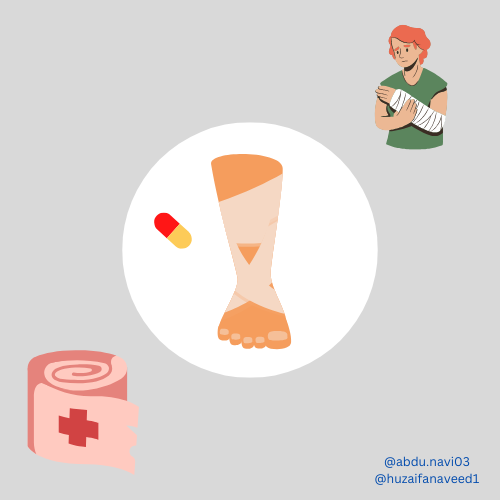
1. Prepare the Bandage and Materials:
First collect all the necessary things you will be requiring.
- Sterile bandage (Roll of gauze or a pre-packaged sterile dressing).
- Scissor to cut the bandage to the required length.
- Clean water or antiseptic solution, to clean the wound.
2.Position the Casualty:
If the bleeder is on forearm the patient must be conscious. So, ask the casualty to sit comfortably with their arm extended in a relaxed position. If the person is unconscious, ensure the arm is supported comfortably, and the forearm is accessible.
3.Apply Dressing:
Clean the wound, place a sterile dressing or gauze stake over the wound to prevent further blood loss, apply gentle pressure.
4.Wrapping the Bandage:
• Begin the bandage about 2-3 inches below the elbow (around the forearm area).
• Make sure the loose end of the bandage covers the edge of the wound dressing by holding it against the forearm.
• Wrap the forearm with the bandage, spiralling it upward. Ensure that the bandage is flat and not twisted.
• Make sure that every turn you make covers the one before it by roughly half the bandage's breadth.
• Wrap the bandage tightly, but too tightly. You should be able to fit a finger between the bandage and the skin to avoid cutting off circulation.
• Continue wrapping until the entire wound area is covered, or until you reach 2-3 inches above the wrist.
• The bandage should be secure, but it should not feel tight enough to cause discomfort or restrict blood flow.
• After the bandage is in position, tie a knot, use an adhesive strip, or a safety pin to bind the loose end. To keep a gauze bandage in place, the end is tucked under the last layer.
• Do not remove the bandage if its soaked in blood, apply another bandage on top of it and continue placing the other one on top of one after the other.
5.Check Circulation:
Check the casualty’s hand for signs of restricted circulation like coldness, numbness, or bluish color. If yes, then loosen the bandage slightly to allow blood flow.
6.Check for Further Bleeding:
Keep an eye on the bandage for any fresh bleeding. If blood leaks through, apply additional dressing on top of the current bandage without removing it.
7.Elevate the Limb
If the bleeding is from limbs, raise the injured limb above heart level to help slow the bleeding, unless it causes pain or further injury.
8. Apply a Tourniquet (If Necessary)
If applying direct pressure fails to stop severe bleeding, apply a tourniquet 2-3 inches above the wound and not over a joint.
Although there’s market available tourniquets (commercial tourniquets) but of-course not everybody and every time is ready for such emergency conditions, in such conditions cloth strips can be used for such purpose. Here we will learn how to apply tourniquet with a cloth.
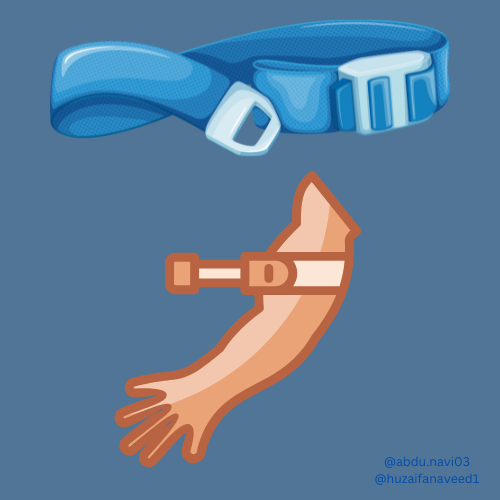
- Choose a Wide Cloth: Use a clean, wide piece of cloth (like, scarf or bandage). Avoid thin materials (shoelaces) as they can cause skin damage.
- Position the Cloth: Place the cloth 2-3 inches above the bleeding site, it should be above any joints (e.g., elbow, knee).
- Tie the Initial Knot: Tie a single knot firmly around the limb to secure the cloth.
- Insert the Windlass: Now place a rigid object (stick, pen) on top of the knot. Tie a second knot over the object to secure it in place.
- Twist to Tighten: Twist the windlass to tighten the cloth until the bleeding stops completely. Ensure it’s tight enough to stop bleeding but not overly tight to cause pain or tissue damage.
- Secure the Windlass: Once bleeding stops, secure the windlass by tying the loose ends of the cloth around it.
- Note the Time: Record the time the tourniquet was applied, write this time with the help of pen on the bandage.
- Do Not Remove: Keep the tourniquet in place until professional help arrives to prevent additional blood loss.
- Monitor the Casualty: Watch for signs of shock and keep the person as calm as possible while waiting for emergency services.
| Aspect | Commercial Tourniquet | Improvised Tourniquet (Cloth) |
|---|---|---|
| Material | Made of durable, specialized materials with a built-in windlass | Cloth (e.g., scarf, bandage, shirt) and a rigid object (stick, pen) |
| Ease of Use | Easier and faster to apply due to built-in components | May take longer and requires more skill to tie securely |
| Effectiveness | Highly effective when applied correctly | Effective but may not be as reliable due to variable tension and material strength |
| Comfort | Designed to minimize unnecessary damage | May cause discomfort or damage if thin material is used |
9. Monitor for Shock and Re-assure the casualty:
Lastly, wait for the emergency services to arrive until then check for any signs of shock and keep the casualty warm and calm.
HOMEWORK |
|---|
Q1. Apply a bandage to the forearm of any peer, family member, or child. Attach a picture as proof and outline the steps you followed to apply the bandage.
Q2. Apply a cloth tourniquet to any peer, family member, or child. Write down the steps for applying the tourniquet. Explain how, when, and by whom a tourniquet should be removed.
Q3. Case Study 1:
You are treating a person who has sustained a deep cut on their forearm following a car accident. The wound is bleeding heavily, and the person is feeling faint.
a) What steps should you take to control the bleeding?
b) How would you assess whether the bleeding is arterial, venous, or capillary?
c) What would you do if pressure alone does not stop the bleeding?
Q4. Case Study 2:
A person has fallen from a height and complains of pain in their abdomen. They have swelling and bruising in the abdominal area, and you suspect internal bleeding.
a) What should you do as a first aider to manage the situation?
b) Why should you avoid applying direct pressure to the abdomen?
c) What signs of shock should you look for, and how should you respond?
Q5 Create an Infographic (Visual Illustration) on Stopping Bleeding
Design a simple infographic that explains the basic steps to stop bleeding. Include how to apply pressure to the wound, when to use a bandage, and when to seek medical help. Your infographic should be easy to understand and show simple instructions for controlling bleeding from cuts or scrapes.
RULES |
|---|
Your title should be "SLC21/WK3: Managing Bleeding: The Basics of Controlling External and Internal Bleeding"
Make sure to use the #firstaid-s21w3 , #steemexclusive, #teachingteam , #learnwithsteem tags, and your country's tag (e.g., #pakistan)
Plagiarism or the use of artificial intelligence of any kind will not be tolerated.
Only your own images will be accepted (Try to create it on various softwares like Canva, etc) Images for free use will not be allowed.
Write a minimum of 800 words
The link of your task must be added in the comments of this publication.
Use the #burnsteem25 tag only if you have set the 25% payout to @null.
You can publish homework in any community and in any language. But don't forget to use the original tag.
Invite three of your active Steemian friends.
The participation schedule is between Monday, November 10, 2024, at 00:00 UTC to Sunday, - November 17, 2024, at 23:59 UTC.
REWARDS |
|---|
SC01/SC02 would be checking on the entire 17 participating Teaching Teams and Challengers and upvoting outstanding content. Upvote is not guaranteed for all articles. Kindly take note.
At the end of the contest, I will be nominating four (04) users who have had a great performance in the contest and have complied with the previously established, and therefore, are eligible to receive SC01/SC02 votes.
—----
Contact Information (Discord)
@abdu.navi03 (abdu.navi03)
@huzaifanaveed1 (huzaifa_1114)
Best regards,
Dr @abdu.navi03
Dr @huzaifanaveed1
Amazing knowledge. 👍
https://steemit.com/hive-141434/@aril.hatake/slc21-wk3-or-managing-bleeding-the-basics-of-controlling-external-and-internal-bleeding
https://steemit.com/hive-118902/@xkool24/slc21-wk3-managing-bleeding-the-basics-of-controlling-external-and-internal-bleeding
It has been a while since we returned to Steemit platform and loving the new challenges and good content. Keep that up and hopefully when time permits, will come visit more often.
Best wishes!
https://steemit.com/firstaid-s21w3/@uzma4882/slc21-wk3-or-managing-bleeding-the-basics-of-controlling-external-and-internal-bleeding
SLC21/WK3 | Managing Bleeding: The Basics of Controlling External and Internal Bleeding
Here is my entry:
https://steemit.com/hive-168205/@ahsansharif/slc21-wk3-managing-bleeding-the-basics-of-controlling-external-and-internal-bleeding
My entry
https://steemit.com/hive-168205/@rossnenye/slc21-wk3-managing-bleeding-the-basics-of-controlling-external-and-internal-bleeding-by-rossnenye