MSI Z170 7 GPU BIOS Setting step by step
MSI Z170A GAMING PRO CARBON have 7 PCIE-E slots,it's a good motherboard to build mining rig.
Old BIOS is hard to MOD and only can run 6 GPU at same time.
How to use old BIOS MOD to success 6 GPU see my blog old past (link)
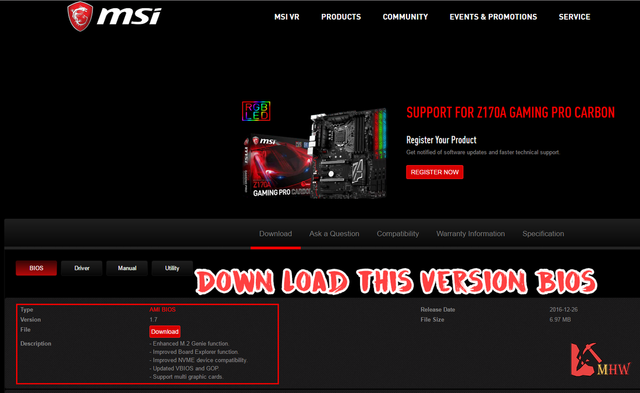
2016-12-26 MSI release new BIOS version 1.7 for Z170 and Z170A motherboard
It's easy to setting and successful mining 7 GPU at same time.
My mining rig:
(1)CPU : Intel® Celeron® Processor G3900
(2)Motherboard : MSI Z170A GAMING PRO CARBON
(3)GPU : MSI GAMING X RX 470 4GB * 6 and MSI GAMING X RX 470 8GB * 1
(4)Memory : Kingston 8GB DDR4 2400
(5)SSD: 120GB
(6)PSU : CORSAIR RM1000X
(7)Other : USB 3.0 PCI-E Express 1x To 16x Extender Riser Card Adapter X6
(8)System : Windows 10
Step 1. Download BIOS Version 1.7
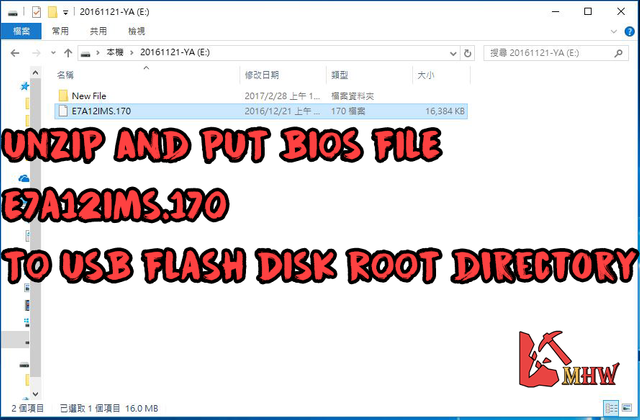
Step 2. Unzip and put BIOS file E7A12IMS.170 to USB flash disk root directory.
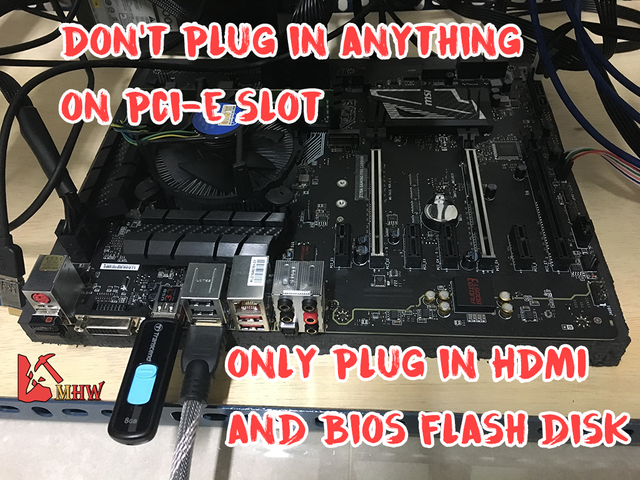
Step 3.
Shutdown computer and don't plug in anything on PCI-E slots.
Only plug in HDMI cable and BIOS USB flash disk.
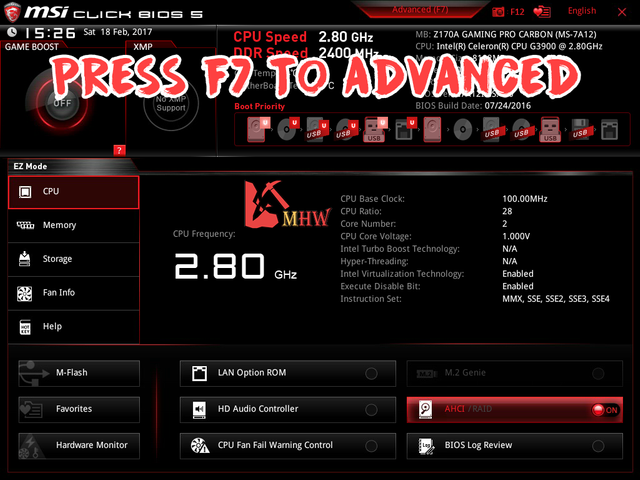
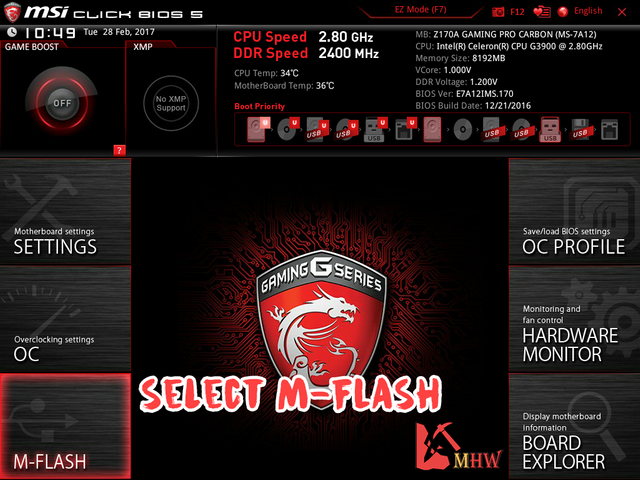
Step 4. Boot up and into BIOS and press F7 to Advanced.
Step 5. SELECT M-FLASH
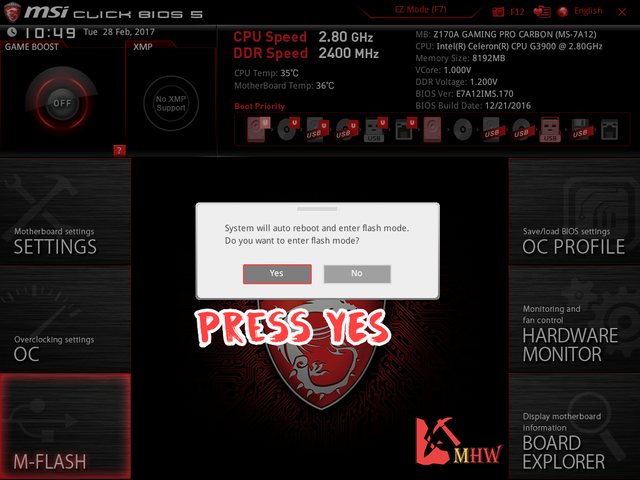
Step 6. Press Yes to Auto reboot enter flash mode.
Step 7. M-Flash mode
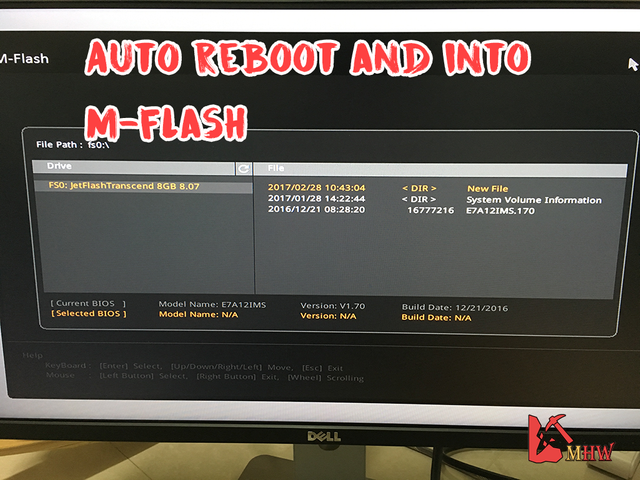
Step 8. Select BIOS file E7A12IMS.170 and press YES to flash BIOS.

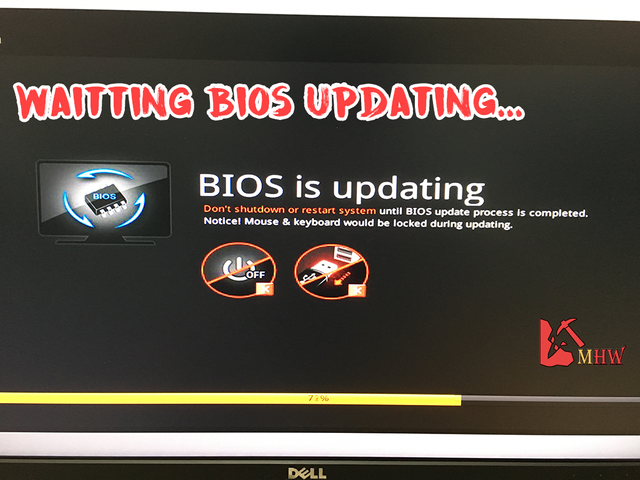
Step 9. Waitting BIOS Updating
Step 10. Into BIOS
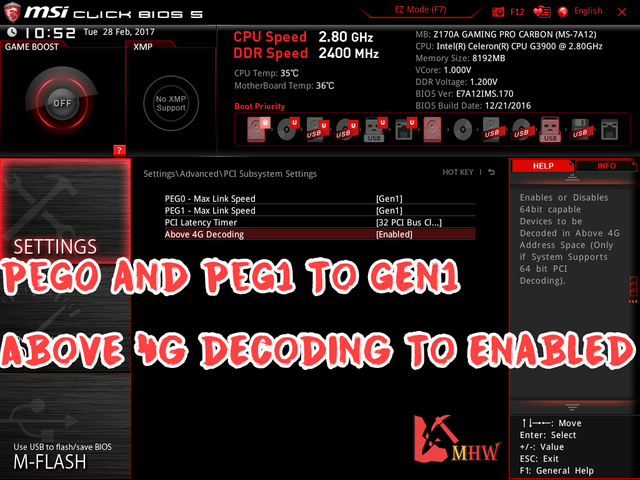
Settings>Advanced>PCI subsystem Setting
PEG 0 and PEG 1 set to Gen1
Above 4G Decoding set to Enabled
Step 11.
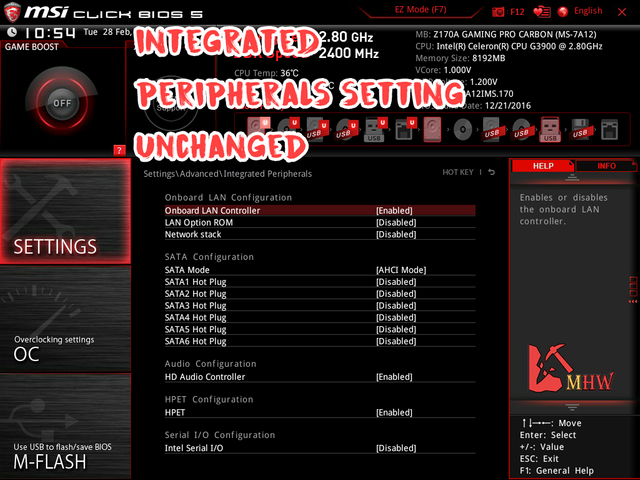
Settings>Advanced>Integrated Peripherals
Unchanged
Step 12.
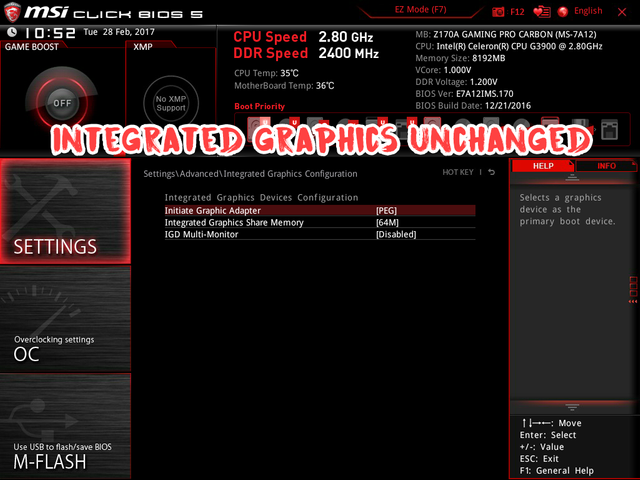
Settings>Advanced>Integrated Graphics Configuration
Unchanged
Step 13.
Save change BIOS and shutdown computer.
Plug In all USB extender riser and HDMI cable plug In Graphics card.

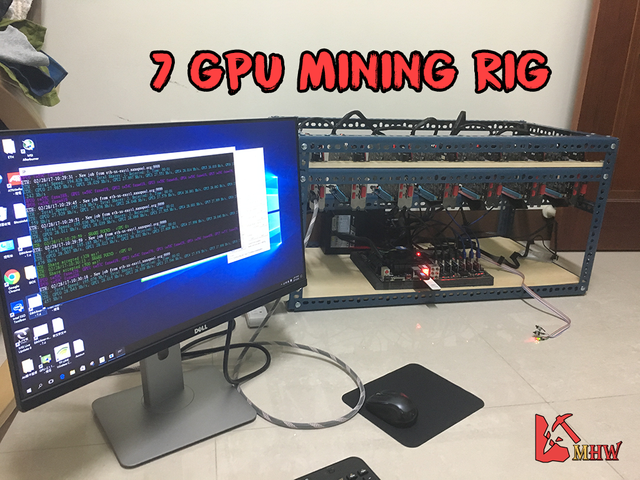
Step 14. Boot up into Win 10 the 7 GPU is get.

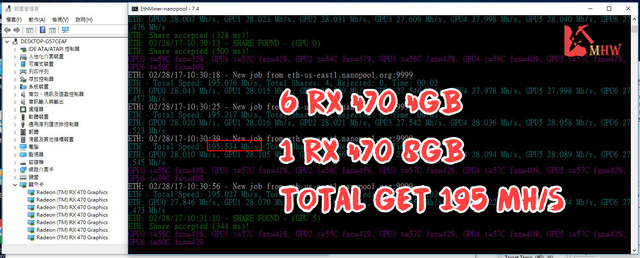
Step 15. ETH mining Claymore can detect 7 GPU.

Step 16.
MSI GAMING X RX 470 4GB *6 +
MSI GAMING X RX 470 4GB *1 = 195 Mh/s ETH
Step 17. This is my 7 GPU mining rig
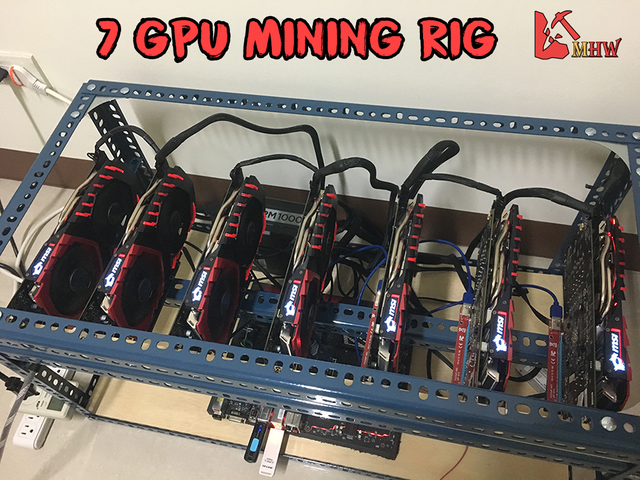
Step 18. This is easy to build 7 GPU mining rig.
Tuning GPU see my blog: How to distinguish GPU quality to tuning your GPU
RX 470 4GB BIOS MOD see my blog:MSI GAMING X RX 470 4GB BIOS MOD Hynix chip 28 Mh/s
RX 470 8GB BIOS MOD see my blog:MSI GAMING X RX 470 8GB BIOS MOD Micron chip 28 Mh/s
Hope it helps you.
Old BIOS is hard to MOD and only can run 6 GPU at same time.
How to use old BIOS MOD to success 6 GPU see my blog old past (link)
2016-12-26 MSI release new BIOS version 1.7 for Z170 and Z170A motherboard
It's easy to setting and successful mining 7 GPU at same time.
My mining rig:
(1)CPU : Intel® Celeron® Processor G3900
(2)Motherboard : MSI Z170A GAMING PRO CARBON
(3)GPU : MSI GAMING X RX 470 4GB * 6 and MSI GAMING X RX 470 8GB * 1
(4)Memory : Kingston 8GB DDR4 2400
(5)SSD: 120GB
(6)PSU : CORSAIR RM1000X
(7)Other : USB 3.0 PCI-E Express 1x To 16x Extender Riser Card Adapter X6
(8)System : Windows 10
Step 1. Download BIOS Version 1.7

Step 2. Unzip and put BIOS file E7A12IMS.170 to USB flash disk root directory.

Step 3.
Shutdown computer and don't plug in anything on PCI-E slots.
Only plug in HDMI cable and BIOS USB flash disk.
Step 4. Boot up and into BIOS and press F7 to Advanced.

Step 5. SELECT M-FLASH

Step 6. Press Yes to Auto reboot enter flash mode.

Step 7. M-Flash mode

Step 8. Select BIOS file E7A12IMS.170 and press YES to flash BIOS.

Step 9. Waitting BIOS Updating

Step 10. Into BIOS
Settings>Advanced>PCI subsystem Setting
PEG 0 and PEG 1 set to Gen1
Above 4G Decoding set to Enabled

Step 11.
Settings>Advanced>Integrated Peripherals
Unchanged

Step 12.
Settings>Advanced>Integrated Graphics Configuration
Unchanged

Step 13.
Save change BIOS and shutdown computer.
Plug In all USB extender riser and HDMI cable plug In Graphics card.

Step 14. Boot up into Win 10 the 7 GPU is get.

Step 15. ETH mining Claymore can detect 7 GPU.

Step 16.
MSI GAMING X RX 470 4GB *6 +
MSI GAMING X RX 470 4GB *1 = 195 Mh/s ETH

Step 17. This is my 7 GPU mining rig

Step 18. This is easy to build 7 GPU mining rig.

Tuning GPU see my blog: How to distinguish GPU quality to tuning your GPU
RX 470 4GB BIOS MOD see my blog:MSI GAMING X RX 470 4GB BIOS MOD Hynix chip 28 Mh/s
RX 470 8GB BIOS MOD see my blog:MSI GAMING X RX 470 8GB BIOS MOD Micron chip 28 Mh/s
Hope it helps you.