Adjusting an ergonomic chair
Hey guys!
Following my first post on « Choosing a proper ergonomic chair », the logical question that comes next is… « How do I adjust it for my body size? ». My goal in this post is to go beyond the typical guidelines sheet that you can Google and help you make all the proper compromises and solutions to set yourself up to avoid developping MSDs.
First, allow me to repeat what your mother said when you were 3 years old : « Sit your butt at the end of the chair, and use your backrest ». Of course we don’t think of a « technique » or a « method » to sit – however, if you don’t sit properly, you might have the costliest, most adjustable chair ever, you’ll still put yourself at risk.
So, let's begin!
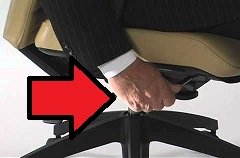
1. Adjust the chair height : lower or raise your chair so that your hips and knees are parallel to the ground / so that if you had a platter full of coffee cups on your thighs, they would be stable.
On 3-lever chairs, the middle one is usually height. If your weight is on the chair and you lift the lever, the chair goes down. If you take your weight off the chair and lift the lever, the chair goes up.
In my experience, most people sit on chairs that are too high. If you’re reading this right now and your feet are on the legs of the chair, it’s your case too! If you sit on a chair that’s too high, the edge of the seat will compress your hamstrings and inhibit blood flow, hence the feet on the legs : to increase circulation. If your chair is too low, you’ll get a « flat butt » feeling, the same one you had in elementary school when sitting on wooden chairs.
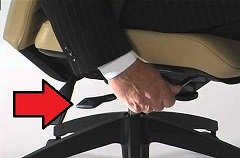
2. Adjust the chair tilt : very slightly tilt the seat backwards.
On typical 3-lever chairs, the first one (closest to the knees) controls the tilt. Lift the level up, use your hips and bodyweight to adjust the tilt, and push the level down.
A very light tilt backwards, pretty much like a car seat’s, will encourage you to slide to the end of your chair and be comfortable.
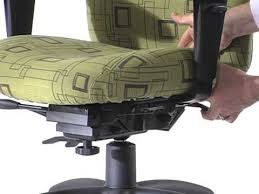
3. If applicable, adjust the seat depth : you should have a finger’s distance between your seat edge and your calf.
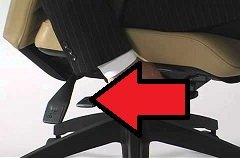
Some chairs do not have this adjustement. Those that do usually have a long, thin metal handle underneath the seat pan between your legs, or it is on your left-hand side, near the backrest. While standing up in front of your chair with a foot on one of the chairs, lift the handle and with your free hand, pull the seat towards you.
If you are tall and the chair seat is too short for you, you will have a lot of pressure on your buttocks (flat-butt syndrome!)
4. Adjust the backrest height : your inwards lumbar curve your should be filled by the outwards curve of the backrest.
Most chairs have a backbone that is tightened with a plastic screw. On some other models, you have to pull the backrest upwards to activate the mechanism, which will « click » one notch higher.
So when your momma told you to « keep your back straight », perhaps she didn’t know it, but she meant « keep your lumbar curve », and the chair will help you keep it supported without effort.
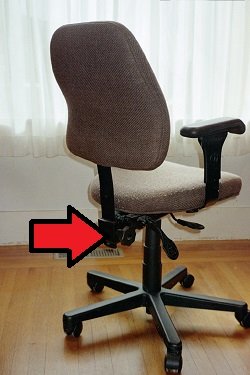
5. Adjust the backrest tilt : be as upright as possible, without feeling pushed out of your seat.
On a 3-lever chair, the farthest one (closest to the backrest) usually controls the tilt. Pull it upwards to unlock the mechanism, and use your torso to control the tilt of the backrest by leaning to the front or back. When you feel like it is at the right place, let go of the lever.
If you feel like your shoulder blades & upper back are not supported, tilt the backrest forward. If you leave your backrest too far backwards, your head will naturally protract and you might grow old with excessive cyphosis (dowager’s hump) – not a good look!
6. Adjust the armrest width : have your elbows resting underneath your shoulders.
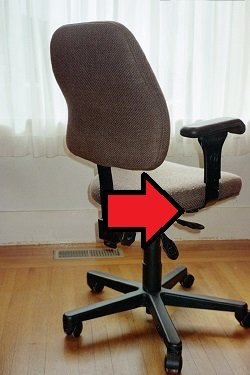
On typical chairs, a screw shaped like a star or a flower can be found underneath the armature of the armrest (underneath the seat), which locks the armrest into place. Loosen it, move the armrests to desired position, and screw them in place.
Having your elbows abducted (elevated sideways from your torso) with even just a little amplitude is enough to inhibit blood flow and be uncomfortable.
7. Adjust the armrest height : have your forearm parallel to the ground, with the elbow touching the armrest but without shoulder elevation.
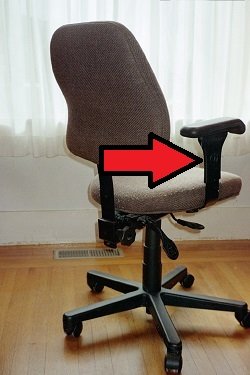
Most chairs have either a screw on the outside of the armrest, or a button that you can pinch in order to raise or lower the armrests.
The armrests are too low if your elbows do not touch it. You can tell they are too high if you leave you arms hanging outside the armrests and bring them in. If your shoulders elevated, the armrests are slightly too high.
Once you go through these steps in sequence, you should be pretty well set up in your chair. If you were not able to follow the sequence because your chair doesn't have the aformentionned ajustements, fear not! It is not a death sentence. However, the longer hours your spend working in a chair, the more worthwhile it is to acquire a proper chair. See my guide on choosing the proper ergonomic chair for details.
Of course, sitting is still a static posture which you do not want to maintain for prolonged periods of time - even if you have the best ergonomic chair in the world, even if it is properly adjusted, try to stand up AT LEAST once per hour for a minute.
Did this sequence work for you? Are you an "outlier" who needs help? I'd be happy to oblige !
