EOS Token Distribution Overview & Guide
This is a guide to participating in the EOS Token distribution as well as a general overview, you can skip this first part if all you want to know is how to participate.
Why EOS ?
In layman's terms, Bitcoin is digital money, Ethereum is digital money with a calculator on top you can program to do cool things ( like make new tokens to fund your awesome project ), and EOS aims to be a better Ethereum. As an Ethereum/Smart Contract Developer myself, let me be the first to tell you that they have a point, Ethereum while awesome has a ton of growing pains (scalability, developer experience, feature set, etc,etc) EOS might provide a much friendlier and efficient ecosystem...or not.
The plan
First let's be clear, EOS is in startup mode, there is a deadline and some preliminary code. The point of their Token distribution which ironically uses the Ethereum platform is to raise funds by issuing tokens you buy with Ether, once the distribution is done (June 1, 2018 ), your tokens will be reborn as native currency in the EOS Blockchain. At least that's the plan, EOS makes it clear they don't guarantee anything.
How Much ?
At current trading prices EOS is already trading at roughly 1/6th of Ethereums capitalization, and 1/12 that of Bitcoin, so the upside potential is there, on the other hand it could fail in a number of ways in which case it's value will probably be more towards zero ($0).
As far as investments come this one is on the highly risky side of things, it is also somehow technically challenging to participate on the Initial distribution ( I'll try making it simple), so just invest what you are willing to loose and by all means do your homework by reading everything in their site:
How to participate :
Step 1 - Day 1 - Funding
Get some Ether, the most common way of getting ether is through an exchange.
Step 2 - Day 1 - MEW
Open a wallet in MEW (MyEtherWallet), make sure you are at the right site so you don't get phished:
https://www.myetherwallet.com/
or get the address from the github repo by searching google.
Opening a wallet on MEW (Quick Way):
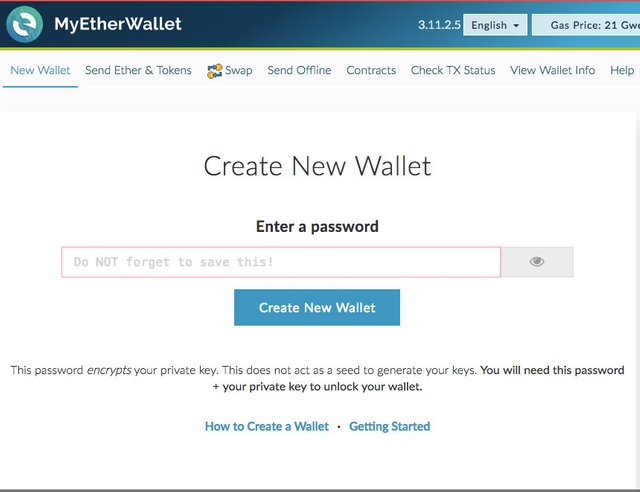
- Read all the notices and start by entering a password to create a wallet:
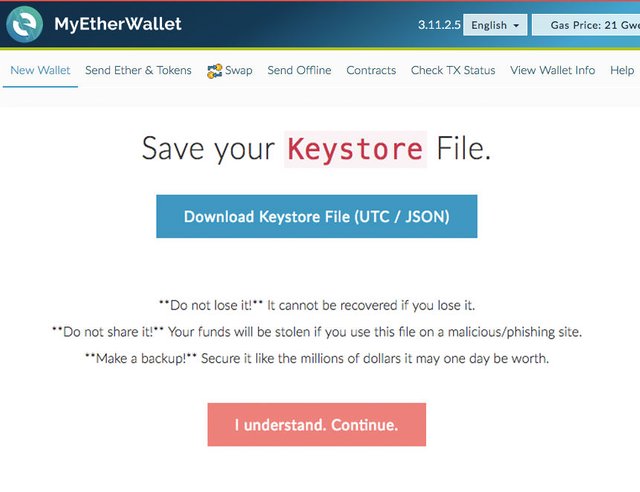
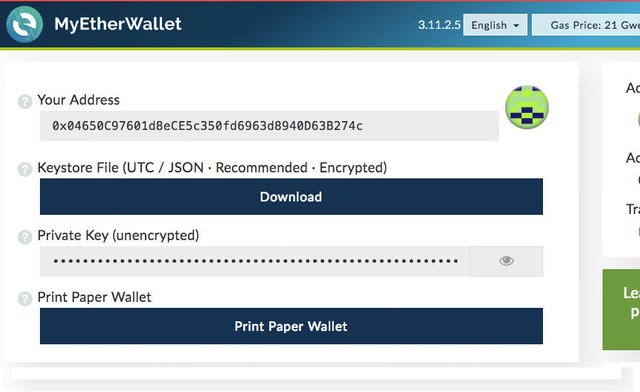
- Next save your Keystore in a safe place:
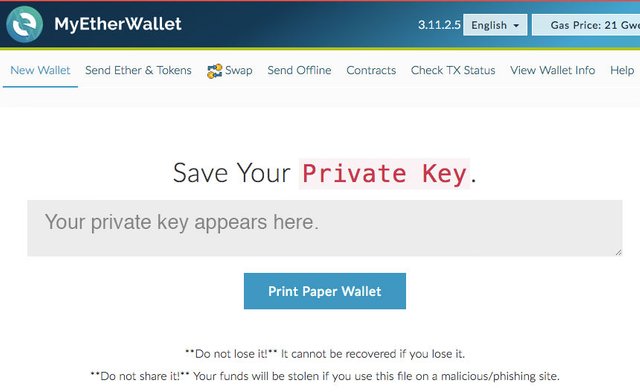
- Save your private key as well, this one is also a sensitive piece of information, so don't share it.
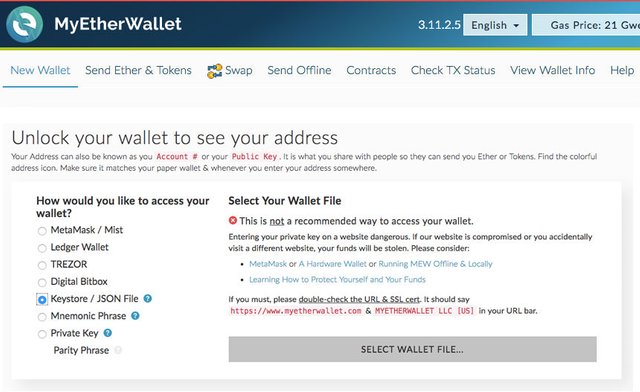
- Now you need to get your address by unlocking your account with the keystore file and your password:
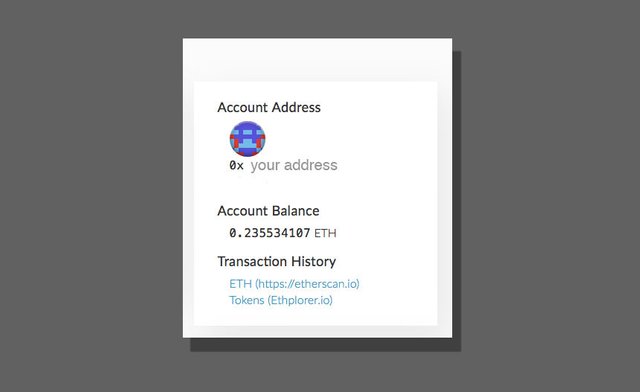
- And finally you get your account address with a 0 ETH balance:
Before you proceed, make sure you have the following information at hand:
- Your Wallet address
- Your Private key
- Your Encrytped Keystore file
- Your password for the Keystore File.
Step 3 - Day 1 - TRANSFER TO MEW
Transfer your Ether from your exchange to your MEW address, this will be different based on your exchange.
Once this is done, you will have a positive balance in your MEW wallet you can consult:
Step 4 - Day 1 - Calculate Transaction Costs
This is a very important step, calling contracts and sending transactions costs fees in the form of gas (GAS * Gas price) in the Ethereum network, so if you were to just send the amount of ether you have in your wallet, you will be left without Ether to pay for claiming and registering your EOS tokens, additionally, if you don't use the correct gas price your transactions might get stuck and you'd loose that gas.
Let's first calculate the costs:
- Transfer: 51,416 gas
- Claim: 66,253 gas
- Register: 90,558 gas
Grand Total : 208,227 gas
Now gas price is variable, you can consult the current rates here:
As of this writing (late January 2018) I am using these prices for my contracts.
High traffic period gas price (gwei): 40
Low traffic period gas price (gwei): 3
I'll go with a medium price of 10 gwei for this tutorial.
Total Cost :
10(gwei)* 208,227 gas = 2,082,270 gwei = 0.00208227 ETH
So you will have to subtract this amount or a similar one (lower or higher depending on current gas price) to your wallets balance, in this case:
0.235534107 - 0.00208227 = 0.233451837
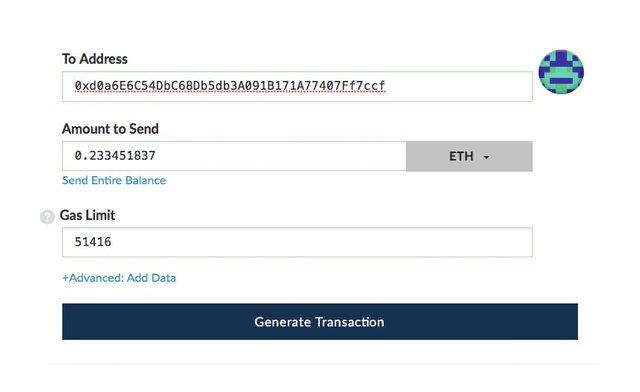
This is the amount that we will be sending to the EOS TOKEN distribution contract and it will leave us enough in our wallet to claim and register our tokens.
Step 5 - Day 1 - THIS IS IT.
Transfer your Ether from your MEW Wallet to the EOS Token distribution contract, get the address from the eos page:
It should match this address:
0xd0a6E6C54DbC68Db5db3A091B171A77407Ff7ccf
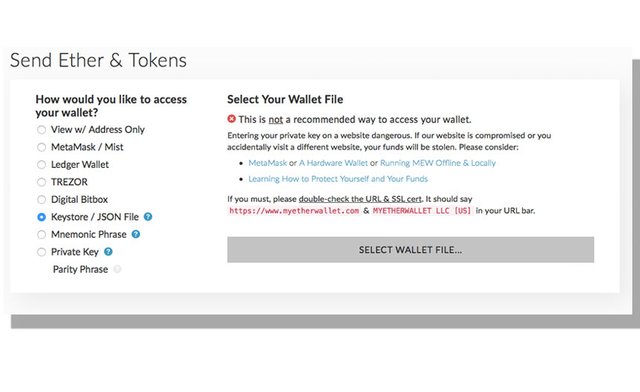
In MEW start by selecting the send Ether & Tokens tab and unlock your wallet with the Keystore/JSON File + your password:
In the next screen input the amount you calculated on the previous step, the gas limit will auto populate.
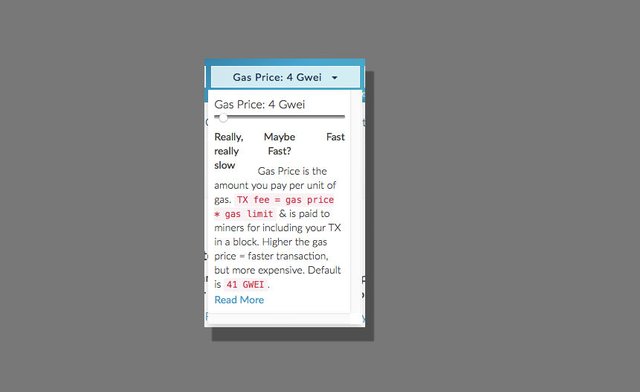
Change the gas price slider to suit your needs and balance,I lucked out and the network was having low transaction fees, so I went with 4 gwei rather than the 10 previously discussed:
Click generate transaction followed by send transaction and confirm the amount & address are right, you will then be given a txHash, copy it and save it.
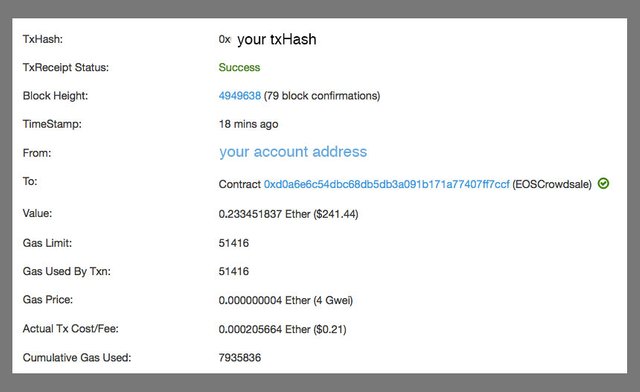
In order to confirm everything went right, consult your txHash in a block explorer like Etherscan:
Here's the one for this transaction:
Phew !
You are almost done with Day 1, you still have to a) claim your Tokens ( after the 1 Day crowdsale period ) and b) register your Address to lock in your tokens.
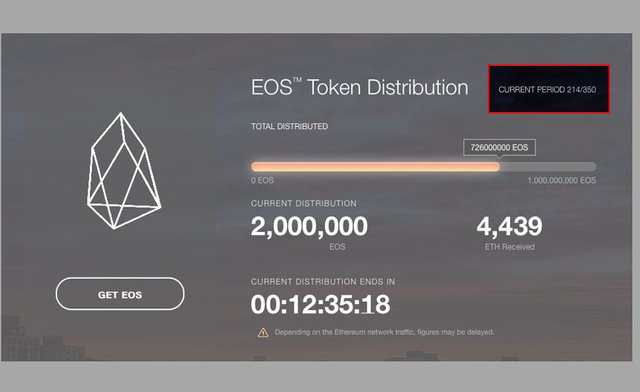
The last thing you need to do on day 1 is to write down your contributing period, you can get it from the eos site:
Current Period 214 in this case.
Or from https://eosscan.io
Now to wait for the sales period to finish ( but yeah, you are in ! ).
STEP 6 - Day 2 - Claim
Once the token distribution period has ended you will now need to claim your tokens:
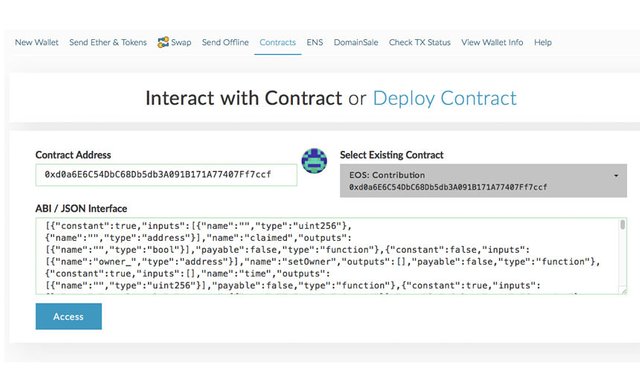
- Go to MEW and select the contracts tab, then select the eos contribution contract from the dropdown and finally the Access button:
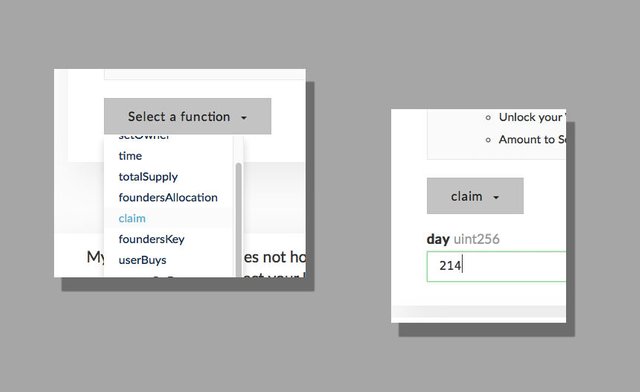
- From the functions dropdown select the claim function and input the period you contributed to ( 214 in our case ).
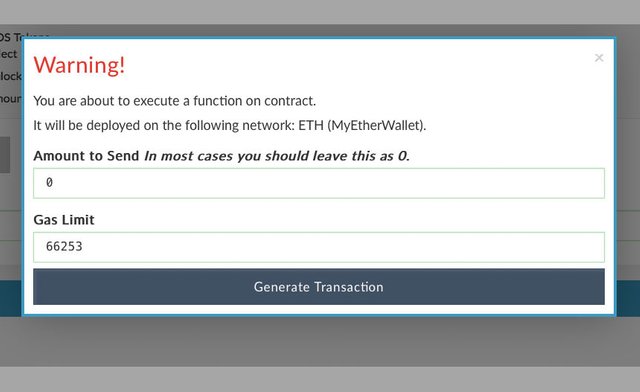
- Unlock your wallet, change your gas price if you need to, ( I used 4 gwei again) and click the write button ( leave the fields as they are):
- Generate the transaction (only Once), and save your txHash.
MEW can sometimes skip the txHash or give you a notice about a duplicate hash, so you might need to query a block explorer like Etherscan.io with your wallet address and look at your tx History to find your transaction.
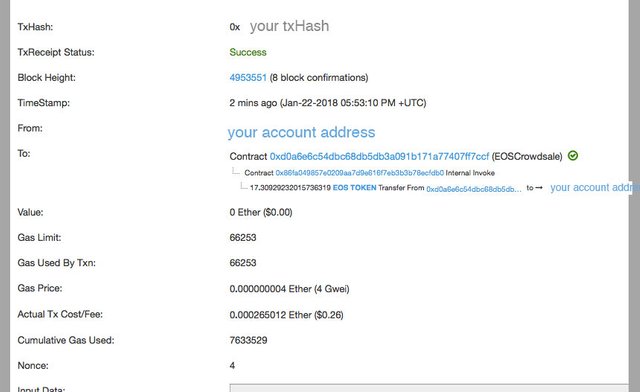
This is how a successful claim txHash looks like:
If you read the receipt, you will notice there is an internal transfer of 17.30 EOS Tokens, these are the tokens you received from this period.
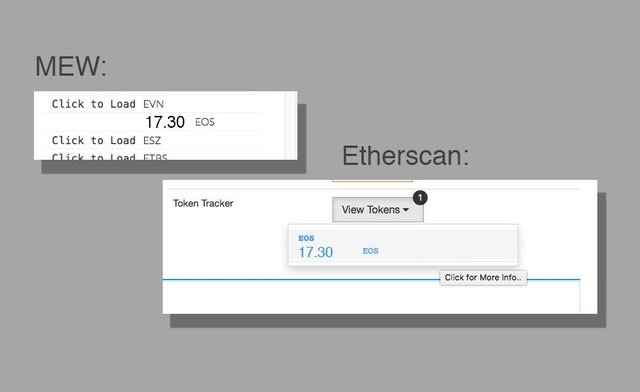
Your EOS Tokens are now in your possession, if you need to verify your balance you can see your EOS Tokens either in the Token Tab in Etherscan, or by selecting them on MEW ( both options might take a little while to show up):
STEP 7 - Day 3 - Register
You could also do this step on day 2 after claiming your tokens, but you might want to spread it out.
Note: You have up till 23 hours after June 1, 2018 to do this step, if you forget you might loose your contribution, so I recomend you do it asap
Why Register ?
As mentioned at the start of this tutorial, EOS tokens are meant to be reborn in the EOS Blockchain at some point after the presale.
EOS Tokens on the Ethereum blockchain will become frozen after June 1st and the registered account credited on the EOS blockchain, there is no specifics as to how the swap will happen, but they (EOS) requires you to register, so you have to, else you have lost your contribution, if we are to go by other presales ( Ethereum for instance ), you will most likely have to provide a private key which is part of the registration process along with access to your Ethereum account.
Important Note: You only need to register Once per account, so if you plan on sending more Ether to the EOS Crowdsale there is no need to register again.
To register follow these steps:
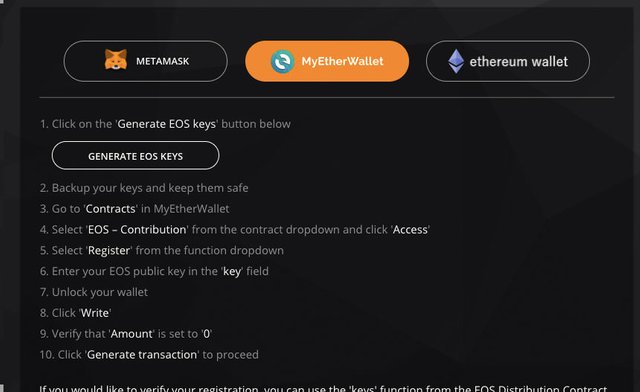
- Visit the EOS Token distribution Register Page:
you will have various options to register, I'll be using the MEW route:
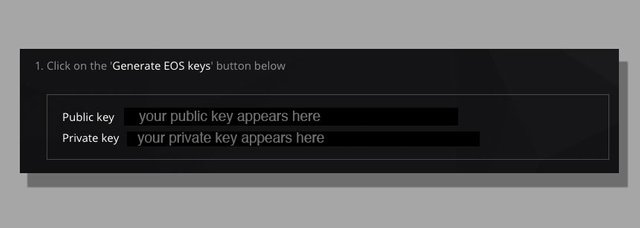
- click the generate EOS KEYS, and save both someplace safe.
Back in MEW, select contracts, from the select existing contracts the EOS Contribution and finally the register function.
In the field paste the public key you just got from the EOS Instructions page, I repeat use the PUBLIC KEY, not the PRIVATE KEY !
Unlock your wallet and click write, adjust your gas price if need be and accept the default values.
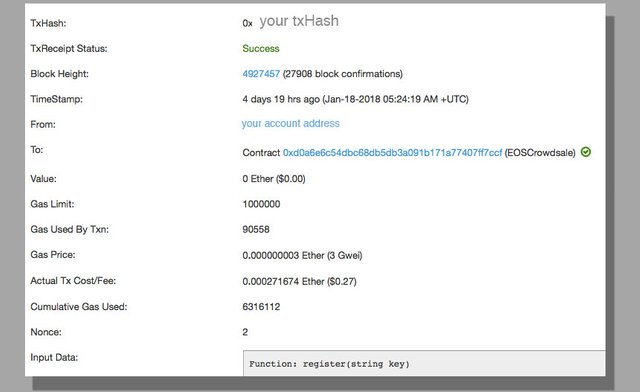
You can check the status of your registration via the txHash, here's what a successful one looks like:
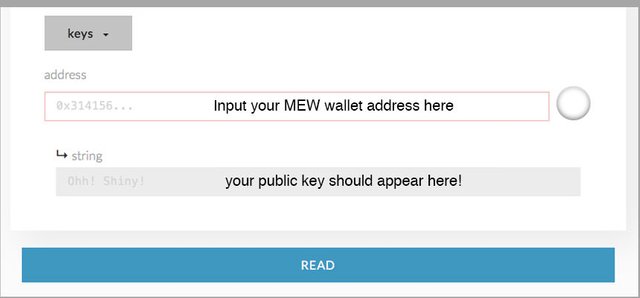
To confirm that everything went well, go back to MEW and select the contracts tab followed by the EOS Contribution contract, then Access and finally the Keys function.
STEP 8 - Day 3 - Pat yourself in the Back
At this point you will likely forget about your EOS Tokens for a while, so it is a good idea to save the information you will likely need later.
To recap, at this point you should have the following information in a safe location.
- MEW Wallet Address
- MEW Keystore file
- MEW Keystore File Password
- EOS Public Key
- EOS Private Key
And of course the number of EOS Tokens in your account :)
Going the MetaMask - EOS Interface Route:
The alternative of using MEW is going the MetaMask Route and using the EOS Interface, instructions can be found at the EOS site.
If you want an alternative overview of the ways you can participate check out this post by a sandwich (it's a bit outdated though):
Contributing to eos token sale with myetherwallet and contract inner workings
Extra STEP 9 - Day 4 - Install metamask/consult interface.
Even if you used MEW, it can be beneficial to install Meta Mask ( A Dapp browser/ Wallet extension) and consult the EOS Interface,you might also need or want to access your MEW account and tokens from metamask in the future, to do so follow this instructions:
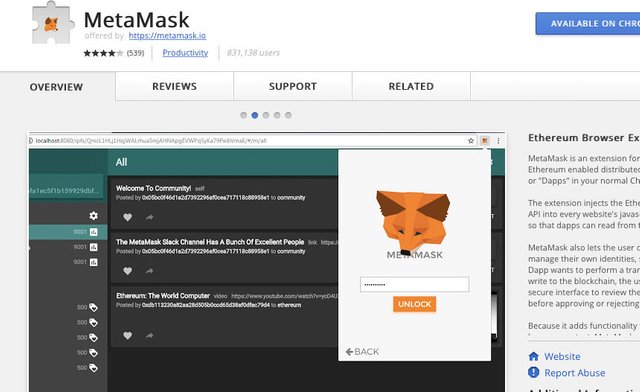
- Install the Chrome Browser and install the MetaMask extension from the Google Store:
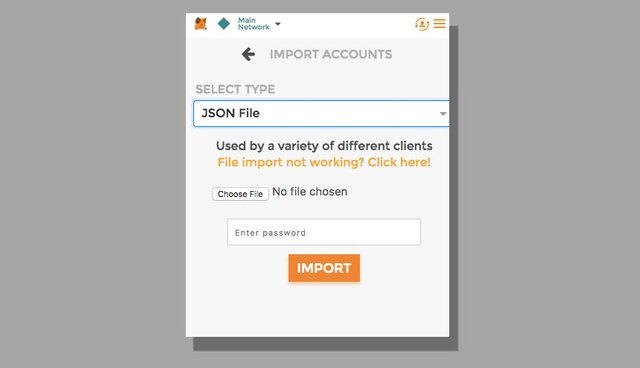
- You will need to configure metaMask with a password to unlock it ( yes,one more password to store !), and then import your MEW keystore file and password from the account menu option:
In order to access the EOS Interface go to their site:
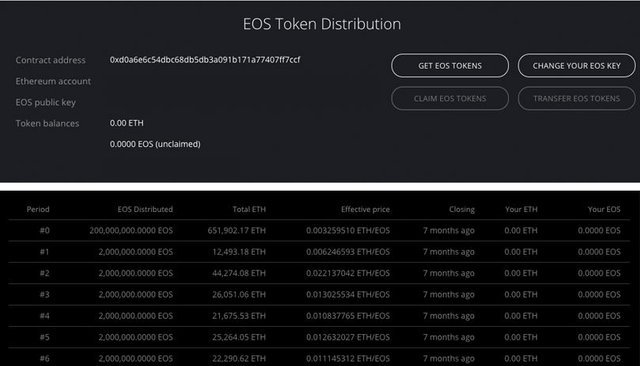
After importing and unlocking your account you will see this interface:
In it you will find your information ( make sure you are in the right metaMask account),your tokens and a list of periods ( if you contributed that will be reflected there by period )
You can also transfer, change your eos key and get more tokens.
Conclusion:
I hope this quick guide helped you participate in the EOS Distribution, I will revisit EOS once the Distribution is done, see you on the other side !
Keno

Coins mentioned in post: