More progress on the Mercedes 280se, getting close.
We found a damaged bolt in the radiator hose casting to the water pump we just replaced. A previous mechanic had overtightened this bolt, and it showed a fracture over about half the bolt cross section. This is why a torque wrench is recommended, especially if you are new at mechanic work!
When we were setting the bolt, even before it was tight; the rest of the bolt sheared. This was really serious, because where it was mounted it was very difficult to get to. So if we couldn't remove it where it was, the entire water pump would have to be removed again!
The last removal required us to remove the distributor, and rotate the engine by hand to access the lower half of the bolts. We didn't want to do that again!
I've had a deal with my kids, that if they know how to do something, I expect them to Do it; but if they don't know how, I'll show them. Sadly for me, this was a 'show them' time!
First I dug out the proper tools; a right angle drill head, a #3 center drill (because the casting has a hole that size), and a 1/8" Left hand drill bit. Now before people begin snickering, there really Are left hand drills; this is not a joke! I'll put a link at the bottom of this post to an ebay da lol es ad. This is not to recommend you buy this set, but only to prove they exist!
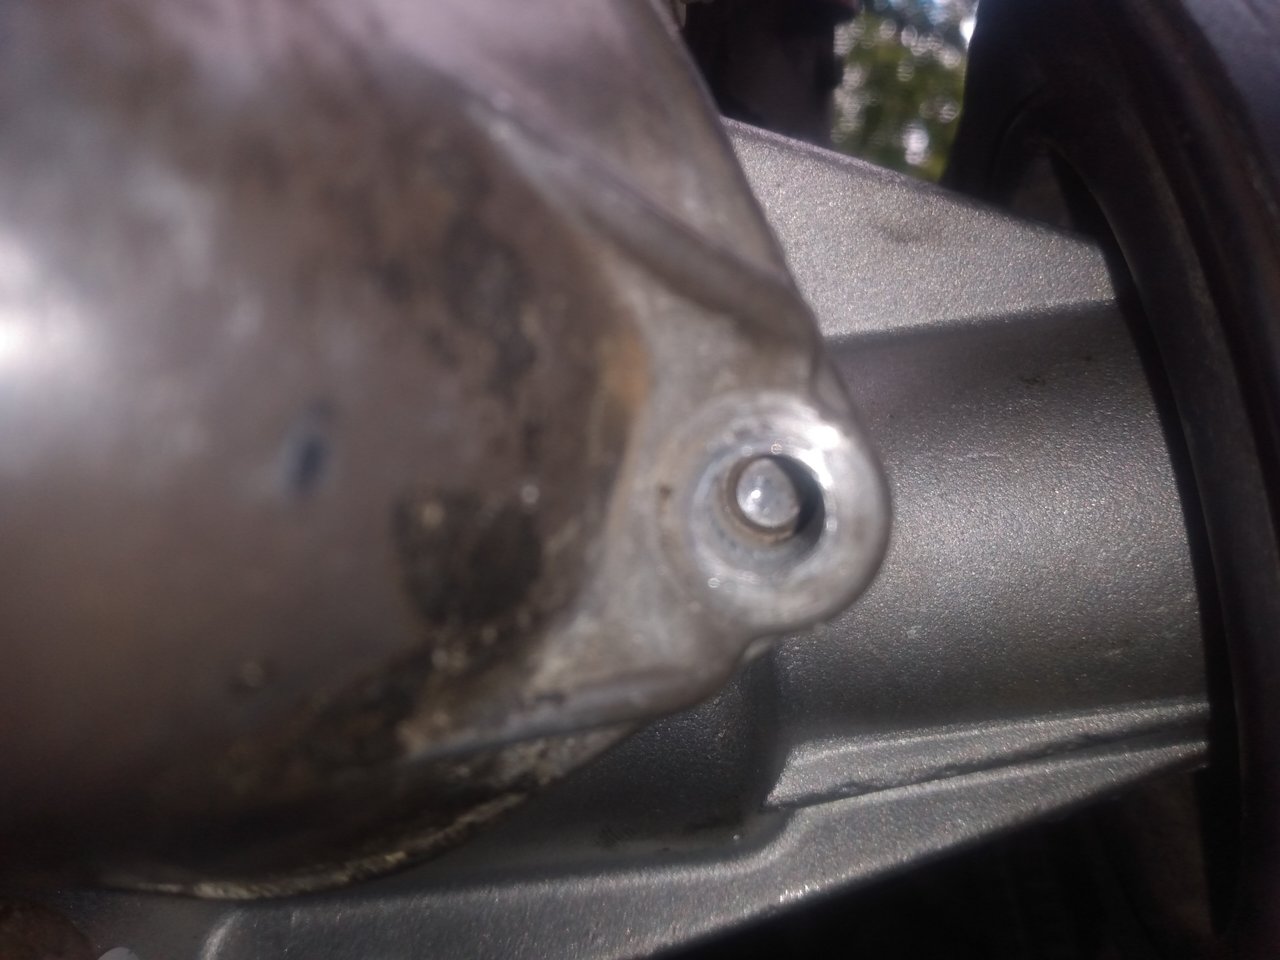
First we put the casting back on with the two remaining good holes. The 'broken' hole in the casting can then be used to guide the center drill; to drill a starter hole in the broken piece, using the right angle drill head.
It looks like this:

Here is the broken bolt showing the center drilled hole.
Next the left hand drill goes into the right angled drill head and the broken part is drilled. One of two things will happen; first the drill will hang up and unscrew the broken screw piece, or second the drill will penetrate the broken piece. In the first case, the screw can be removed with a needle nose pliers. In the second case, an easy out can be used.
Here's what it looked like:
We got lucky, and it was the first option! I was able to reach up from underneath, and remove the bolt piece.
The pictures are limited because this operation took two of us to do the work, due to the location. We both had to run the drill assembly, to make this work.
Then the deal took over, and he finished the reassembly:

As a side note, every time a steel bolt holds an aluminum casting down, I use new stainless steel bolts! The regular steel bolts, will corrode from galvanic action; and can cause problems later.
The water pump is finally replaced with proper rebuilding and Not patching...no duct tape or bailing wire here.
This leaves radiator replacement and one main battery cable insulation repair (damaged in the original underhood fire), so we're getting close (It's been two years of rebuilding fire damage). As long as we don't find something else broken....
Here is the verification for the left hand drill:
https://www.ebay.com/itm/192086328300?epid=19022347751&hash=item2cb93cc3ec:g:4qEAAOSw9GhYhv72&amdata=enc%3AAQAHAAAA4DNmYZCVZiW%2FOc89ErQpqKGmsvU7JynYMJJGyRS3C1pcDLG%2BFzDlkAVNjIWQYpVV3vL%2FMKeY6Zz7z1ViC%2B%2B3zm1z7KkI3ZBSqLKqI70xexxY2tWygQHBIWW2oOjrzqFj%2Bf2FTkh8yVuAdzuwcHgOsmj7VnnrLl36dKo%2F3tARf%2F%2FjtrGdoLN08rF4CJ88IlgCbLmk%2Bl5MnmVeyd8Ry8ZHtBbDqviGzZYNhGNqbz%2FYB5M5Owi8h81eaoOfMGZvo6XlcR%2F46pnHZUOBxuQPRuqgy8TQOZ4ZSX40QdkZe6I0iiQ1%7Ctkp%3ABFBMqO-X4P9g
Sorry this link it so huge, but it works!