8. Custom Weather Station: Rain Sensor
Welcome back, this post is going to cover connecting and integrating the rain sensor from the wind / rain sensor assembly.
Connecting
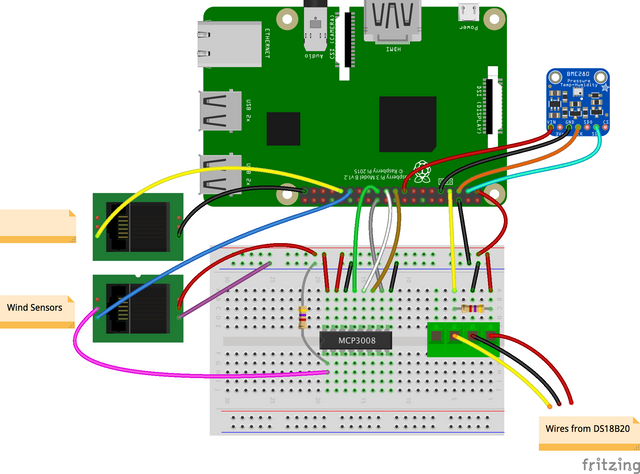
Started off by cutting off the connector the sensor came with and adding my own connector that was easier to plug wires into. I have been using the following guide as a reference for most sensors. The rain sensor is unlabeled in the image in the top left. It has just two wires and connects to GPIO button 6.
Made a simple example program which ran without issue.
from gpiozero import Button
from signal import pause

rain_sensor = Button(6)
rain_count = 0

def spin():
    global rain_count
    rain_count = rain_count + 1
    print("spin" + str(rain_count))

rain_sensor.when_pressed = spin
pause()
Ros 2
Added the sensor as a new node in the project rain_sensor.py. The node operates a bit differently than other nodes in the project. Instead of sending messages at known intervals the node only sends messages when it records rainfall. This is sent as a header message, which includes a time stamp and a frame_id where I added the amount of rain recorded. The recorded rain amount is always the same. This data is meant to be captured into a database then other more interesting post processing information such as rain fall per period of time can be reported. The message is reported on the /rainfall topic.
I will be adding this sensor along with the wind speed and wind direction to the master launch file later, for now launch with ros2 run mimir rain_sensor
Please like and subscribe.
- Building a Custom Weather Station in ROS2 Parts and Plans (DIY BLOG)
- Custom Weather Station: Installing Ros2 (DIY BLOG)
- Custom Weather Station: Temperature, Pressure, Humidity Sensor Install
- Custom Weather Station: UV Sensor install
- Custom Weather Station: Ground Temperature Sensor
- Custom Weather Station: Wind Speed Sensor
- Custom Weather Station: Wind Direction Sensor
