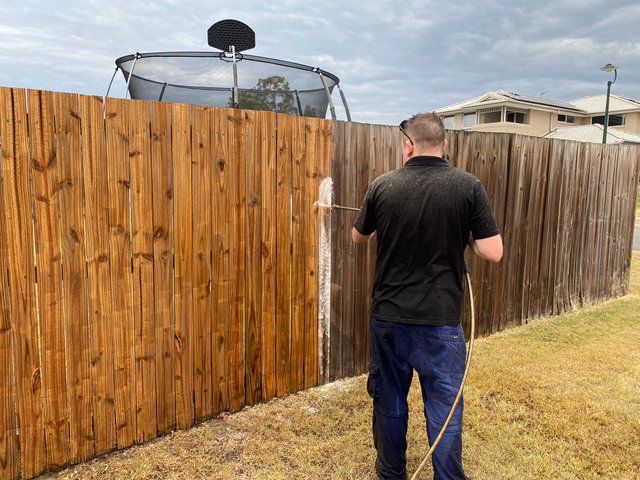
How to Restain Our Deck: Simple and Effective Steps
If your wooden deck has lost its original charm and appears weathered or dull, restaining is the most effective and budget-friendly way to revive its natural beauty and protect it for the long term. Below, we offer a comprehensive, step-by-step guide that explains everything you need to know about how to restain your deck for a flawless, long-lasting finish.
What You’ll Need to Restain Your Deck
Before starting the process, make sure you have the following materials ready:
Deck cleaner or wood stripper
Power washer or hose with spray nozzle
Orbital sander or sanding pole (with 60-80 grit sandpaper)
Stain applicator (brush, roller, or sprayer)
Exterior deck stain (semi-transparent or solid)
Painter's tape and drop cloths
Protective gloves, goggles, and mask
Step 1: Inspect the Deck Thoroughly
Begin by walking around your deck to check for loose boards, popped nails, splinters, or mildew. This step is essential before applying any stain. If you notice any rotted wood or structural issues, repair or replace damaged boards. Tighten loose screws and ensure the deck is structurally sound to prevent any complications during staining.
Step 2: Clean the Deck Deeply
A clean deck ensures proper stain absorption and prevents future peeling or flaking.
Here’s how to clean your deck effectively:
Apply a commercial deck cleaner or wood stripper using a pump sprayer.
Let it sit for 10-15 minutes (as per the product instructions).
Scrub with a stiff-bristle brush to remove dirt, mildew, and old stain residue.
Rinse thoroughly using a power washer on a low setting or a garden hose with a high-pressure nozzle.
Important Tip: Avoid holding the power washer too close to the wood; it can damage the surface.
Let the deck dry completely for at least 48 hours before proceeding to the next step.
Step 3: Sand the Deck Surface
Once your deck is completely dry, it’s time to sand it. Sanding helps remove splinters, smooth rough areas, and opens up wood pores for better stain penetration.
Use an orbital sander or sanding pole with 60 to 80 grit sandpaper.
Focus on high-traffic areas and spots with remaining old stain.
Sweep or vacuum all the dust thoroughly once sanding is complete.
Step 4: Protect Surrounding Areas
Before staining, make sure to protect nearby surfaces like siding, plants, and concrete. Use painter’s tape and plastic sheeting or drop cloths to cover these areas. This step ensures a clean and professional finish without accidental stains on unwanted areas.
Step 5: Choose the Right Deck Stain
There are various types of stains available:
Transparent: Offers minimal color but highlights wood grain.
Semi-transparent: Offers moderate color and UV protection while allowing the wood’s natural texture to show.
Solid stain: Provides the most color coverage and UV protection but hides wood grain.
For most decks, a semi-transparent stain offers the best balance of appearance and durability.
Step 6: Apply the Deck Stain Properly
This is the most crucial step in the deck restaining process. Ensure the weather is dry, with temperatures between 50°F and 90°F, and no rain expected for at least 48 hours.
Here’s how to apply the stain:
Stir the stain thoroughly before and during application to maintain color consistency.
Begin staining with a brush in corners and edges (cut-in first).
Use a roller, pad, or sprayer for the main deck area.
Always stain two to three boards at a time, working the full length of the board to avoid lap marks.
Apply the stain evenly and generously, ensuring it doesn’t pool or puddle.
Allow the stain to penetrate for 10–15 minutes, then wipe off any excess with a clean rag to avoid sticky patches.
Step 7: Let the Stain Dry Completely
Allow the deck to dry for at least 24 to 48 hours. During this period:
Do not walk on the surface.
Keep pets and furniture off the deck.
Check weather conditions to ensure it remains dry.
A second coat may be needed depending on the type of wood and stain used. Always follow the manufacturer's recommendations for best results.
Step 8: Maintain Your Restained Deck
Regular maintenance can extend the life of your deck stain and protect the wood.
Follow these maintenance tips:
Sweep the deck weekly to prevent dirt buildup.
Clean with a mild detergent and water every few months.
Reseal or restain every 2–3 years depending on wear with exterior deck sealer, sun exposure, and product quality.
Bonus Tips for Best Results
Always test the stain on a small, hidden area before full application.
Avoid staining in direct sunlight to prevent uneven drying.
Choose a high-quality stain for longer durability and better protection.
Final Thoughts
Restaining your deck is a simple yet highly impactful project that restores its aesthetic appeal while providing long-term protection. Following the steps outlined above ensures a professional-grade finish that will last for years. With the right tools, timing, and technique, your deck can be transformed into a stunning outdoor retreat.
