How to Set Up Your HiveOS Wallet (New Website)
This is an extension of the crypto mining series, where I cover how to start mining easily and without any fees. Read the previous article first if you haven't already.
Step 1) Decide Which Coin to Mine and Which Mining Pool
If you decided to mine in a pool, you will have to register within that pool directly from their website. For example, Supernova's pool website is https://suprnova.cc/ The great part about HiveOS is that they have automated many of the major pools. You simply have to register within the pools' platform, create a worker and password for that worker, and get that information ready for the next steps within HiveOS.


Step 2) Click on Your Worker & Navigate to Wallet
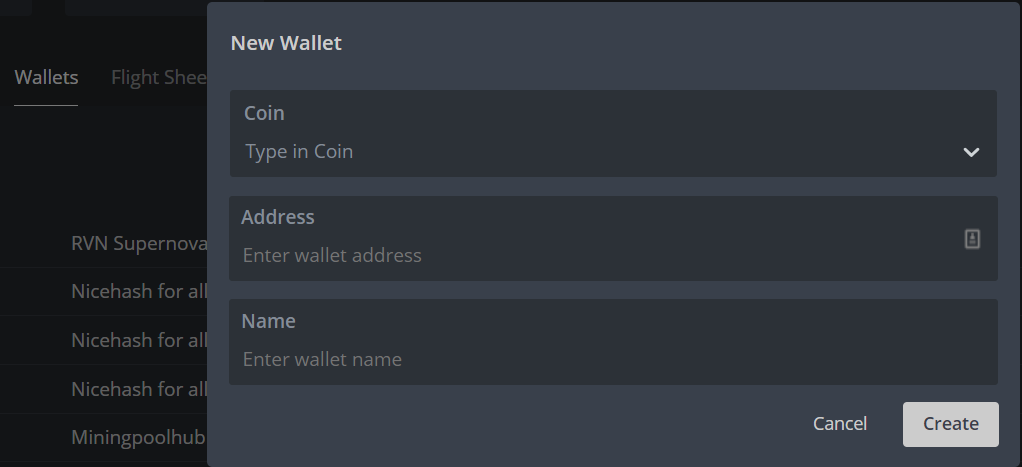
Click on "Create Wallet" and then enter in the information required. It is best to know which coin you wish to mine for along with which mining pool you wish to use. HiveOS also gives you the option to set up your miner with whatever configuration you wish, so you can mine coins solo if you prefer. I have never tried that before, so I would recommend you use the easiest options first.
This wallet contains the pool wallet address that your mining rewards goes to. After you sign up to a certain pool, for example: Supernova, you will then have to input your personal wallet address you want your mining balance to go to after it reaches a certain threshold. For HiveOS platform, for Supernova, the wallet address you need will be 'workername.password'. On step 1, the demo worker name was 'Demoboiz' and the password was 'Yuh'. So the wallet address for Supernova on HiveOS would be Demoboiz.Yuh
This is not true for every mining pool. Sometimes these pools have a true wallet address. Other times, it will be similar to Suprnova with the 'workername.password' format.

Notice that Supernova and Miningpoolhub both have the 'workername.pw' format while Nicehash has their own wallet address (found in your account).
Or, if you decide to mine solo, it will go to the personal wallet address you choose to use, directly from the miner.
Step 3) Click on Flight Sheets
Enter in the coin you wish to mine followed by the wallet you want to use. You should have set this up on Step 2. If you need to add another wallet to utilize, click on the Add Wallet Option.

If you choose a pool, it will naturally give you the option to use the stratum (or mining url) stored within their database. More often, it is accurate, but you will have to verify that yourself by searching for the stratum for each coin on their website.

select on the pool server and verify that it is correct and up to date

Select the miner from the dropdown. If you own an NVIDIA computer (Intel Chip), use the CC Miner. If you own AMD (Ryzen Chip), use SG Miner. The miner dropdown list may vary depending on the pool or coin.
Step 4) Click on the Rocketship
After all that is done, you can create the flight sheet. Go back to the flight sheet tab, and click on the rocket ship:

Clicking on the rocket ship will make this your main wallet and miner. When you boot up the miner, it will use this wallet and miner to start mining.
Thanks for reading, hope it was useful to you. HiveOS recently updated the site and now it is even more easier to use than before. Video on this will be coming soon here.
Consider using my affiliate link for Hive OS if you decide that it is the easiest and best option for you. The first 3 rigs are free and you will receive $10 to your account if you use my promo code DIVIDENDS
AFF LINK: https://hiveos.farm?ref=62523
[Original article: https://www.dividendraptor.com/2018/09/how-to-set-up-your-hiveos-wallet-new.html ]
I upvoted your post.
Mabuhay, keep steeming.
@Filipino
Posted using https://Steeming.com condenser site.
Great summary to setup hiveos quickly. Thnks