How to Separate Beads in a Bracelet: A Practical Guide
Introduction
Knowing how to separate beads in a bracelet is an essential skill for jewelry makers, DIY enthusiasts, and small business owners creating custom designs. Did you break a piece, want to change the colors, or want to use beads to make another craft, it is better to separate the beads neatly and make sure that you do not damage the integrity of the materials you are working with and produce the results that are truly professional-looking. Even novices will be able to cope with this task effectively and without injuries with the help of the right tools, techniques and guidance.
Understanding the Materials
It is worth noting that before you are going to separate beads in a bracelet you should ensure that you know the kind of beads and the stringing material you are dealing with. Beads can be created of glass, acrylic, clay, metal, silicone or pearls, and each of them needs a little different treatment to prevent chipping, cracking, or scratching. The approach also depends upon the stringing material, which may be an elastic cord, nylon thread, wire or fishing line. In delicate beads, soft procedures are essential whereas heavier beads can bear more tension during separation.
Tools and Preparation
The process of dividing beads can be made very easier with the presence of the right tools. Small scissors or cutters, flat-nose pliers, bead stoppers and a bead tray or mat to prevent the pieces from becoming messy should also be essential. The flat surface does not allow beads to roll and lose. Containers are also useful in sorting beads according to their colors, sizes or materials, particularly when you intend to use them in other projects. The correct preparation makes the process effective, well-organized and minimizes the risk of the loss or breaking of your beads.
Techniques for Separating Beads
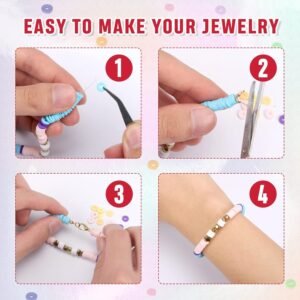
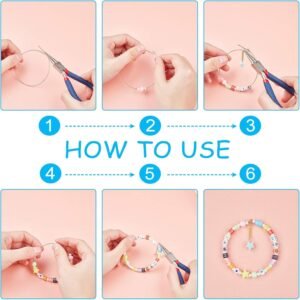
The technique of separating beads in a bracelet is determined by the string material. In the case of elastic cord bracelets, the knot can be cut by cutting the cord gently or the cord can be stretched to push the beads off one at a time. In the case of wire or thread bracelets, knots should be carefully undone or crimps are removed with a pliers and every bead must be secured when it has been removed. The most important is patience, in a hurry the beads may be broken, or the cords frayed. Bead stoppers may be useful in keeping the beads in order and avoiding unexpected dropping of beads in the process of separation.
Tips for Reusing Beads
After the beads have been separated, they may be cleaned, polished or sorted to later be used. This grouping can be done depending on type, size or colour and so it becomes easier to plan new designs be they bracelets, necklaces, keychains or beadable pens. Crafters can save on material costs, waste and design whole new and creative design by using beads of old or broken bracelets. It is not only sustainable but also makes DIY projects experimental and innovative.
Conclusion
In summary, knowing how to separate beads in a bracelet is an important skill for any jewelry maker or DIY enthusiast. Through the proper tools, knowledge of the materials, and close methods, we can safely take out beads, arrange, and use them again in the future. Use it to make a personal craft, to mend, or to make small business items, learning to handle this skill will guarantee efficient and professional output of the final product, and will enable creators to use all their beads to their highest ability.

