Tifa Lockhart | Lires Artwork Process part 2 | NSFW | Fan Art
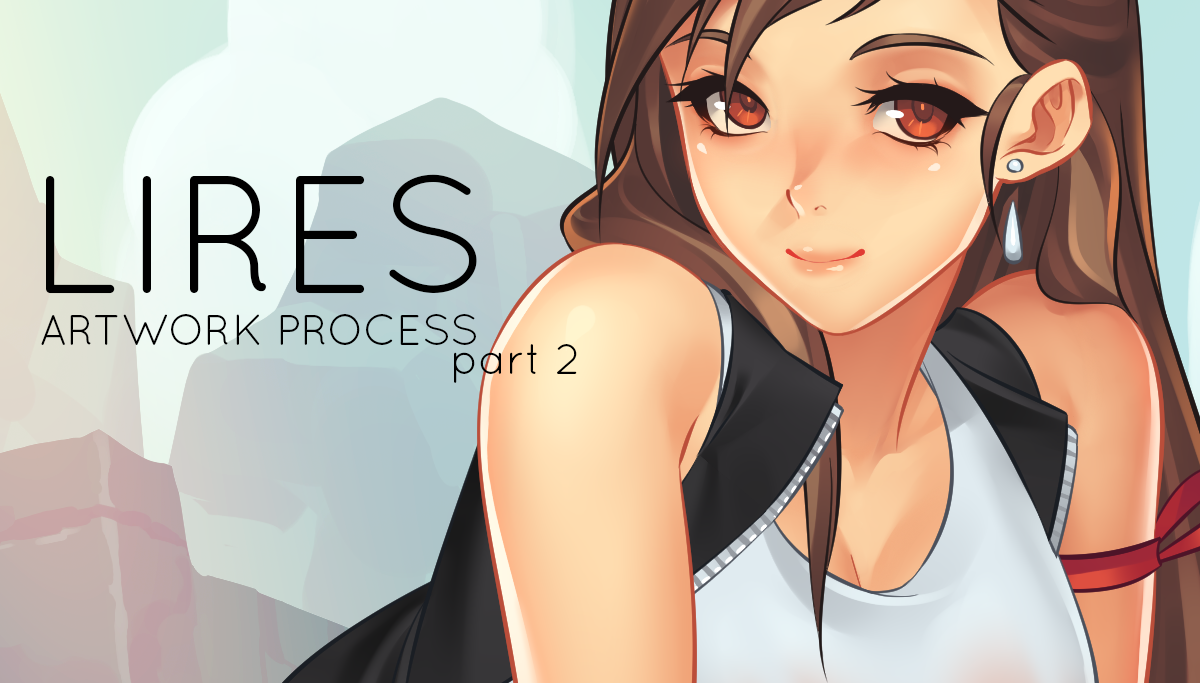
Hey guys! I'm back with the 2nd part of my artwork process for Tifa Lockhart. I'm going to show how I import my artwork inside Live2D.
But first, I would just like to suggest that you vote for @curie as witness here https://steemit.com/~witnesses. @curie has helped a lot of artist who's just starting here on steemit, just like me.
And also check out @smartsteem! I think they're onto something amazing for quality-post steemers!
Chopping up the parts!
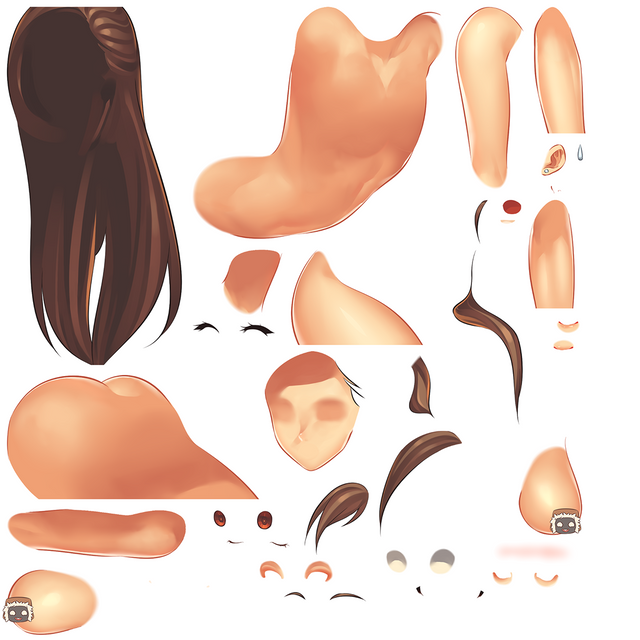
After I've finished painting all of Tifa's parts, I separate them by layers inside a Photoshop Document (PSD).
Using Live2D
Live2D is divided into two programs; the Moderler and the Animator. In this post, I will only be talking about the Modeler. The Modeler is where you setup the parts to be animated.
Live2D Modeler
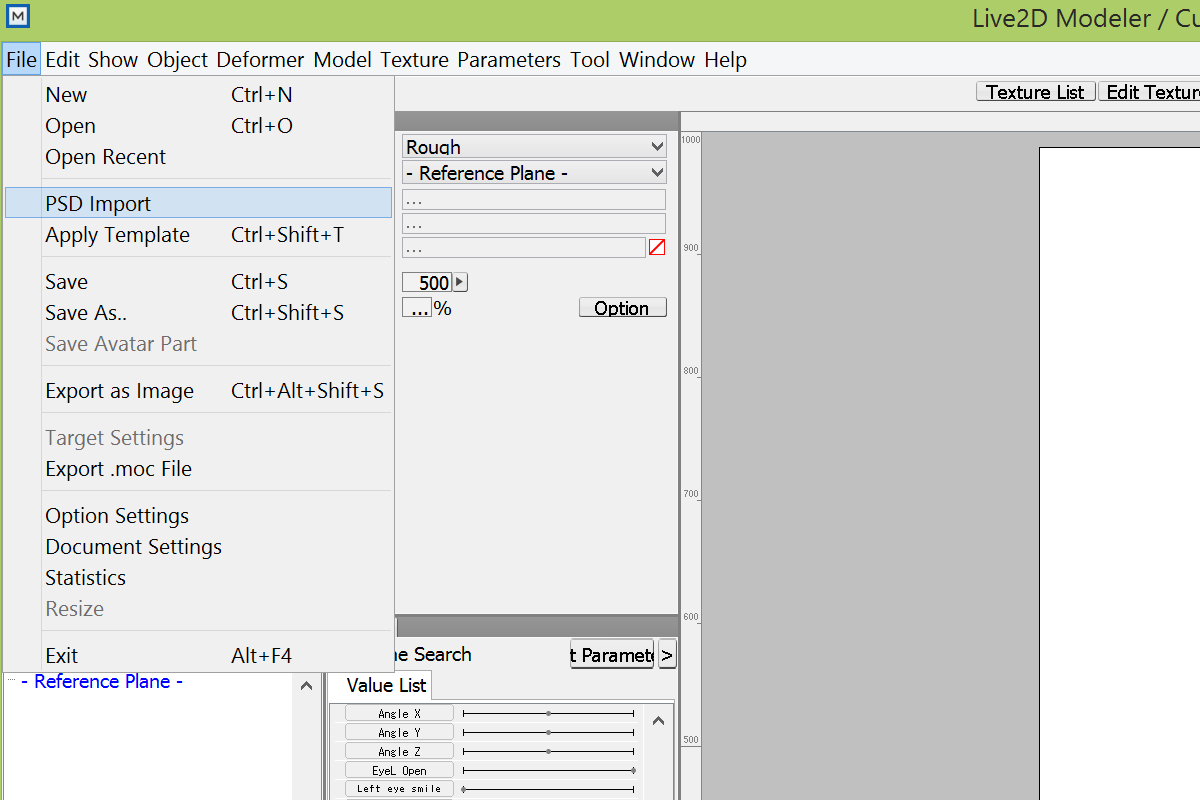
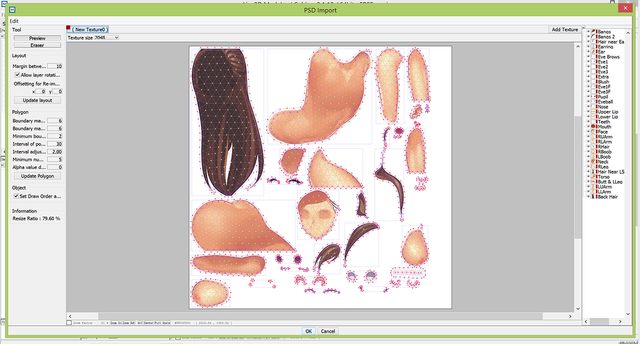
The first thing I do inside the Modeler is to import the PSD of my artwork.
After that, it'll automatically mesh each layer in your PSD. Then you can just press OK.
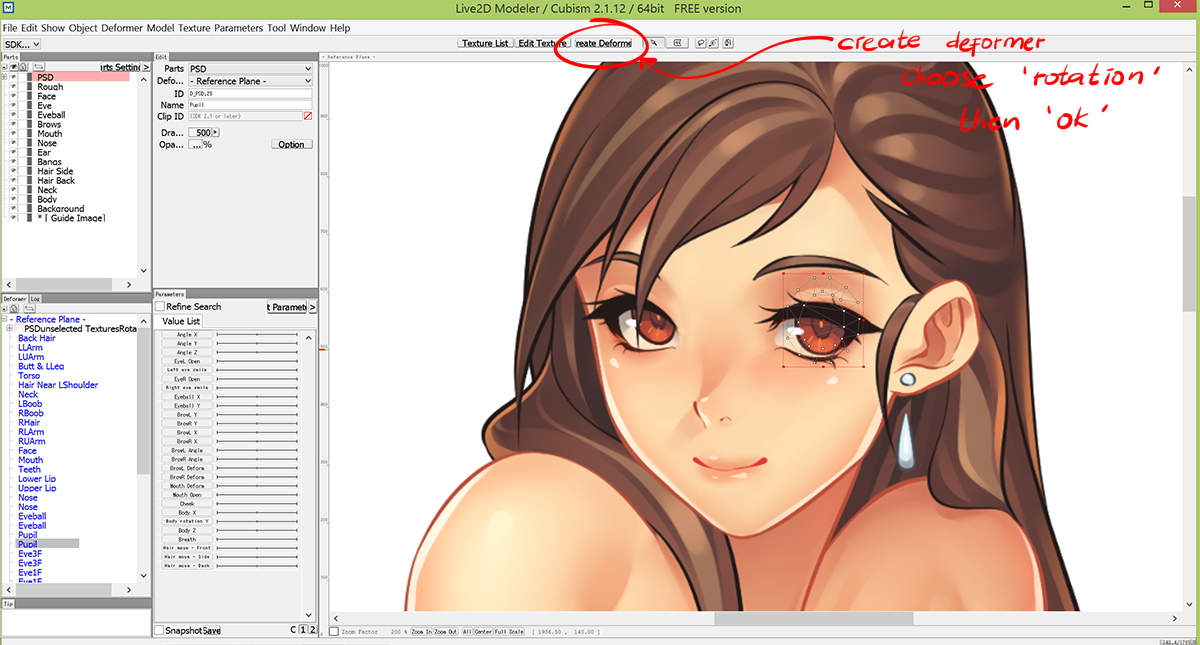
Once the PSD is imported, you can now start to add Deformers on each part. As an example, I'll add 2 deformers for Tifa's eyes - one each.
To add deformers: click the part (in this case, the pupil), then click "create deformer".
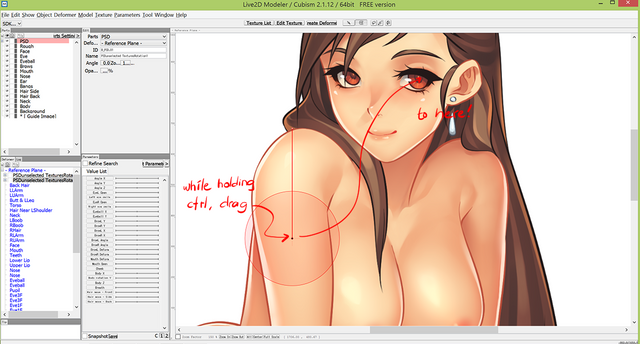
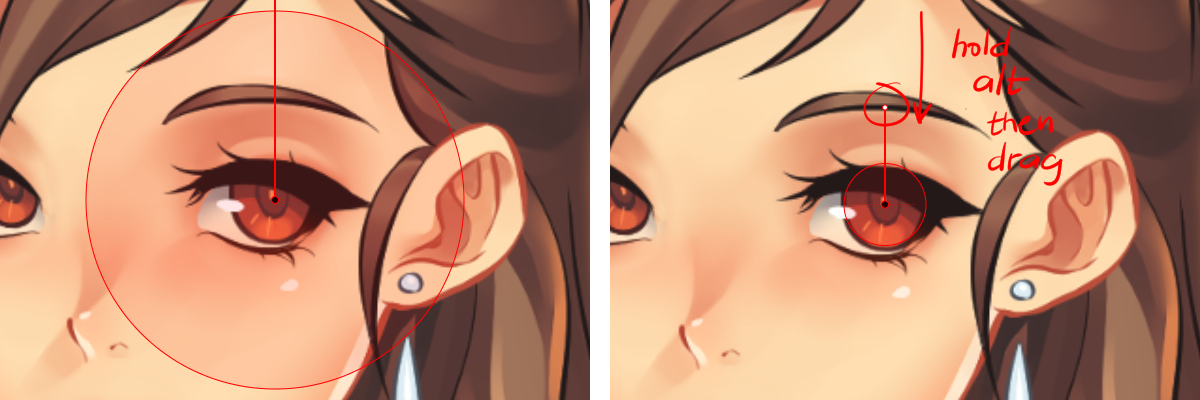
Now the rotator will not exactly land on the part. So you'll have to move it by holding ctrl, then drag the rotator to the part. Then to make it smaller, hold alt then drag the end of the line towards the center of the circle.
We can now add a "controller" to the deformer. Live2D already have a list by default. But you can edit it to fit your preference.
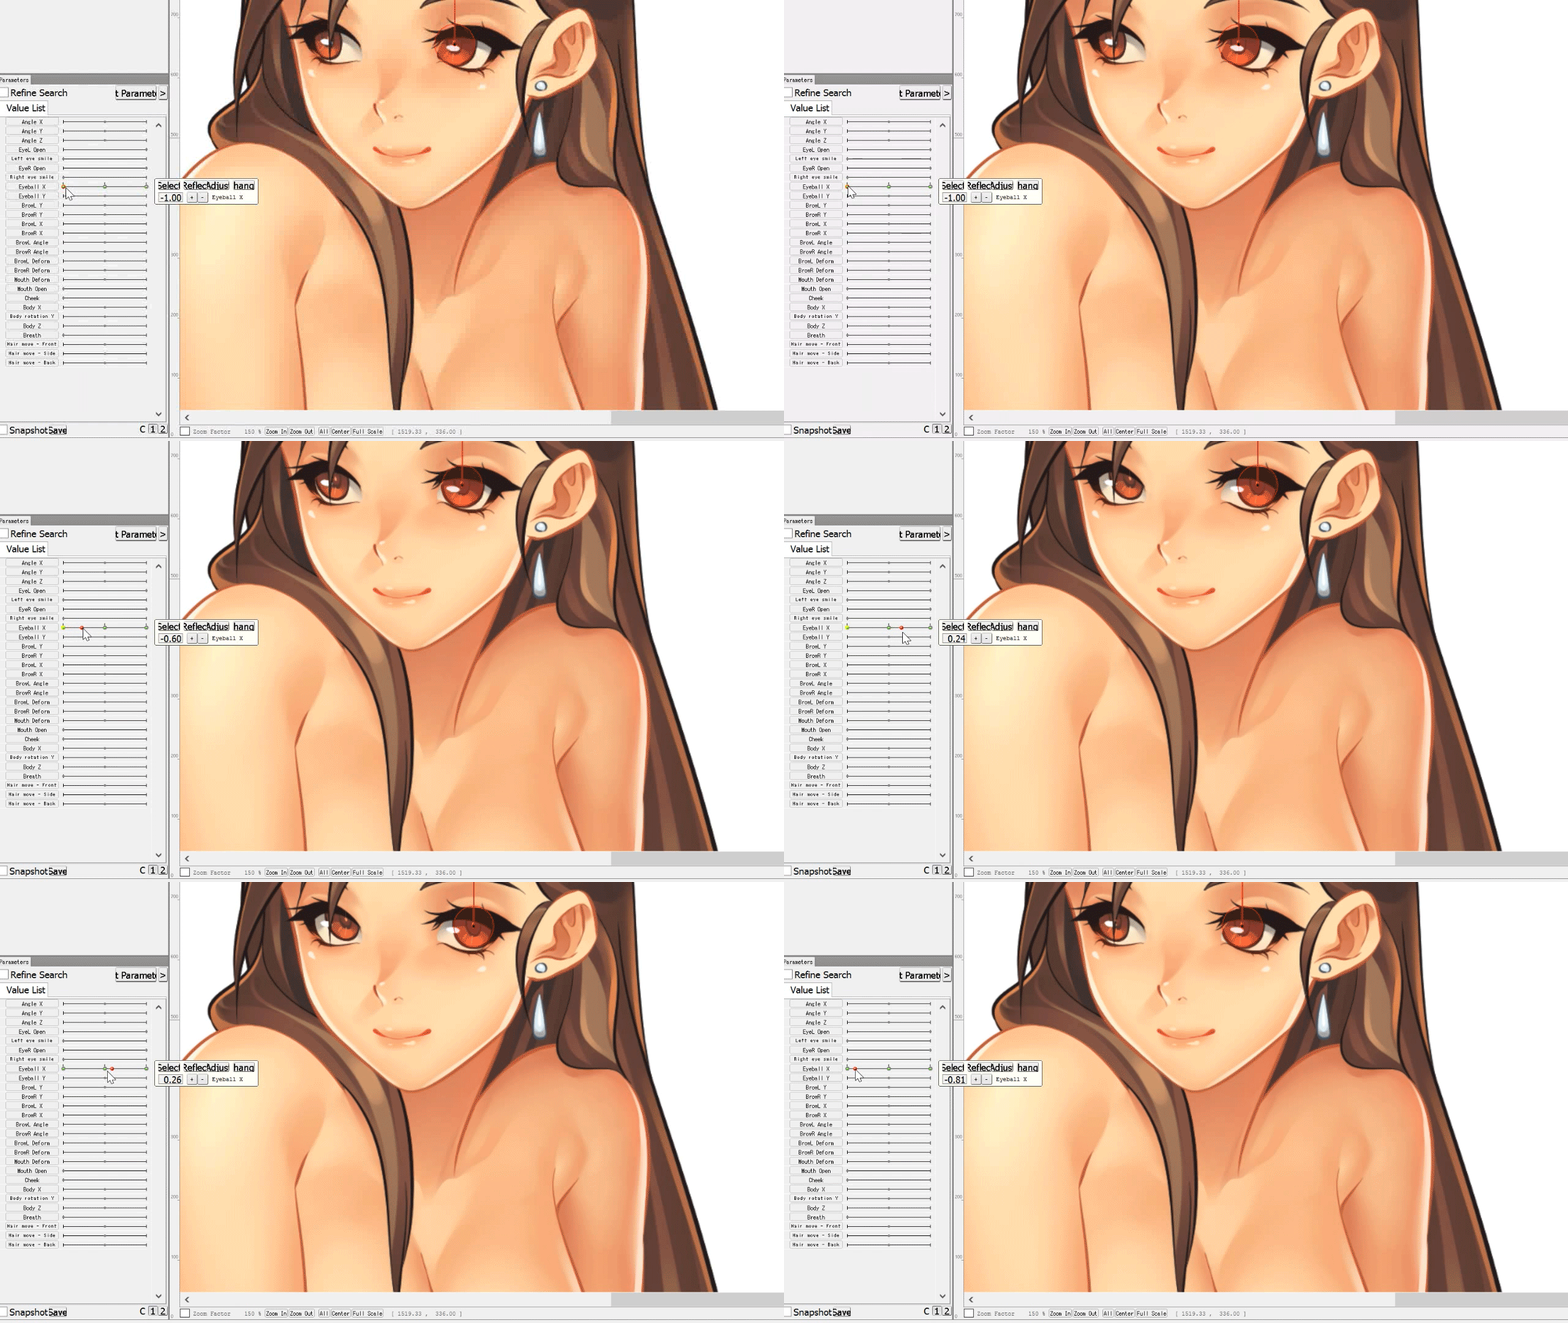
I chose to add 3 keys for the eyes; -1 is for eyes moving/looking to the far left, 0 for center, and 1 for eyes moving/looking to the far right.
To record a position, choose your prefered 'key' (in this case, -1), then move the part (in this case, the pupil) to your desired location. That's it!
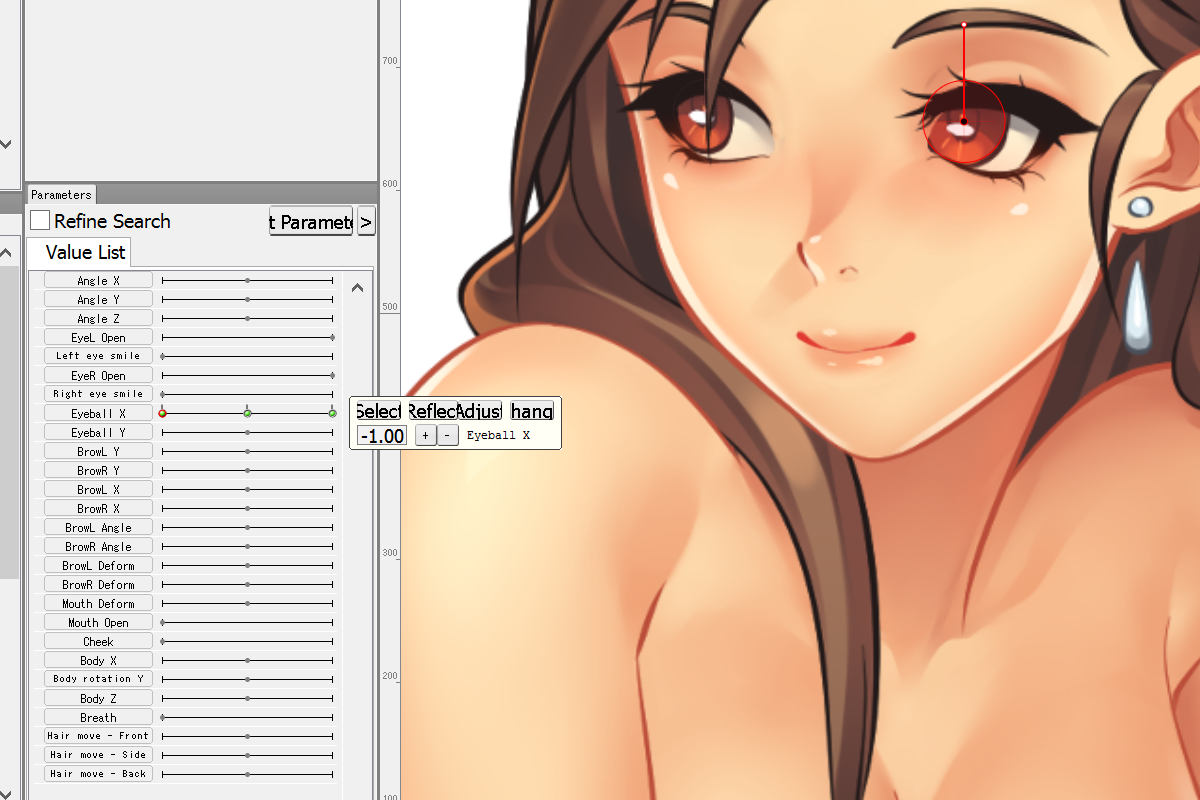
I've also added the other eye on the same controller. You can test the controller by moving the circle between the keys.
That's it for now guys. I've already spent a huge amount of time on this tutorial than I should have. xD
In part 3, I'll discuss about how to use the Animator. Till then!
-lires

Gracias @lires, es ua buen tutorial, voy a probar a ver cómo me sale.
Very useful thank you very much
Stunning and useful artwork! (;
Helal
Sneaky Ninja Attack! You have been defended with a 9.07% vote... I was summoned by @lires! I have done their bidding and now I will vanish...Whoosh
You got a 4.70% upvote from @upme requested by: @lires.
Send at least 2.5 SBD to @upme with a post link in the memo field to receive upvote next round.
To support our activity, please vote for my master @suggeelson, as a STEEM Witness
The only reason why i comment on your 27days old post is because you didn't post anything in the last 3.5 weeks :D
It's time to back right? ;)
Rly cool so far ! I rly wanna do animations in the future
Congratulations @lires! You have completed some achievement on Steemit and have been rewarded with new badge(s) :
Click on any badge to view your own Board of Honor on SteemitBoard.
For more information about SteemitBoard, click here
If you no longer want to receive notifications, reply to this comment with the word
STOPCongratulations @lires! You have completed some achievement on Steemit and have been rewarded with new badge(s) :
Click on any badge to view your own Board of Honor on SteemitBoard.
For more information about SteemitBoard, click here
If you no longer want to receive notifications, reply to this comment with the word
STOP