SLC S23W6 - Real-Time Accessibility Feedback App – Implementing QR Code Generator and Scanner in Flutter
Hello everyone!
I warmly welcome you to the 6th week of the Steemit Learning Challenge season 23 and especially I invite you in the Technology and Development Club where you can share and learn tech.
I am working on a real-time accessibility feedback application. Last week we developed an image extractor feature of this application. This is sometimes a problem that we have an image and text on it and we want to extract that text in just one click but we suffer for this. So I added i n this accessibility application. Today I will develop two more features of this application which co-relate each other. These will be QR code generator and and QR code scanner. With the help of these features the users will be able to generate QR code for any text link or anything. On the other hand the user can scan any QR code bar code with this application.
QR code Generator
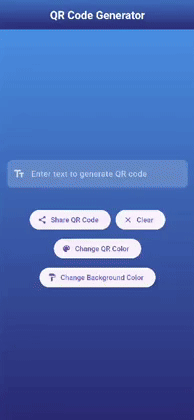
This QR code generator feature will have a separate screen to execute the functionality without any mess. It will have the following components:
- App Bar
- QR code display
- Input to get text for the QR code generation
- Share QR Code
- Copy QR Data
- Clear Input and QR Code
- Colour Change for QR code
- Background Colour Change
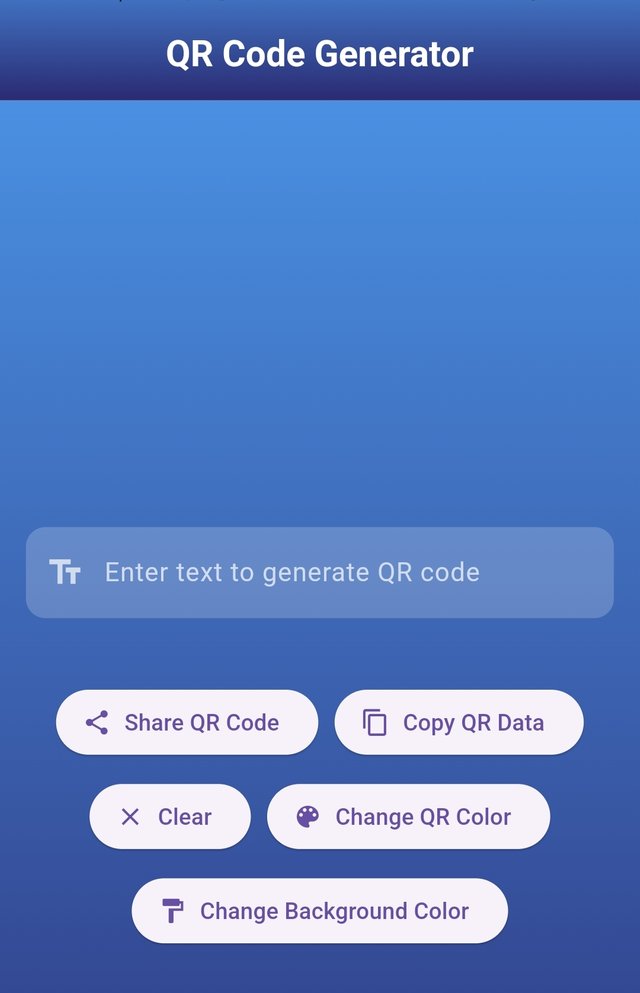
This is the complete interface of this screen. It allows the user to navigate and interact with this screen with the ease of use. I have made everything simple so that anyone can easily use this feature without any prior interaction. The input has a hint text to inform the user to enter any text to generate the QR code.
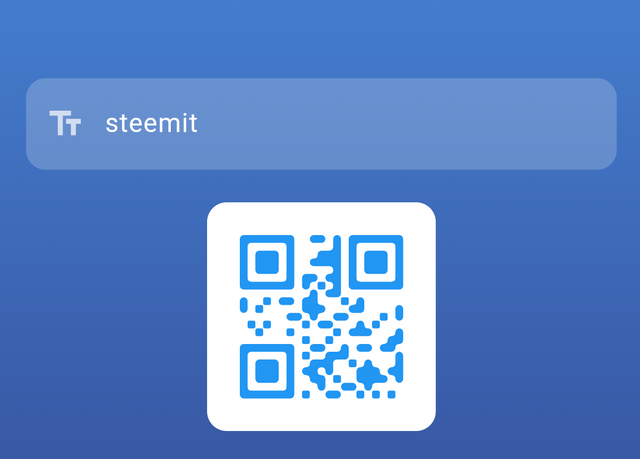
Here you can see that I gave steemit as input to generate QR code. As soon as I gave the input and click on enter the qr code was generated. This qr code can be shared anywhere to any platform which supports images.

These are all the useful action buttons which have the following functionalities:
- Share QR Code: This button is used to capture the QR code as an image and then share it to the external sources such as at WhatsApp.
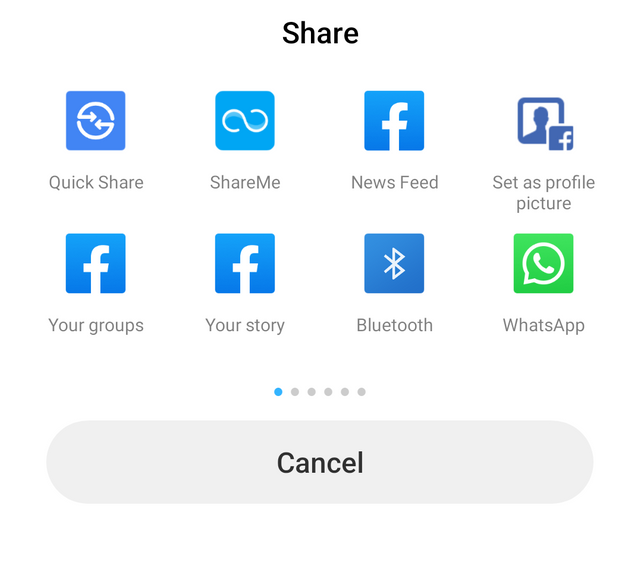
As soon as the share button is clicked the Qr code is taken as an image and then it becomes ready to share to any external source from the application. You can see a number of options to share the QR code.
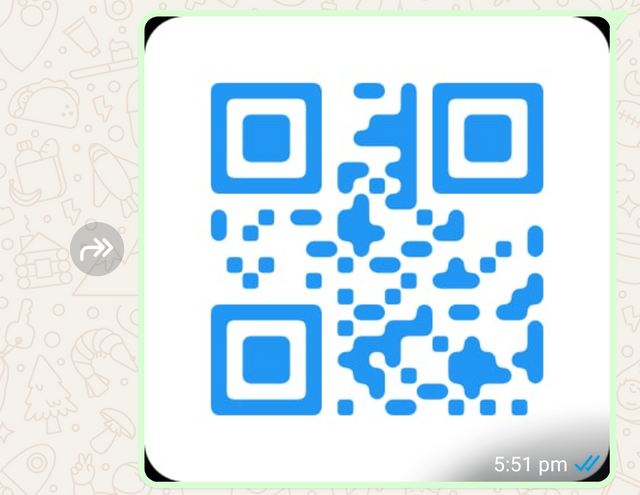
I selected WhatsApp to share the QR code and it opened my WhatsApp and I sent this QR code to myself to test. You can see it has been shared successfully.
Clear: This is used to clear the input text and the display of the QR code generated.
Change QR Color: This is used to change the color of the QR code.
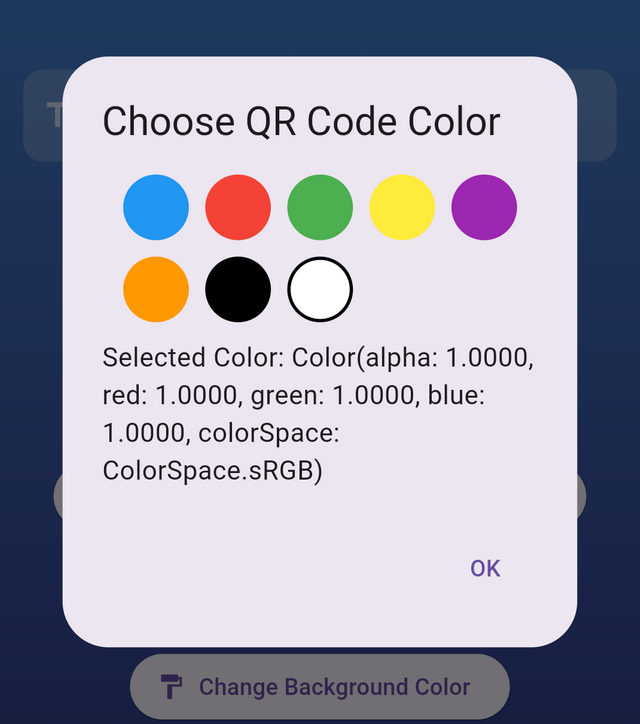
These are all the available colors to change for the QR code. I want to change the color so I have chosen white color for the QR code as you can see in the picture.
- Change Background Color: This button is used to change the background color of the QR code.
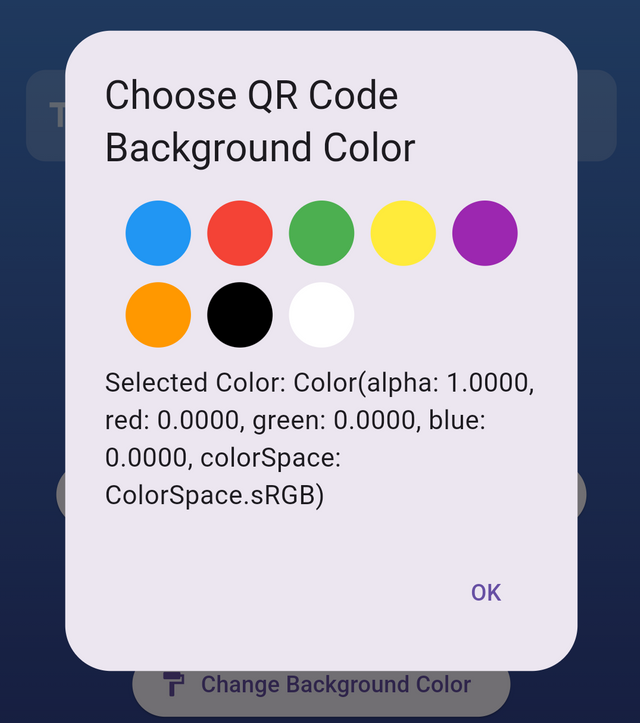
When the user click on the chnge background colour then there is a pop up with the pre-defined colors. I have chosen here black color as the background of the QR code.
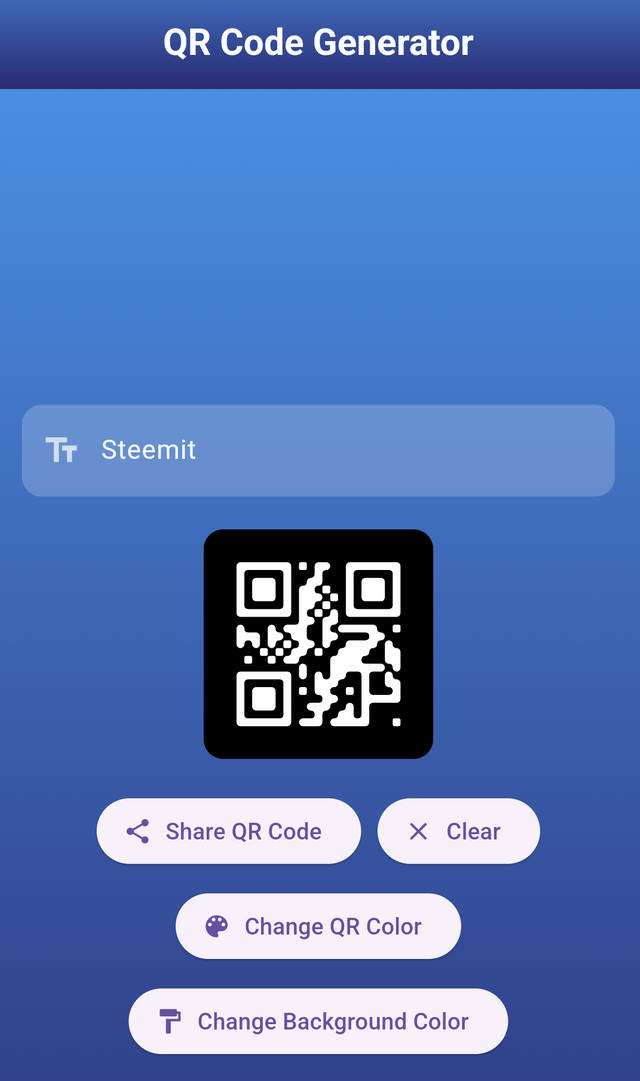
So the user can use any custom color for the QR code as well as for the background color. You can see the output after changing the colors both for the QR code as well as for the QR code background. So the user can choose any colors from the list of available colors according to their desired combination.
Here is the complete working of the QR code generator. I have shown how it generates QR code of given input and how the use can change the colour of QR code and background.
QR Code Scanner
This QR code scanner feature will have the following components and elements to perform the functionality:
- App Bar
- Flash Light Button
- Camera Switch Button
- Scan from Gallery Button
- By Default Open Camera
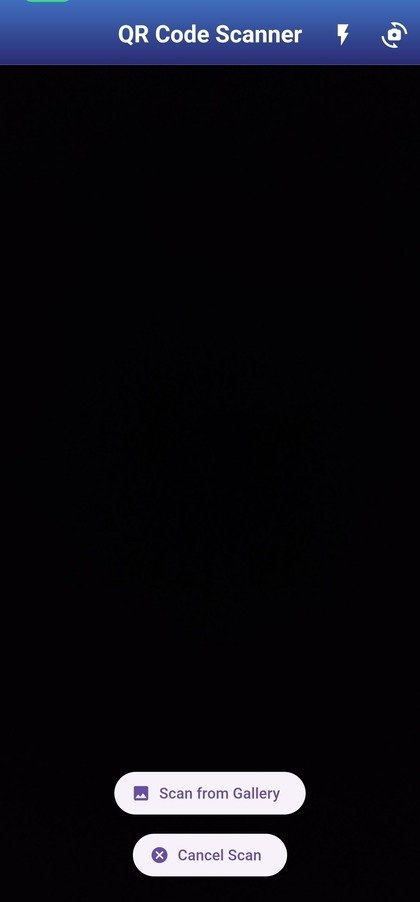
This is the complete interface of the QR code scanner. Let me break it down its all components with all of its features.

This is not just an app bar for this screen but it has two important functions in it. It has two icon buttons. The first button in the actions is to turn on the flash light of the camera. This helps to scan the QR codes even when the QR code is not in the well lit place. When the user clicks this button the flashlight is turned on without any further requirements.
The next button is used to switch the camera because this QR code scanner can scan from both the cameras. If the user wants to scan from the rear camera then it can work with rear camera but if depending upon the direction if the user wants to scan the QR code from the front camera then it can be used to scan the front camera.
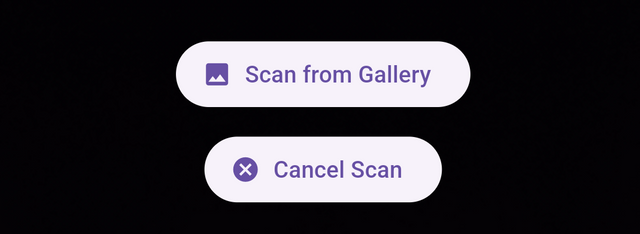
At the bottom of this screen there are two buttons, one button is to select image from the gallery and scan QR code from that image. The other button is to cancel the QR code scanning if the user does not want to scan the code.

This is the code which provides direct scanning from the camera. It uses the functionality from the mobile_scanner package and detects the live QR codes and after scanning then it returns the result. It takes care to not scan the same Qr code again and again in one turn. If a QR code passes through the camera it scans it ad shows result if it again comes in front of the camera the camera will ignore it.

This is the logic to scan the image by picking it from the gallery. First of all it checks it checks if the image is selected or not. If the image file is not null then it passes the it mage to the analyzeImage through its path and it scans the image and finds the QR code on the image. If there is a bar code on the image then it returns the decode of the qr code otherwise it shows exception.
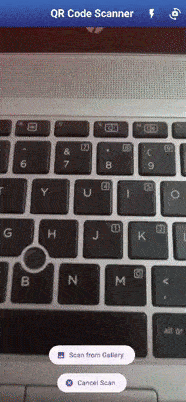
This is how the QR code scanner works. This is very fast and sensitive. As soon as it captures any QR code it scans and displays the result and ponce it has scanned and displayed the result it dies not over-right and then scans the unique QR code in one turn but after running it again it will again scan the already scanned QR codes. It scans live with the camera as well as with the images. I have tested it and if the image is large but with a QR code anywhere in the image then it suddenly captures the QR code and scan it successfully.
Finally today the complete development of the application has been completed with all of its features. Actually it was a final year project and I have completed it successfully. This complete application has the following feature:
- Issue reporting
- Issue Tracking
- Admin Dashboard for Issues
- Language Translation
- Image Extraction
- QR code Generator
- QR code Scanner
With all of its features it is the best assistant for the students and it is really useful for the students. I have given it the name as Omni Assist app which have the ability to assist the students in many ways.
GitHub Repository
In this GitHub repository I have shared login_screen.dart, signup_screen.dart, splash_screen.dart, issue_page.dart, and location_picker_page.dart and other screens for the learning purpose only and as I will progress I will share the other files as well.
What I have learnt
I have learnt these things while working on the project:
Firebase authentication and Firestore integration
Handling user inputs and validation
State management in Flutter while managing the user session and controlling the user inputs through controllers.
Enhanced user experience and UI design with the implementation of the multi-step sign up process. The use of the gradient in the layout to make it look more attractive.
Error handling and debugging. I managed the error handling of the duplicate accounts, invalid credentials and empty fields.
Image uploading and accessing it via Cloudinary.
Storing the data in firestore database.
Implementation of
OpenStreetMapand Nominatim API.Tracking of the reports.
Handling comment section on the basis of the user
role.Language translation.
Image extraction.
QR Code Generator
QR Code Scanner
What can you share in the club?
Our club is all about technology and development including:
- Web & Mobile Development
- AI & Machine Learning
- DevOps & Cloud Technologies
- Blockchain & Decentralized Applications
- Open-source Contributions
- Graphic Design & UI/UX
Any posts related to technology, reviews, information, tips, and practical experience must include original pictures, real-life reviews of the product, the changes it has brought to you, and a demonstration of practical experience
The club is open to everyone. Even if you're not interested in development, you can still share ideas for projects, and maybe someone will take the initiative to work on them and collaborate with you. Don’t worry if you don’t have much IT knowledge , just share your great ideas with us and provide feedback on the development projects. For example, if I create an extension, you can give your feedback as a user, test the specific project, and that will make you an important part of our club. We encourage people to talk and share posts and ideas related to Steemit.
For more information about the #techclub you can go through A New Era of Learning on Steemit: Join the Technology and Development Club. It has all the details about posting in the #techclub and if you have any doubts or needs clarification you can ask.
Our Club Rules
To ensure a fair and valuable experience, we have a few rules:
- No AI generated content. We want real human creativity and effort.
- Respect each other. This is a learning and collaborative space.
- No simple open source projects. If you submit an open source project, ensure you add significant modifications or improvements and share the source of the open source.
- Project code must be hosted in a Git repository (GitHub/GitLab preferred). If privacy is a concern, provide limited access to our mentors.
- Any post in our club that is published with the main tag #techclub please mention the mentors @kafio @mohammadfaisal @alejos7ven
- Use the tag #techclub, #techclub-s23w6, #country, other specific tags relevant to your post.
- In this first week's #techclub you can participate from Monday, March 24, 2025, 00:00 UTC to Sunday, March 30, 2025, 23:59 UTC.
- Post the link to your entry in the comments section of this contest post. (Must)
- Invite at least 3 friends to participate.
- Try to leave valuable feedback on other people's entries.
- Share your post on Twitter and drop the link as a comment on your post.
Each post will be reviewed according to the working schedule as a major review which will have all the information about the post such as AI, Plagiarism, Creativity, Originality and suggestions for the improvements.
Other team members will also try to provide their suggestions just like a simple user but the major review will be one which will have all the details.
Rewards System
Sc01 and Sc02 will be visiting the posts of the users and participating teaching teams and learning clubs and upvoting outstanding content. Upvote is not guaranteed for all articles. Kindly take note.
Each week we will select Top 4 posts which has outperformed from others while maintaining the quality of their entry, interaction with other users, unique ideas, and creativity. These top 4 posts will receive additional winning rewards from SC01/SC02.
Note: If we find any valuable and outstanding comment than the post then we can select that comment as well instead of the post.
Technology and Development Club Team


Good
Thanks this valuable post
@mohammadfaisal
I have a question for you, how many posts can we write in the Steem Learning Challenge? Can we write only one post in a week or how many can we write? Please let me know.
Follow @steemitblog for the updates and you can write as much as you can but not with AI. Firstly publish your introduction post in the Newcomers community and get verified.
My entry link:
https://steemit.com/techclub/@sun-developer/slc-s23w6-create-story-creating-mistake-checking-and-translatation-website-complete
https://steemit.com/techclubs23w6/@faran-nabeel/steemit-learning-club-s23w6-or-or-enhancing-and-adding-features-in-web-based-tradingdashboad-to-set-marin-mode-laverage-and
My Entry