Getting Hooked on Punch Needle: My First Try!

Assalam-o-Alaikum everyone, Today I want to share my first punch needle experience with all of you. A few days ago I bought a punch needle kit which contained all the necessary things like punch needle tool, yarn, fabric, embroidery hoop, and instructions. Punch needle is a very interesting and creative hobby in which designs are made on paper. I tried this craft for the first time and I am sharing all my steps with you so that if you also want to try it, it will be easy with my help.
First of all I opened my punch needle kit and checked everything. The kit contained everything a beginner would need. I did not have to make a design because it was already drawn in fabric.
After that I tightened the fabric in the embroidery hoop and set it so that it was strong and easy to stitch. Then I learnt how to thread the punch needle tool with the yarn. For this I watched YouTube videos as at first I did not know how to put the yarn into the punch needle. The yarn has to be inserted in front of the punch needle through a pin so that it comes out from the other side, then the yarn has to be carefully inserted into the hole of the punch needle and taken out from the front side. See images to understand better.
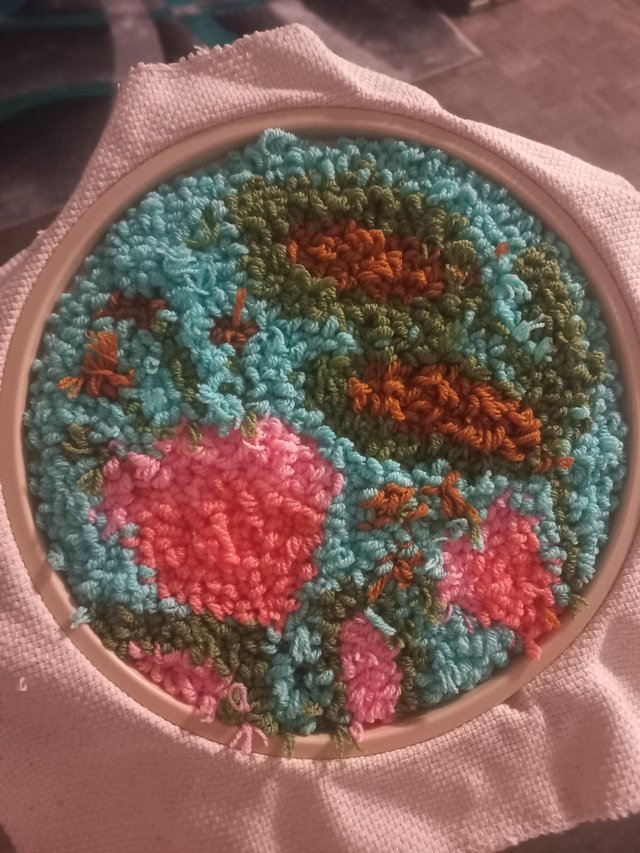
Now the most important part was to punch the fabric. I started punching carefully according to my design. Initially it was a little difficult but slowly I started enjoying it. Patience and consistency are very important while punching. This is a very relaxing and creative activity which reduces stress.
 |  |
|---|---|
 |  |
 |  |
 |  |
 |  |
 |  |
When my design was complete, I cut out extra yarn pieces from back. I really liked this journey of punch needle because this is not just a hobby but also making something with my hands.
If you too want to try punch needle then definitely get a complete punch needle kit which contains all the things. Have a little patience and keep practicing, your designs will become even better. My first experience was very good and I will try new designs in future as well.
Thank you for reading everyone :)
Show us the back side ;-)) My grandma explained to me: when embroidering, the back looks exactly like the front if you do it right. And if you haven't done it right, you do it again ;-))))
I didn't know about that, I think it's good as it was my first time 🤭 what you say :))
I never really managed to live up to my grandma's handicraft standards. Probably because I didn't enjoy it enough... She would probably have been gracious with your first attempt ;-))
🎉 Congratulations!
Your post has been manually upvoted by the SteemX Team! 🚀
SteemX is a modern, user-friendly and powerful platform built for the Steem ecosystem.
🔗 Visit us: www.steemx.org
✅ Support our work — Vote for our witness: bountyking5