A brother from my factory gave me this light and said that his was not working at all and it was not working through the battery and it was in the kitchen, and it would have been very useful to use it in the kitchen. Now it is not able to be used in the kitchen; even if the current goes out, it cannot be seen in any way. That is why he gave the light to me so that I could repair it quickly. Then I brought it home and planned to repair it.
First, you can see I took the broken light in my hand, and there was a little dirt under the light since it was used for cooking, so I will clean the light when the repair is complete.
Then I took off the white cover on the top of the light; you can see the features of each light one by one. There are all kinds of lights in the market. The quality of the lights is endless. The LED panel that you can see in this light operates on 5 volts. If you input 220 volts into the circuit of this LED light, the output is only 5 volts DC. And it gives 5 volts of light even when there is current, and when the current goes out, it gives 5 watts by taking 3.7 volts from 4 volts through the battery.
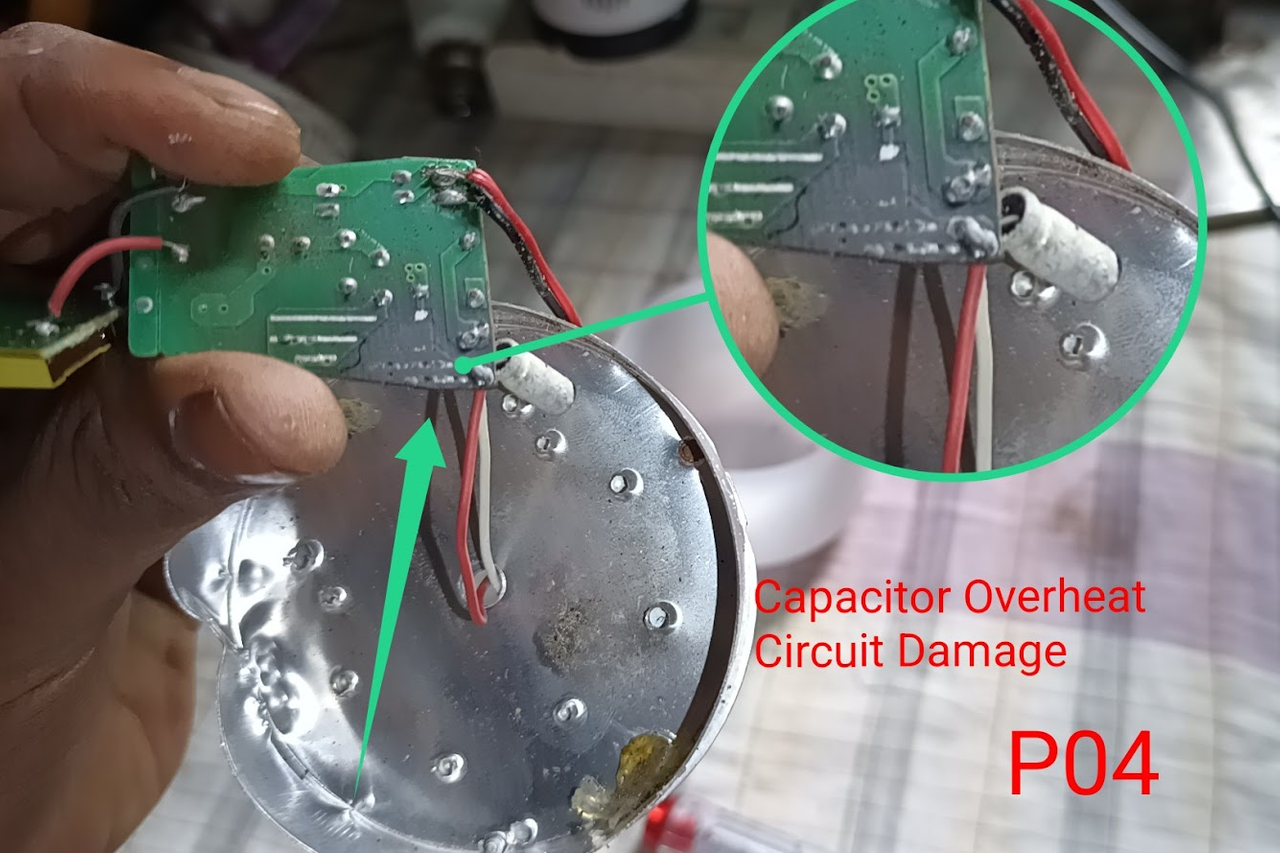
Now you can see that I have taken out the heat sink, removed the circuit and battery from inside, and the front part is very burnt; a capacitor is completely dated, and many parts of the circuit have turned black, and this shows that the light has been running for a long time and it is now damaged.
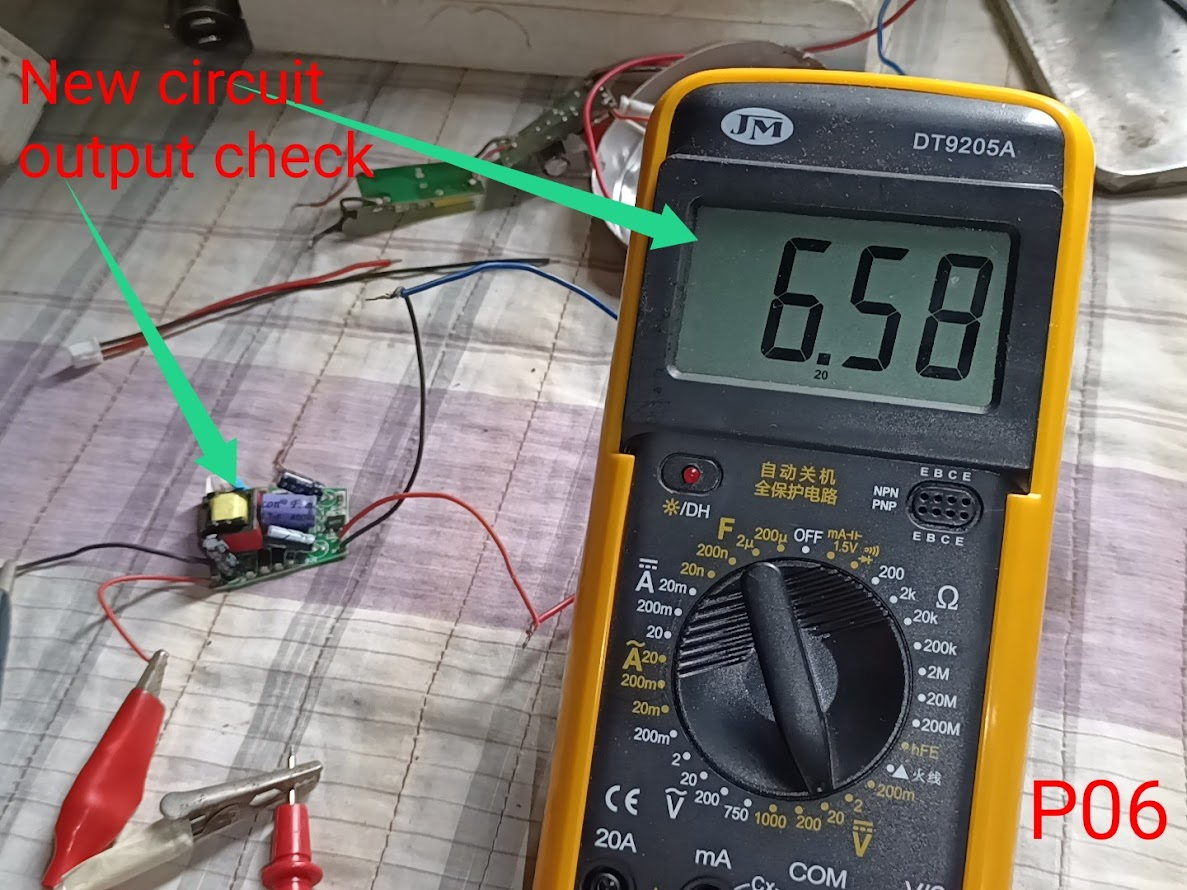
Then I bought the LED circuit from the market for 45 taka, which is the Bangladeshi market price; now I will charge 70 taka for this light. Before connecting the circuit, you can see that I have tested the circuit first, and you can see the output voltage of my multimeter is 6.58 volts. This proves that the new circuit is completely correct and usable.
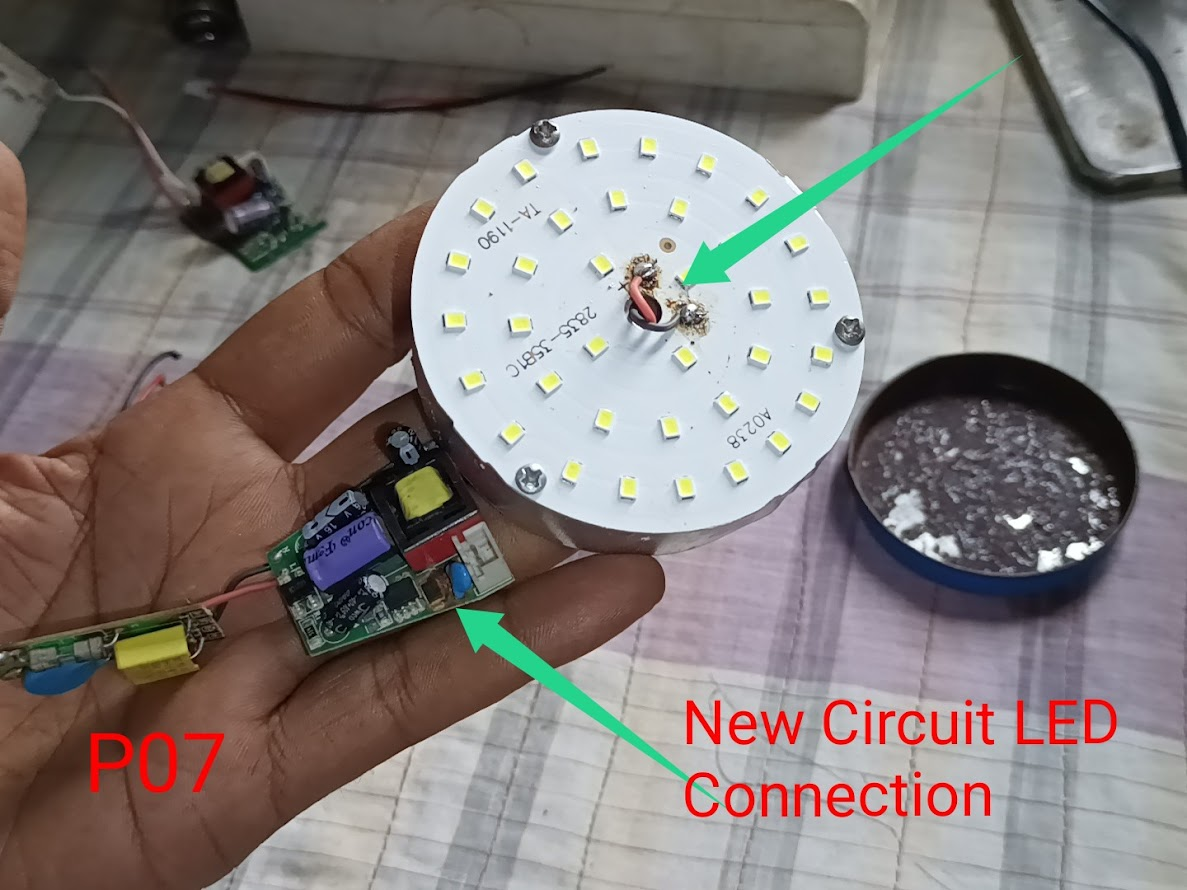
The new circuit is connected to the LED light. I soldered the red wire from the output voltage circuit to the plus icon of the LED and soldered the black wire from the circuit to the minus icon of the LED. Then you can see that there was no battery clip here; it was directly soldered to the circuit, so I took a battery clip. If you do the work properly, you can get good service, but I will cut the wire from the battery and attach the clip right away.
Then I cut the wire from the battery and attached the new clip and insulated it with a heating tube. Then before placing the battery in the circuit, I measured the output of the battery, and you can see that the multimeter shows a rating of 3.54 volts as the output, which proves that the battery is completely fine. Then I connected the battery to the circuit and shorted it and saw that my circuit was working through the battery without any 220-volt voltage.
Then I refitted the light and put the body cover on it and connected it to the two-pin holder to check with 220-volt input voltage. Then you can see that the light is working very well, and you can see a circuit in front of the light. This is an old circuit, and this light had been running for more than a year, so it has been given life again by installing a new circuit.
Then, to check if the light runs through the battery without 220 volts, I put my hand on the back and shorted it, and you can see that my light was burning through the battery without any 220 volts input, and this light is now completely fixed in both directions. Now it will run through 220 volts and also through the battery. So I hope you liked this repair post of mine, and I have taken a picture with my work as proof of work.
Video Tutorial: To better understand the practical part of this tutorial, you can watch the video below.
🟩 Thank you for reading my post and giving your valuable time. Stay well and stay healthy. God bless you.
🟩
✅ We support @pennsif and @pennsif.witness for the growth of this platform. pennsif.witness his contribution to the Steemit community. Vote for him as a Witness here: Click to Vote
.png)


.gif)