Tutorial: BMS circuit connection and 12V battery pack. | With a video tutorial.
Assalamu alaikum Everyone. I am @imranhassan From #Bangladesh
.png)
An important circuit for lithium-ion battery packs is BMS (Battery Management System). As you can see in the picture, this small board actually helps the entire battery pack to work safely and can be used to increase the output. The job of the BMS is to control the voltage of each cell, balance the cells during charge and discharge, and protect the battery from risks like overcharge, over-discharge or short-circuit.
Step -01
This circuit is essential for any big power bank, e-bike or solar battery pack. But today I will show you how to make a small 12-volt pack. So let's see step by step how I did these tasks.
Step -02

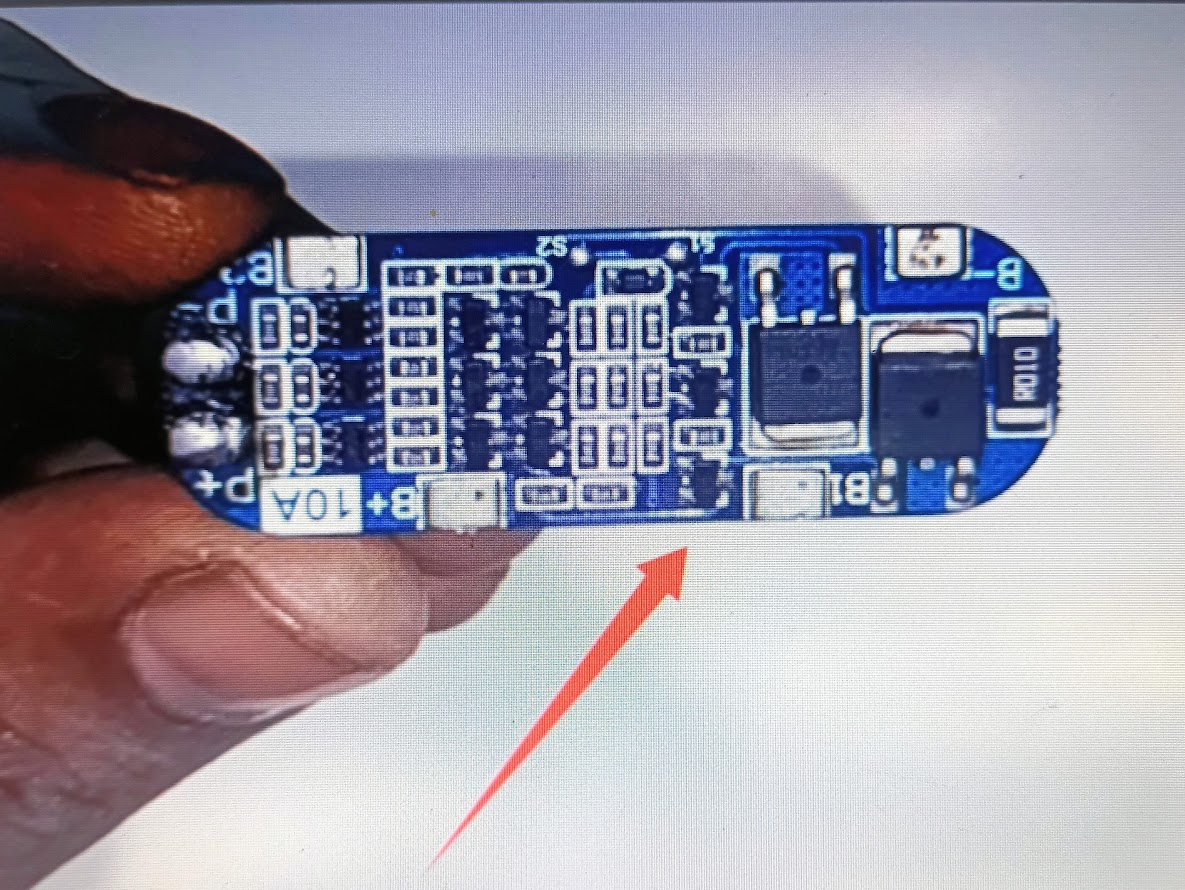
Now the circuit board that you see in my hand is basically a BMS. First I took it in my hand, and I observed how to make its connections, and now I will show you step by step, so let's get started.
Step -03

Now you can see that I have turned the circuit board upside down, and there are some diagrams on the back of it showing how to connect it to the battery, so first I have tried to show you with more symbols. First, there are 0 volts, then there are 3.7 volts, then there are 7.4 volts, and then there are 11.1 volts. With these diagrams, we will basically give our battery connections, so let's see how to connect the batteries.
Step -04

Now you can see three batteries in my hand; these are lithium-ion 3.7-volt batteries. These are supposed to be 2000 mAh, and there is a model of this battery which is a very popular model called the '18650 lithium-ion battery'.
Step -05

Now you can see that I have taken three batteries and the circuit board in front of me, and I have to connect the batteries in line by soldering one to the other and connect one to the positive line of each battery with the BMS, so let's start with how to connect.
Step -06

You can see that I have soldered the output sections of the battery first so that it is easy for me to make the connections. You can also connect it like this at the positive site and the negative site.
Step -07

Then, to combine the batteries, that is, to make a series line, I have taken two jumper wires and soldered them.
Step -08
Now you can see that I have connected the three batteries together through adhesive paper and soldered the negative with the positive so that the series line is sleeping, and at another site I have completed the series line by connecting the negative with the positive; from here now, 12 volts output will be available.
Step -09

Now you can see that after connecting the series line of the battery, I am checking the output with the help of a digital multimeter. Now, without any circuit connection, the output is more than 12 volts; when we make the circuit connection, it will decrease a little.
Step -10

To connect to the BMS, you can see here that I have joined two red and black wires to the negative and positive ends of the battery, and from the positive of each battery, I have taken out the output with two more red coloured wires.
Step -11

Now you can see that my connection is complete. I have connected the negative of the battery to the 0 V connection of the circuit, and I have connected 11.1 volts to the positive, 3.7 volts to the positive and 7.4 volts to the positive.
Step -12

Now you can see that I have connected a positive and a negative two red and black wires to the input and output section of the circuit, and there I have connected the output of the battery, and I have checked by running a 12-volt motor. The motor is spinning very nicely, and I have to charge it with this connection.
Step -13

This was our battery pack BMS circuit connection today. This is considered a tutorial post for you, and it is easy for you to connect three volt batteries with a series line connection and get a 12-volt output and protect the battery. You can run any big thing. There are as many lights of 12 volts.
One thing you always have to remember is that if you want to run a big fan, then you have to increase the battery and increase the amperage of the circuit. In comparison, you have to buy a circuit of larger amperage from the market. There are circuits up to 10 amperes, 20 amperes, and 30 amperes in the market. I have shown it with a 10 ampere circuit in today's tutorial, and my three batteries have only 6 amperes.
| Video Tutorial: To better understand the practical part of this tutorial, you can watch the video below. |
|---|

✅ CC: My friend @rmm31
✅ We support @pennsif and @pennsif.witness for the growth of this platform. pennsif.witness his contribution to the Steemit community. Vote for him as a Witness here: Click to Vote
| Photography Details | 📱 Device: Walton Xanon90 | 📍 Location: Narayanganj, Bangladesh | 📷 Captured By: @imranhassan |
|---|
Saludos amigo @imranhassan.
¡Excelente tutorial! Gracias por compartir tus conocimientos sobre BMS (Battery Management System) y cómo conectar un circuito de 12V con baterías de litio-ion. La explicación paso a paso y el video tutorial son muy útiles para entender el proceso. ¡Bien hecho! 👏💡
Bendiciones...🙏🏻
0.00 SBD,
0.35 STEEM,
0.35 SP
Thank you very much for taking your valuable time to stay with my post and for leaving such a nice and inspiring comment.
Saludos amigo, te cuento que con ese tipo de módulo pude construir mi propio UPS para el router, con una autonomía de 8 horas, utilizando baterías de reciclaje de tablet.
Son bastante útiles y versátiles.
0.00 SBD,
0.09 STEEM,
0.09 SP
I'm trying to make these battery packs bigger by connecting nine batteries in series and three in parallel. I'll increase the amperage and make a fan for my mother and wife. So that they can breathe fresh air and not sweat while cooking in the stove room.
Excelente idea amigo, me gustaría ver ese proyecto culminado, seguro que se sentirán felices y orgullosas al tener un ventilador fabricado por usted.

Que necesito hacer esto pronto porque mi esposa suda mientras cocina y tiene problemas de amigdalas en la garganta.
https://x.com/ImranHosen98536/status/1970894947604979866
Hello there, you have posted a great quality post and we are happy to support you, stay up with good quality publications
Curated by heriadi
অ Thank you very much, sir, for supporting me and encouraging me with your post.
Here is your content summary:
By improving the marked items you could get Higher Votes!
Curated by @alejos7ven