A few days ago, an aunt in my area gave me a battery-powered charger fan and said that she had left this channel for a long time and what was the problem with it, she could not understand but said that it would not work through the battery. Then I decided to work on the fan at my house and I decided to work on it.
Step -01
First, I took the entire fan apart and you can see that there is a lot of dust and dirt here which needs to be cleaned before working. Then I took the entire fan apart and decided to clean the fan fan and fan cover part by part. After cleaning the fan, I dried it in the sun and you could see the dirty fan that the fan was broken. Then I heated it in fire with the help of copper wire and made small holes there and I tied and strengthened it.
Step -02
Then I cleaned the fan cover circuit body cover everything and brought it to my work table now I will find out the problem why the fan was not working. So before repairing the fan, I first have to fit the fan and the plastic covers on the fan, so I locked the fan with the motor with the fan pin.
Step -03
Then you can see that I have fitted the fan motor and fitted two round black cage covers on the back and front of the fan and put them nicely. Then I soldered the output line from the circuit to run the fan motor.
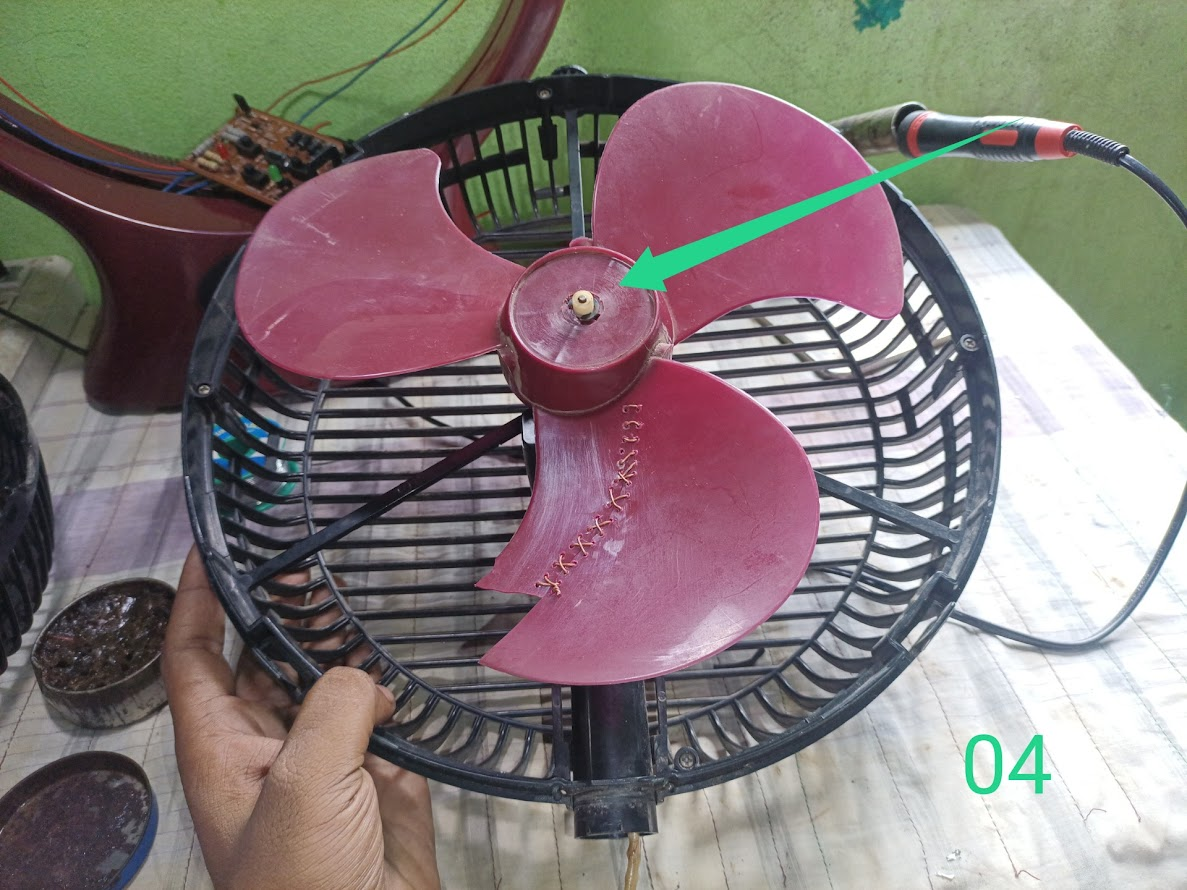
Step -04
Then I gave the 220 volt input voltage power connection to the circuit and you can see that a red light and a green light are on here, which means that the fan option of my circuit is running. On one side, my fan blades are spinning, on the other side, for the battery to charge, you can see that here I checked the output with the help of a multimeter, it is 7.37 volts, which is effective for charging the battery.
Step -05
At this stage, I found the problem with this fan. There was no problem with the circuit of this fan or the resistance capacitor. The only problem was the place where the battery was charged. The line that came from the circuit that was positive output voltage did not reach the battery. A clip was cut where the battery would be charged. Due to this, the battery would not be charged and the fan would not run through the battery. Then I soldered that place and checked the output with the help of a digital multimeter. Here you can see the output as 7.47 volts which is now fine and the battery will charge and run through the battery.
Step -06
Then I measured the battery earlier and charged it through one of my chargers. The battery is fine and I installed the battery in the place of the fan body cover. When everything was complete, I gave 220 volt AC input voltage and you can see that the red power light on my fan is on.
Step -07
Then I ran the fan directly with the help of 220 volt AC input voltage current and you can see that my fan blades are rotating and the LED lights are on so now I will run the fan without the 220 volt AC input voltage current through the battery. In my last picture you can see a picture of me with it rotating in my hand through the battery and a green light is on and this picture will remain as a proof of my work and I will now hand over this fan to its owner.
Video Tutorial: To better understand the practical part of this tutorial, you can watch the video below.
✅ We support @pennsif and @pennsif.witness for the growth of this platform. pennsif.witness his contribution to the Steemit community. Vote for him as a Witness here: Click to Vote
🟩 Thank you for reading my post and giving your valuable time. Stay well and stay healthy. God bless you.
🟩
.png)


Thank you very much sir for your kind support on my post.