"📢 Contest || Unlock Your Creativity || Week - 03".

Made with Canva
Assalam-o-Alaikum Respected Steemians ! |
|---|
Welcome 🤗 to my post. I wish you a happy and healthy life my dear friends. I am once again here for taking part in the contest hosted by dear @zisha-hafiz . I am here to unlock my creativity. I do embroidery on the arm of the shirt. It is cut work embroidery. I hope that you also like it. How are my all dearest friends doing? I am sure that you all will be fine and fit in your life by the blessings of Allah Almighty. I am also good, Alhamdulillah. So let's start the post.
Material Required : |
|---|
- Blue Color Fabric
- Paper for design
- Silver Polish
- Kerosene oil
- Spare cloth
- Of white thread
- Soldering iron (for cut work)
Step 1 |
|---|
- I already had the design of paper. So I went ahead directly printing. I add the little kerosene oil in the silver polish. Then I mixed it with cotton and started printing the design on the arm of the shirt. I printed the design of paper on the arm of kameez. Then after printing I cleaned the polish with Spare cloth.

Step 2 |
|---|
- Then I set the thread on the machine. I put the fabric in the frame. Then I started to do embroidery. Firstly , I made two three layers of scalef. Then I started to make flowers of different shapes. It is my favourite work.

Step 3 |
|---|
- Subsequently, I did embroidery in the printing area. I made a little block in it. Then I made different shapes of leaves and Flowers. I draw some of them on the right side and some of them are on the left side. I almost completed the half embroidery on the shirt. After completing the one frame. I put the frame on the other side where the embroidery work is left.

Step 4 |
|---|
- Then I started to make this area. In this step I again made leafs and flowers on the left and right side. In this way I completed the embroidery on the arms of the shirt. I did embroidery on the two arms of the shirt.

Step 5 |
|---|
- Then I ironed the fabric. After the embroidering ironing it makes it even more beautiful. As you can see in the picture both of the arms look beautiful.

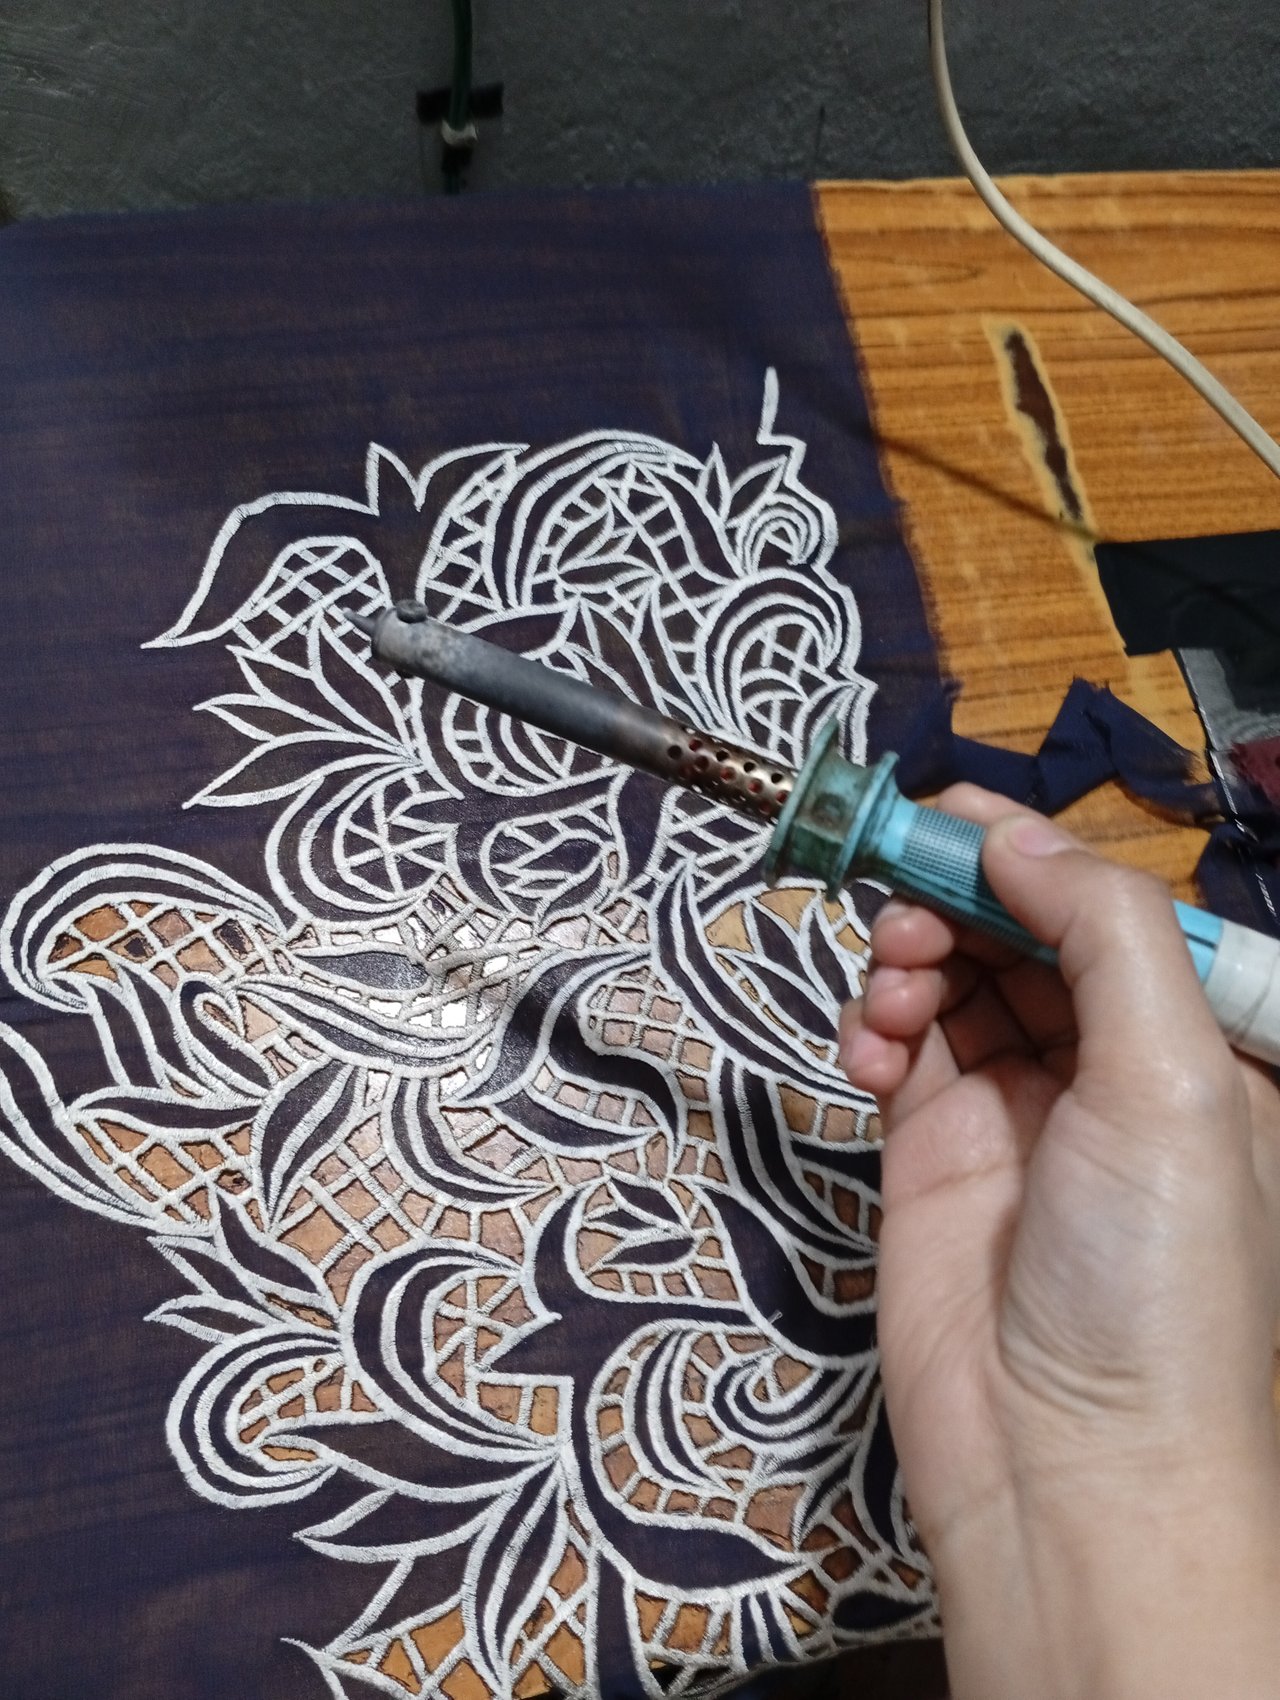
Step 6 |
|---|
- Then after ironing, I turn on the soldering iron. I left it for heat. It is a difficult step in embroidery. When it gets hot , it needs to be handled with extreme care. When it is heated , then I started the cut work. With the help of soldering iron I removed the little pieces of cloth from the blocks which I made in that embroidery. I do it very carefully.
- Then I completed the cut work and the piece of shirt is ready. Dear friends Embroidery , where every stitch tells a story.

So guys this is how I did embroidery on this beautiful fabric. It looks more beautiful and elegant after embroidery.
I would love to invite @bimanakhan , @tammanna , @m-princess and @arjinarahman for taking part in this contest.
|
|---|

Your handiwork is very beautiful. Your work was very perfect. It was very nice of you. It was even nicer for you to mention me. Best wishes to you.
Thank you so much for your kind words. I am glad that you like it. Stay blessed dear!