SC-S26W1/Video Editing, Getting Started
 Video Editing
Like they say, it is never too late to learn something new. Here we are!. There is knowledge in power, and the more you learn, the more you see how empty you really are. Welcome to this week's learning challenge. Let's learn something new. Editing videos with capcut.
Capcut is a popular photo and video editing application widely used on mobile phones, although it's desktop version equally exist. It was first endorsed by tiktok for each video editing. Which by the time was why they used by tiktokers. It was first released in 2019, by a Chinese company which is the same leading company as that of tiktok. Incorporating it with tiktok makes it gain rapid popularity. Presently it exists on both Android and iOS system, Windows and Mac operating systems.
| Task For The Week. |
|---|
In this exercise, I will be taking two photos and two videos to perform an edit. While maintaining the specification for this exercise, these videos are interrelated , same as the photos. It is going to be videos which were taken from my grandma's memorial. It was such a sad day for us. However, it's a memory now.
| Phone specification |
|---|
All photos and videos were taken on Google pixel 6 Pro.
Below the specification.
| Phone 📱 | pix 6 pro |
|---|---|
| Features | specs |
| Battery | 5003 mAh |
| Weight | 210g |
| Scr size | 6.7 inches |
| Os | Android 16 |
| Camera | |
| Main camera | |
| 50 MP wide | |
| 48MP Telephoto cam, 4x zoom | |
| 12MP ultra wide | |
| Video | 4k, 30fps, 60fps, 1080p |
| Selfie | 11.1MP |
| RAM | 12GB |
| Network | Lite/5g, GSM, CDMA,HSPA |
| Release Date | October 2021 |
| Step by step video creation |
|---|
It is very simple to If I'm this task, creating a video with capcut. First we need to download capcut from Play store . Once installed, we open capcut and proceeds to the project area as seen below.
 |  |
|---|
click on project
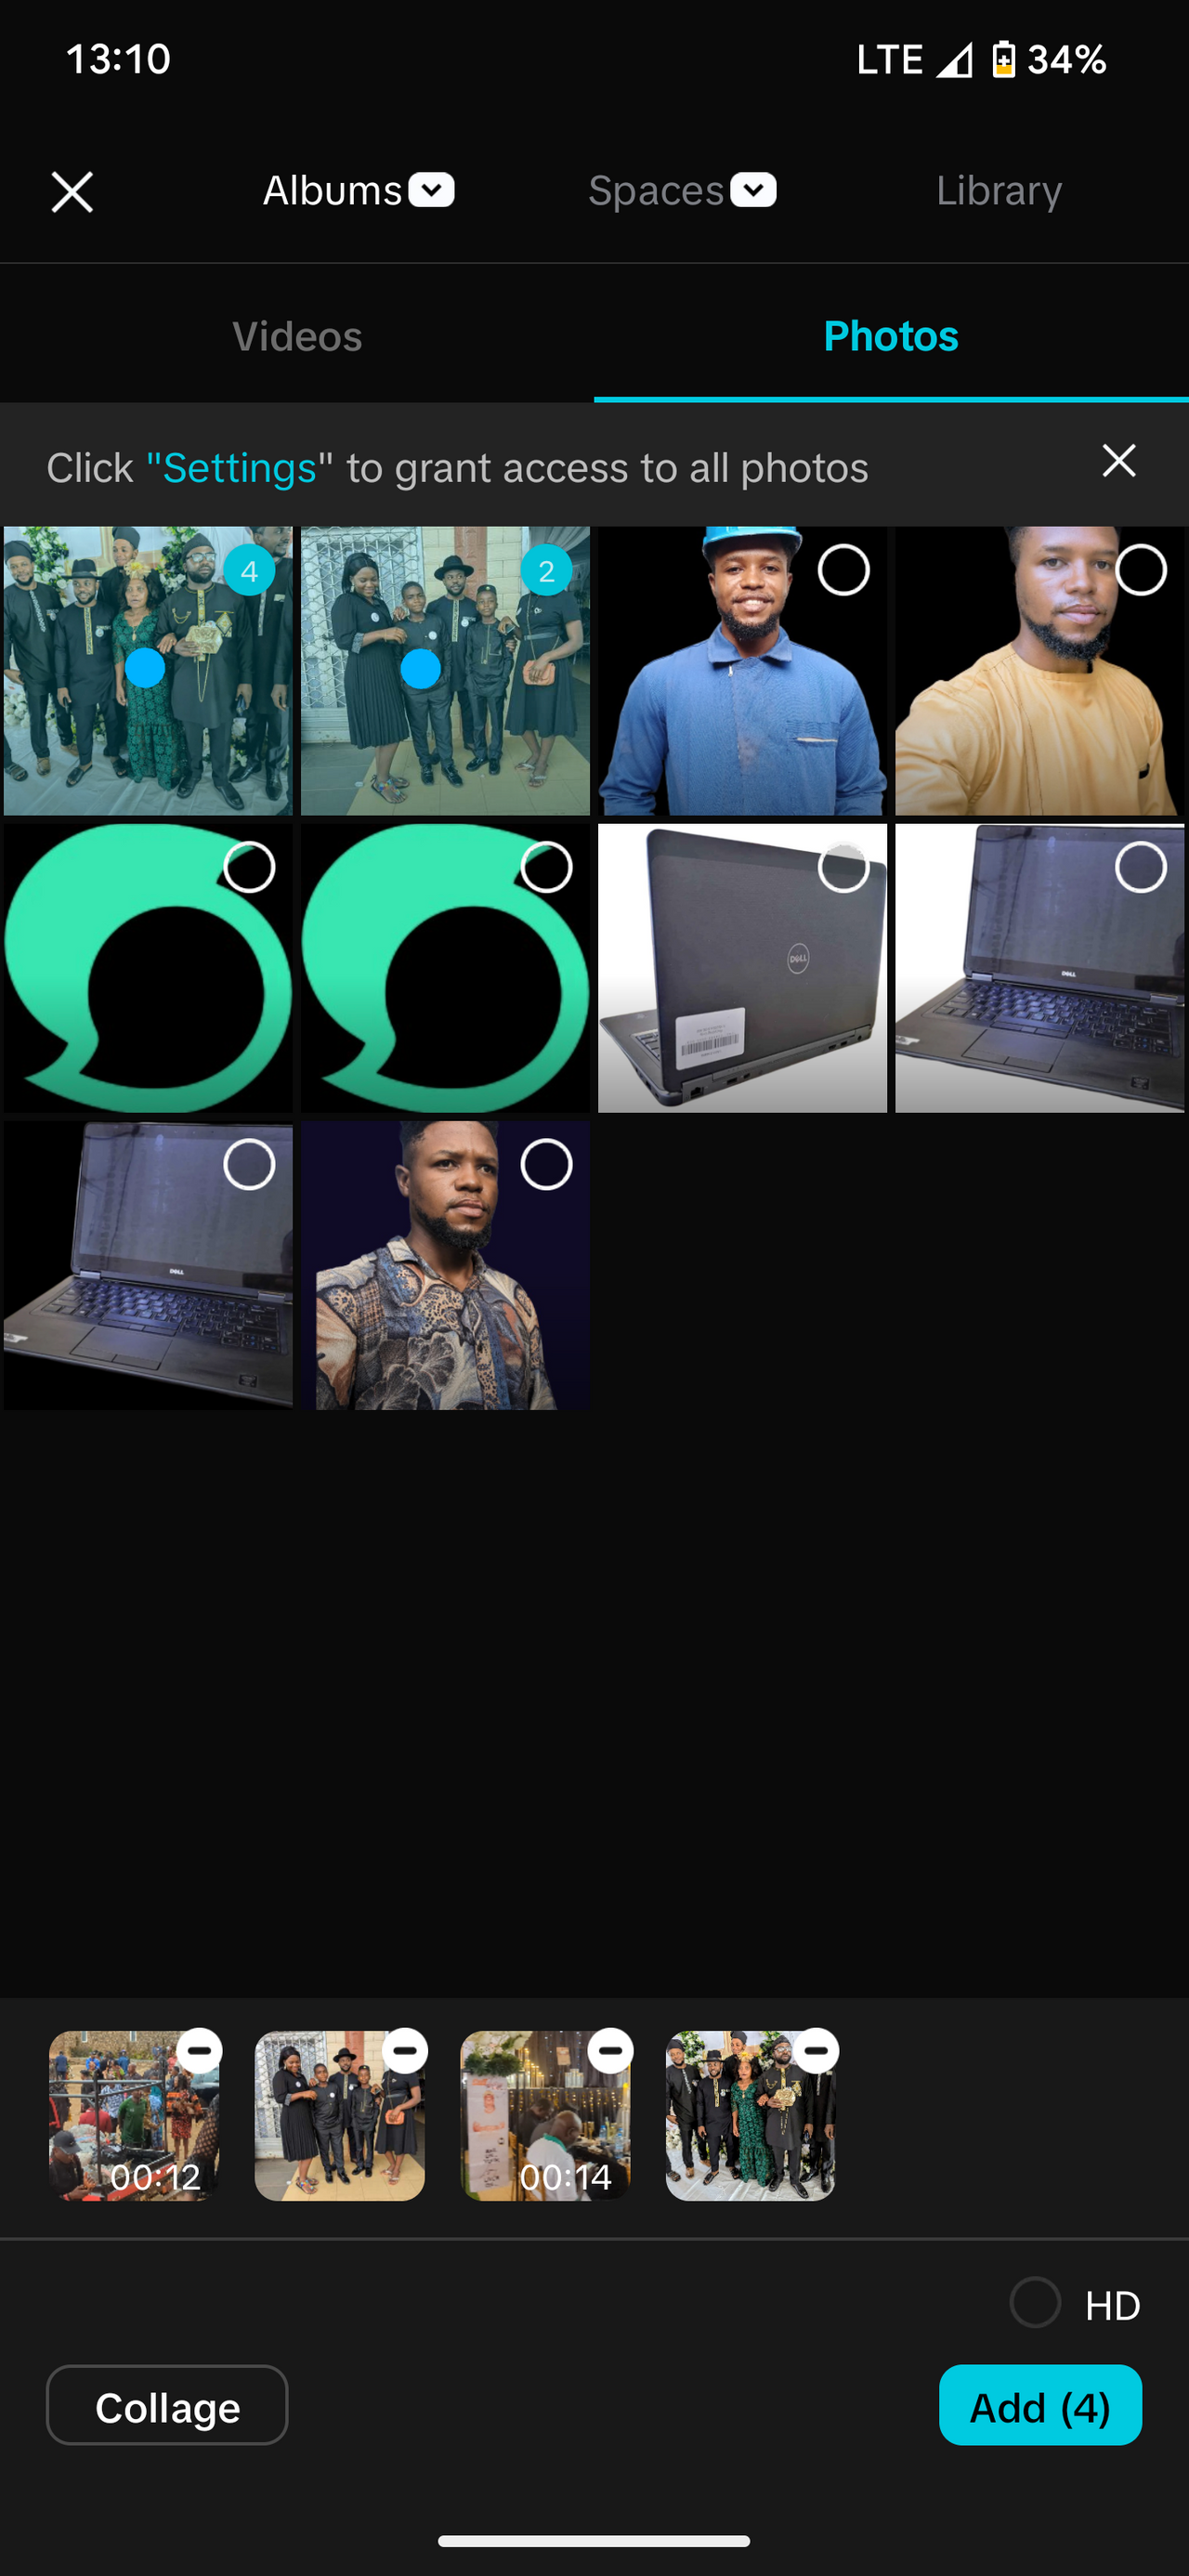
From here this will take us to another menu which is going to request us to add videos or photos from our phone memory. If you have used capcuts before, there will be some videos and Photos already present. This will be my case.
However, we click on the setting option for those who are using Android in order to allow us access to the phone's memory. This will take us to the phone memory and we can Scroll to wherever our videos or photos are found.
 |  |
|---|
Adding photos and videos
From the available pictures provided, we can tap on the video or photos which we need to edit and click done. This will automatically import the videos and photos to capcut local storage. From here we are going to follow another step to import these videos to the workspace.
Once all the photos and videos required for this task has been selected and added., we then move to another section which is going to be to select the videos in order as they will appear in the editing workspace. However, this order doesn't matter so much as it could be rearranged in the editing workspace as well. But for the purpose of this exercise, we are going to select them as they will appear in the editing workspace.
 |  |  |
|---|
adding photos and videos to workspace for editing
Once this is complete, the photos and videos will automatically be added to the Editing area. This will give us the main menu in which we are going to be performing all the work. In this menu there are several tools which can be used to edit videos and photos in a unique way. However, we are not going to do so much of that as we will be focused on specific tools required for this exercise.
We are going to be uploading our videos on YouTube. However, it is important to begin with by setting the aspect ratio to that which were much YouTube application. This is often 16:9 AR. Here is how to do this.
First, screw on the tools below the screen until you reach the end. There you will find the second to the last option, which mentioned aspect ratio. Click on it and it will take you to another menu. From this menu, you can select any aspect ratio depending on wherever you are going to upload your video. However, our focus is YouTube and we are going to select the aspect ratio of 16:9. We can equally see that each aspect ratio is indicated by the icon of the application which best match it.
In our case, the YouTube application is already representing 16:9 AR. So we click on it right away and all our videos and photos will be edited in that aspect ratio.
Once this is complete we return to the main menu.
 |  |
|---|
setting aspect ratio
Back to the main menu, they are a few more things we are going to look at. First, the videos are going to be lengthy of which we don't need that. However, this can be minimized by trimming the video to the area which we would like to display and then leave it there.
In some applications you might find the trim option, however, you can easily tap on the video and drag at the edges on both ends till you reach the precise portion of the video you want to display. This will help shorten the video length.
I perform this on little videos uploaded as I required just a specific portion for this exercise. It is very simple and easy to follow as Seen below.
 |  |
|---|
Video trim
If you look carefully, the original length of the video was around 12.3 seconds, after dragging and trimming to our required Zone, it is now 4.4 seconds. It is quite easy and I'm sure you will catch up while trying.
Completing with video trim, I perform it on the two videos living out just the zone in which we are going to be displaying in our video. After completing, I equally zoom out the photos to fit in the 16: 9 aspect ratio while maintaining the quality of the photo.
Once this is complete, we can move on to the next stage which is by adding an overlay to the video. First we go back to the edit options directly under our video and look for overlay. Once you have found this option, click on it and it will take you to a second menu.
This will prompt you to add an overlay. Same steps as we did when adding photos and video, we are going to add an overlay right next to the already existing photos and videos. This will be the steemit logo. Once I did, we import it to the workspace.
From here there are a few things to do too. First we resize by dragging in or out. I want it to be small, so I am dragging in until it reaches the required size I want to. I place my hand over the image and move it to the top right corner of the video.
Back to the exit section, I tap on the overlay up to the end of the video. This makes sure that it is going to stay there as the video play along right to the end. Our video is going to last for 20 seconds. You will see it right at the end of the overlay.
 |  |
|---|
Adding overlay
 |  |
|---|---|
| Resizing and positioning overlay | Drag till the end |
Once this is complete. We are almost done. We go back to the main menu and click on the play option to see how our video display is going to look like. Once it start playing, you can equally pause ⏸️ using the same button.

play/pause. Final analyzation
One thing you should know is the capcut watermark video is automatically added at the end of our video. In order to remove this, we simply crew to the end of the video and then tap on the the last portion of the video section. The settings on there will appear and we will see a prompt option, indicating delete. We tap on this and the watermark Video is deleted.
 |  |
|---|
Deleting watermark Video. Capcut
After checking and analyzing, our video is okay and ready for export. Looking at the top right corner of the screen, you will see an option indicating export video. We will tap on it and our video will be exported automatically.

Video Export
| Follow up video |
|---|
Step by step the display for a better understanding
| Final Video |
|---|
Once our export is complete, we can proceed by uploading it on YouTube and later copying the link and pasting on Steemit. In that aspect, you need to have a YouTube account. And equally know how to upload videos on YouTube. It is very simple.
You just need to click on the add option on the bottom ribbon of the application and this will direct you to the videos present in your phone, you just select the one which you need to add and click on it. You may add sound If you would love to. You just add some few tags and upload. That's all . At 100%. You just click on share option and then copy the link. And paste on Steemit. And you are done.
Results. Final Video
Alright. Thank you for following up these steps right up to the end. It's been an amazing exercise so far and I enjoyed it as much as you do. Learning how to create videos on the capcut is so much important as some of our videos on social media requires this. However, not everyone has the skills to edit profile videos that will attract A large amount of audience.
This is why this lesson is so important and I am willing to learn a lot more from the main post right to the end of the season. Notwithstanding, I would like to invite some persons to try out their editing skills and this amazing challenge
@chant
@wirngo
@saxopedia
Best regards: @rafk
Aug 11, 25
Upvoted! Thank you for supporting witness @jswit.
Ha sido un gusto leer tu explicación del uso de la aplicación, me parece que la conoces bien pero te ceñiste a lo solicitado para esta clase, explicando de forma detallada.
Es interesante que además podamos observar las costumbres de tu país para despedir a un ser querido. Gracias por compartir.
!upvote 50
the post has been upvoted successfully! Remaining bandwidth: 50%
Que bueno que hayas podido participar y agregar los conocimientos explicados en la clase por el profesor, por otro lado se ha aprendido esa constumbre de tu país de como despedir a un ser querido.
Le deseo mucho éxito en su entrada, saludos.