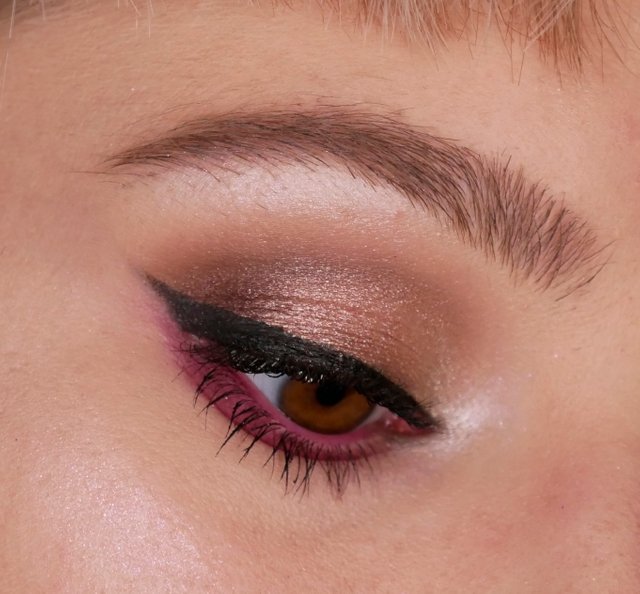
Brown-Bordeaux Eyeshadow Tutorial.
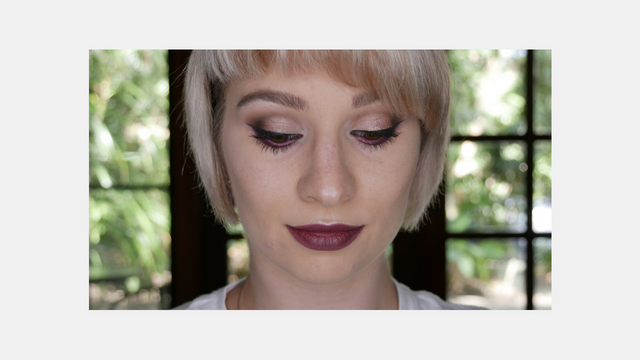
For today’s eyeshadow look, I had a brief idea of what colors/shades I wanted to use but I didn’t really know how the completed look would look like at the end.
For some reason, I also took some inspiration from the Hard Rock Café T-shirt that I was wearing that day, so sometimes you just need to see some colors or an object and this will give you an idea of what you could use and create.
I was so happy how it all came together little by little and I hope that you like the look as much as I do!
Let’s start:
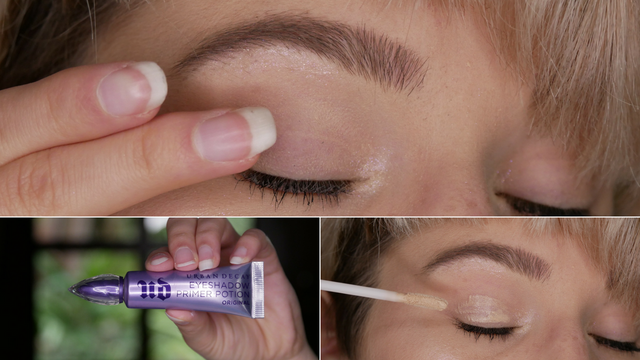
Step 1: Prime.
Eye-primer prevents creasing on your eyelids.
So, if you have oily eyelids go for a good eye primer.
You can apply the primer with your finger and dab it all over your eyelid and let it dry.
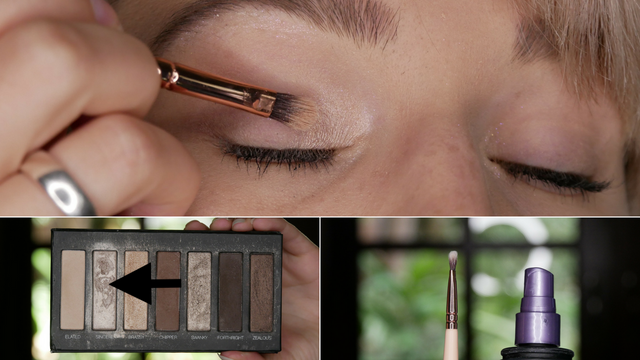
Step 2: Light Shimmer.
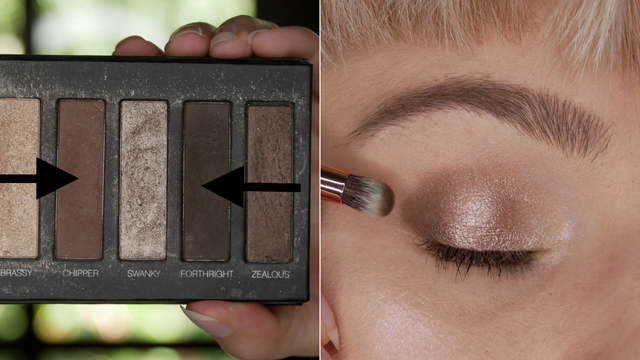
Take a small eyeshadow or even lip brush and dampen it with water or setting spray because this will help the shadow to show up the most.
Place a cool-toned shimmery shade in the inner portion of your eyelid and blend it towards the mid-section of your eyelid.
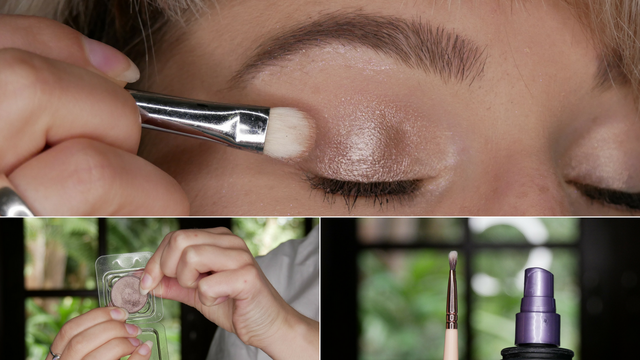
Step 3: Light Brown Shimmer.
Now you can go one tone deeper like a light brown shimmer shadow and place this on the mid-section of your eyelid.
Use a flat eyeshadow brush and dampen it as well. It’s just such an easy trick to make shimmers work the best!
Also, blend this shade into the lightest shimmery shadow because you don’t want to see any harsh lines between each shade.
Step 4: Dark Matte Brown.
Using a denser or a bit firmer rounded eyeshadow brush will allow you to pack on a lot of shadow onto the brush and your eyelid.
I went for a dark matte brown shade but you also could go with black or gray. It’s up to you (:
Apply this to the very outer portion of your eye and keep it on your main eyelid.
Step 5: Blend.
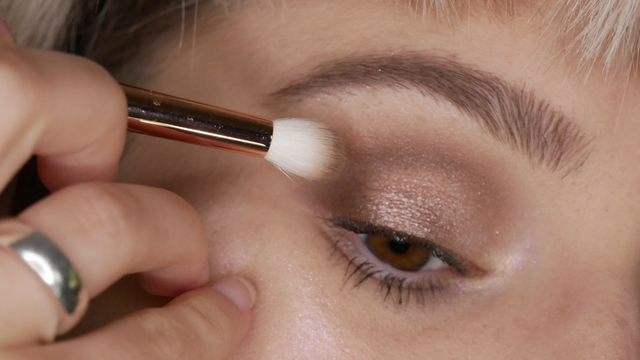
Now you can take a blending brush and build up the shadow in the outer portion of your eye and in your crease. This way you can add a bit more depth to your crease as well as blend the shimmery shades that are slightly touching the crease.
Step 6: Dark Shimmery Brown Shade.
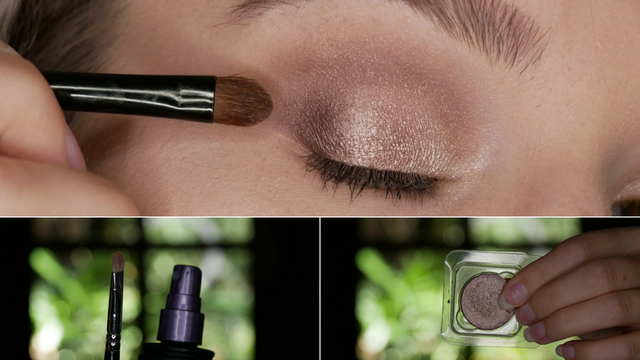
Do the same trick as before, use a smaller pointed eyeshadow brush and dampen it with some water or setting spray then apply the dark shimmery brown shade to the outer portion of your eyelid and do not drag it too far up towards the crease.
Your crease should be as matte as possible because we don’t want to have a shimmery upper part eye area.
Step 6: Winged Eyeliner.
Going for a winged-eyeliner look isn’t always that easy, I know!
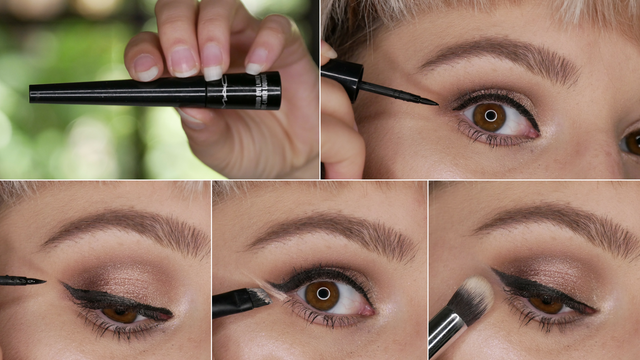
Even that day was not a good eyeliner day for me either and I won’t use this liquid eyeliner pot again because it’s just a mess! I prefer to use my liquid eyeliner pencil!
That’s why I used an angled eyeshadow brush with some concealer on it to get a clean an proper winged-eyeliner look!
After you’ve applied the concealer you now can take your finger, sponge or buffing brush to blend the concealer into the skin.
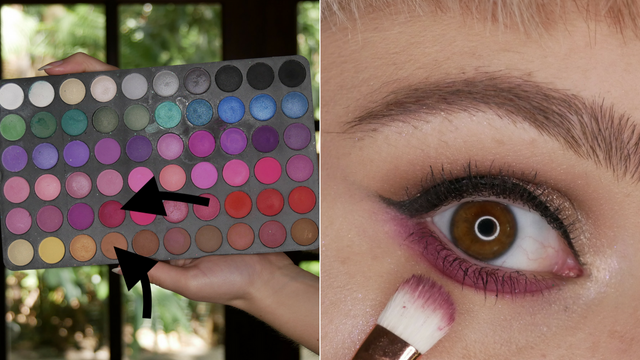
Step 7: Bordeaux Reddish Lower Lash-Line.
This is where I didn’t know what color I should use next… I wanted something with a bit more fun to the look, I missed my colors!
So, I looked down at the shirt and the outlining of the ‘Hard Rock Café’ shirt is in a red-brownish tone. I grabbed my palette and I dipped my flat eyeshadow brush in a red-purplish shade as well as into some brown.
And I applied this shade onto the lower lash-line.
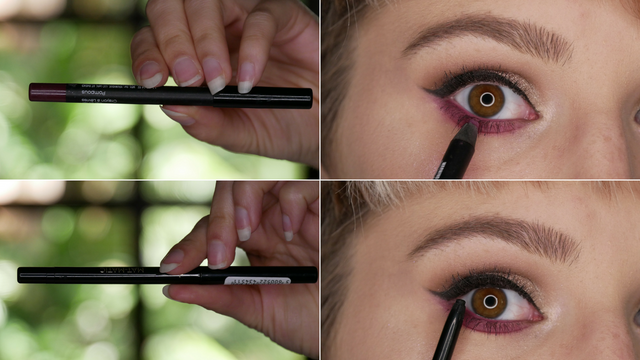
Step 8: Eyeliner pencil.
I also added some black and Bordeaux type of pencil to the upper and lower waterlines to let the shades melt into each other.
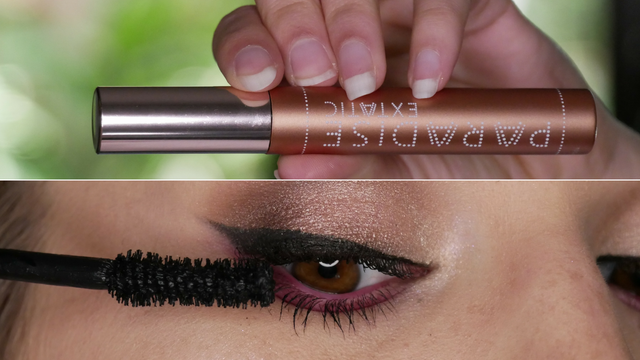
Step 9: Mascara
If you want to receive some attention to your lashes, you need to get yourself a good mascara and add a few coats to your lashes!
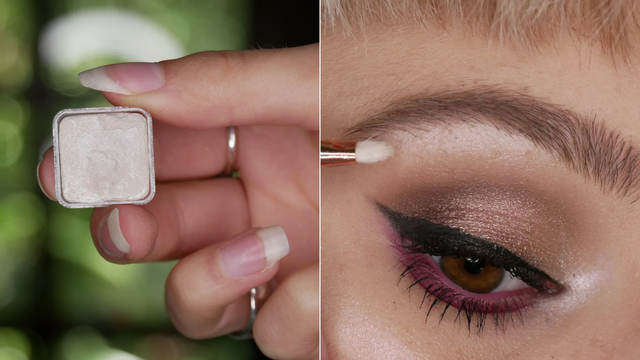
Step 10: Icy Highlighter.
Grab a shimmery shadow that’s lighter than the inner corner portion shade and use it as a highlighter.
Get a small lip brush and dampen it with some water or setting spray. Then dig into the highlighter and apply it to the inner corner of your eye and under your brows.
Also, if you want to highlight the rest of your face, go for it! Use your finger to apply it.
Step 11: Lips.
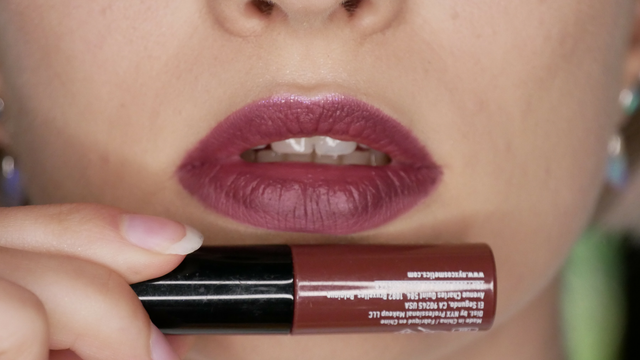
For my lips, I used the same shade of liquid lipstick as on my lower lash-line to bring the eyes and lips together so that they are one team!
That’s basically it for today! I love the end result of this look! And it all came together while I was creating it! Another successful makeup day!
xoxo, Melissa
Follow me on Twitter
Follow me on Facebook
Subscribe to my YouTube Channel
ALL MAKEUP GEEKS, feel free to RESTEEM this article! Let's keep spreading the word with real life everyday makeup application!
If you're someone who needs recognition for amazing an special content, don't be afraid to join the Promo-Mentor Channel

Thank you for your post. :) I have voted for you: 🎁! To call me just write @contentvoter in a comment.
Howdy partner, I'm @photocurator, a curation bot; I keep an eye on the photo feeds, I vote random photos of my followers and at the end of the day I publish a post with links to the best photos. Follow @photocurator to get your photos curated in the future!