"📢 Contest || Unlock Your Creativity || Week - 14".

Edited Using GridArt
Materials for construction
- Strong board
- Leather skin
- Pencil
- Sharpener
- Razor
- Paper cutter
- White Acrylic colour
- Top bond
- Rubber flower
- Brushes
- Disposable cup
- Black wool thread
- Ruler

Step 1
I began constructing a photo frame by first measuring the background of the photo frame on a strong board. The length is 10.5 inches, and the height is 14 inches. After these measurements, I cut it out using a paper cutter.

Step 2
I measured a strong board to be 1.2 inches and then cut it out using a paper cutter.

Step 3
I gummed the 1.2-inch strong board at the edges of the photo frame background using a top bond.

Step 4
I measure and cut my white leather skin. I measure the leather 1.2 inches wide and then cut it using a paper cutter.

Step 5
I gummed the 1.2-inches leather at the edge of the frame.

Step 6
I coloured the inside of the frame and the side view of the frame using a white acrylic colour, bringing me to the end of the frame construction.

Step 7
I drew a flower on the photo frame using a pencil. I then gummed black wool threads to cover all the drawings made with the pencil. I gummed the threads using a top bond.

Step 8
I gummed bottoms of different sizes and colours on the flower made of black wool thread.
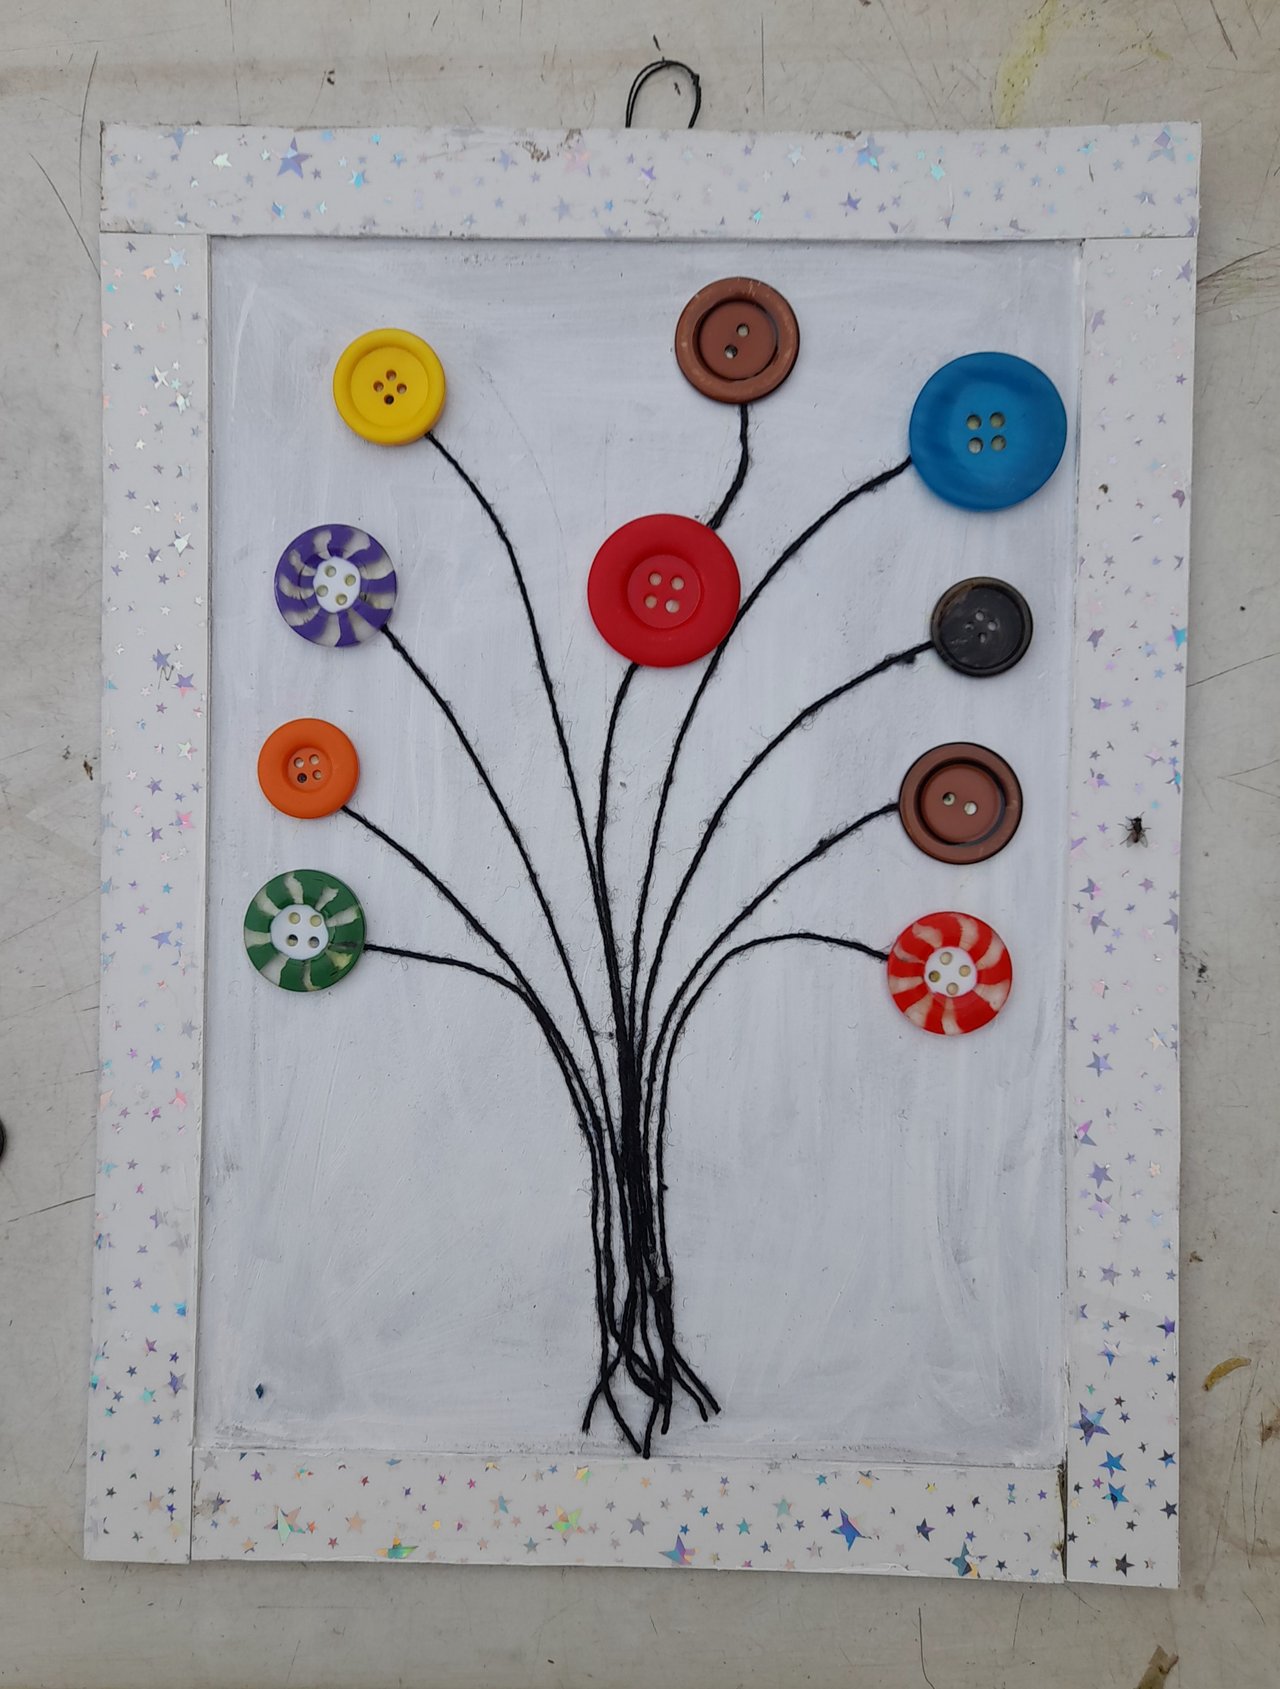
Step 9
I added more buttons to the flower. I also gummed some blind buttons to serve as leaves on the constructed flower.

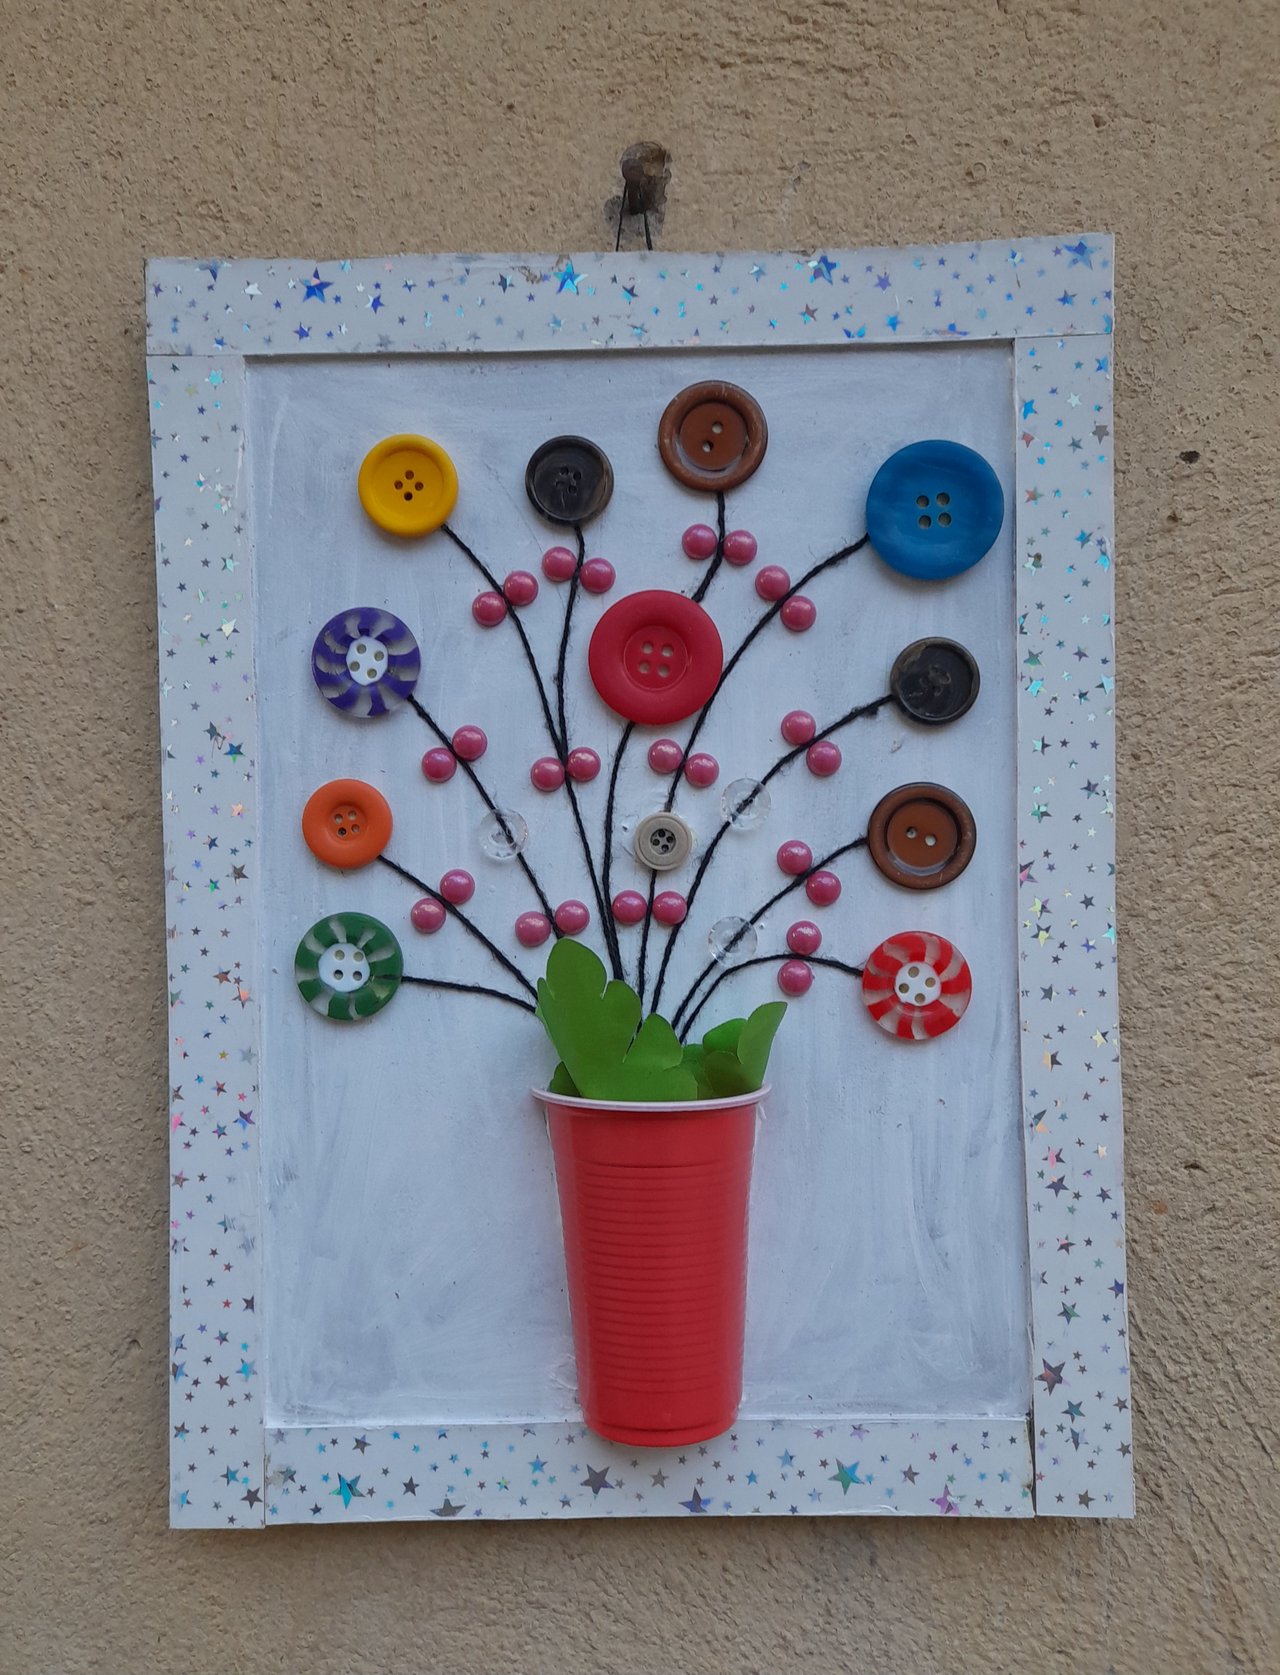
Step 10
I cut a disposable cup into two equal sizes using a cutter. I then gummed one-half of the disposable cup at the roots of the flower using a top bond and strong adhesive.

Step 11
I placed my green rubber flower into the cub to add more beauty to the wall decoration frame.
My Selfie

Conclusion
I am so happy by the end of this craft construction. The steps are so simple that any other steemian can replicate. Thank you all for visiting my blog and for your support.
Invitation
I warmly invite @ngoenyi, @crismenia, @ziaht29 and @bimanakhan to also participate in this contest.
CC
@zisha-hafiz
10% beneficiary to @hive-126193
Oh my goodness. This is so creative.
Keep steeming friend.
Thank you
This is indeed looking so nice, I've always known you for making amazing creation and you never disappoint me. It looks amazing and I love it. Bravo and great job 👍
Thank you
Your most welcome
Here Is My X Share (Twitter Link)
https://x.com/Manasseh3600/status/1926052043963199819?t=TZPHf6Xn8bGMqi8au9otAw&s=19